It's time for another free cut file and this month we wanted to give you an another idea for incorporating your small photos.
We are now able to supply both the Silhouette file and the SVG file so that all makes of digital die-cutters should easily be able to use our files. You can of course use the file from this image using the instructions here. Please do let us know if you have any issues using the files.
We'd love to see them in action so please do share your creations with us in our Facebook Group and tag us on any social media so that lots more people can be inspired.
As always, these cut files are for your own personal use only. Selling the files either digitally or in die cut form is a breach of copyright and makes us sad.
SO in this month of October, UK Scrap Addicts are working with the theme of 'small photos'. I decided for my layout i would create a grid style sketch to work with. Grid designs are a great way to use several small photos on one layout. I really hope you might give this sketch a go too. Using small photos is great when you are trying to tell a story, or when the photos you really want to document are low quality - in my case as the people were moving they were pretty blurry and couldn't have been printed in a large size. Be sure to come and join us over on our Facebook page and share all your small photo creations with us!
You can see how the layout was create, in real time, over on our YouTube channel.
This month we have been challenged to create using small photos. Generally I tend to scrap with just 1 photo on a layout so I also challenged myself to use more than 1 photo.
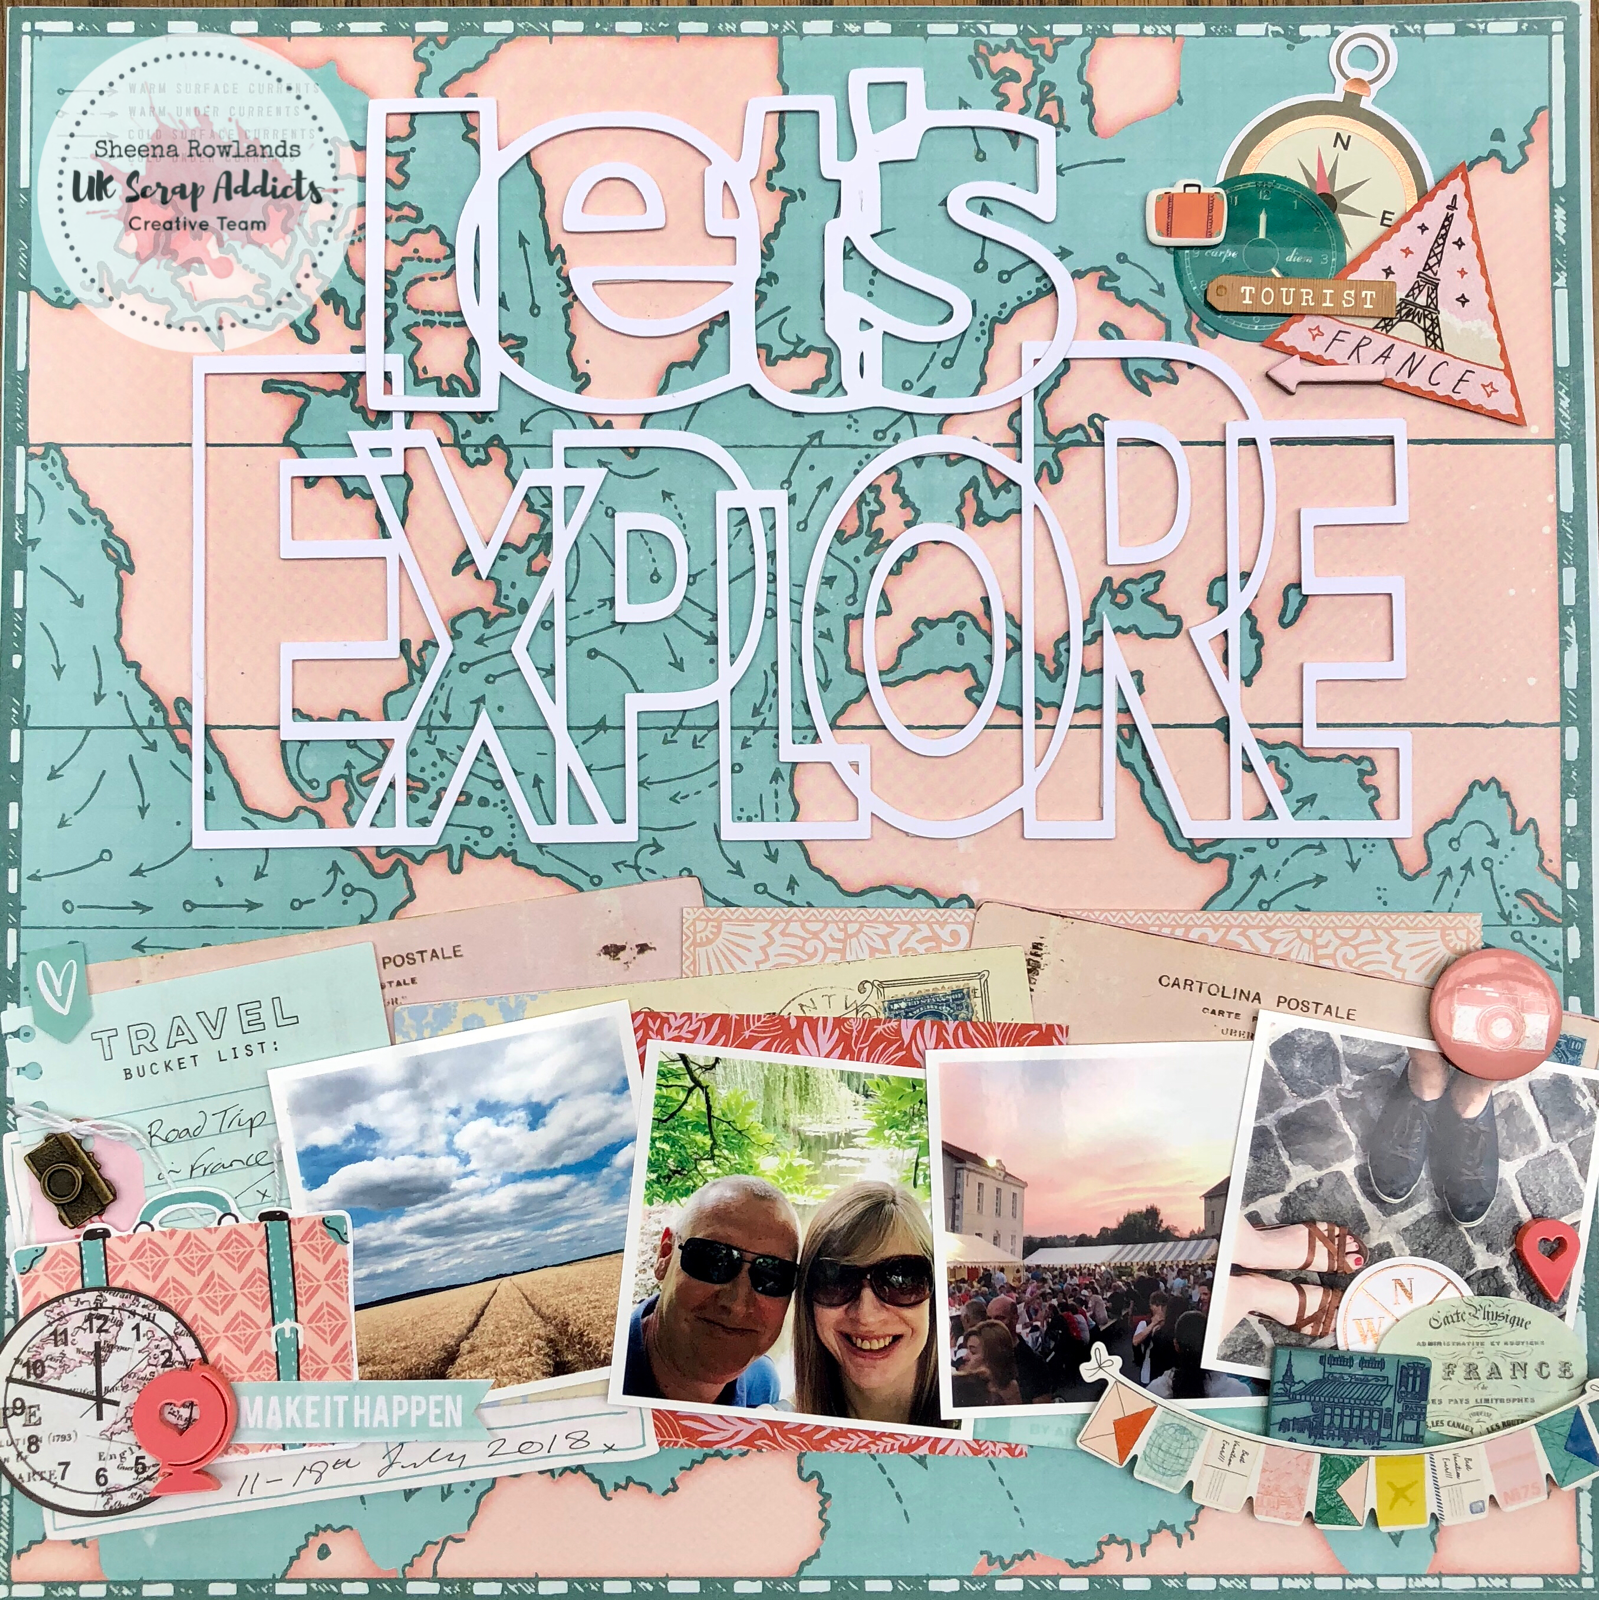
Lets Explore.
Once I had decided to scrap photos from a recent road trip to France I printed 5 photos all 2 1/2 inch square, in fact only 4 made it on my page in the end. I keep all my travel themed papers and embellishments together just to make it easy when I scrap. I loved the map paper from Crate Paper Here and There range & had to use it as my base.
Originally I cut my title on the Silhouette with the intention of backing it with patterned papers but I loved the base paper so much I decided to leave the title unfilled but elevated on foam pads.
I gathered my photos plus some papers and postcards to layer with and added them across the bottom of my page & adhered them when I was happy with how they looked. I then added 3 clusters of embellishments plus a few hand written details.
I love how this came together & we would love to see your pages featuring small photos over on our FB page.
Terri here, ready to kick start a new month here on the UK Scrap Addicts blog. This month the focus is on using small photos. The team have got some amazing layouts to showcase and I'm sure you'll enjoy looking at them as much as I do.
Although the trend is for using only one photo per layout, it is also on trend to use small photos. I love using multiple photos but often find myself with only one used.
I used a mix of my favourite techniques for this layout (paint, fussy cutting and stamping!) for this page plus it as features some of my favourite colours!
I'm determined to get some of my older stash used up. So I've made a promise to myself that even if I use the newest collections I have to add some elements from my older supplies.
Thanks for joining us on the blog, don't forget to share your layouts with us over on the Facebook group. We will have a folder for each month's theme so feel free to add it in there.
Kirei here with my take on this month's UK Scrap Addicts theme which was to use paint on a layout.
I had these lovely shell cut-files that I wanted to use with the Wild Heart paper collection from Crate Paper so decided to back fill them with paper that was painted in coordinating colours. I used an Inklingz paint from Shimmerz and a couple of the Starlights Metallic Paints from Imagination Crafts. Once they were dry I cut them out and then mixed some of the paint with texture paste which I used through a stencil onto each of the shell backgrounds. The cut files were then raised on foam pads to add dimension.
I layered my photo with some of the 'Wild Heart' papers and some of the cut apart tags.
I added embellishments from the coordinating 'Wild Heart' stickers and ephemera.
Finally finishing off with my title using the chipboard stickers and the lovely glittery Thickers from the range.
So why don't you join in with this month's 'Paint' theme and share your layouts over on the UK Scrap Addicts Facebook page and join in with the chat.... we love to see what you create!
It's nearing the end of Summer here so that means one thing - no more super bright layouts! We head into Autumn colours, photos of Hot Chocolate and crisp Autumn mornings and then onto the Big C!!!
But....For now...I bring you one last hurrah of this summer season and who can resist a rainbow layout (I know I can't!).
So this months theme was paint. I decided to use some acrylic paint markers for this layout and I have teamed this layout up with my Alpha Attack series on Youtube to demonstrate that you can use paint to change the colour of any type of Alpha or Thicker (because we usually have lots of those in our stash right!?).
So my thought was rainbow rain. I know this sounds crazy but here is how the layout came together.
I grabbed a whole load of half used Thicker packs from my stash and started sticking them randomly over the lower 2/3 of my page. (I did Gesso my page first knowing I was going to be applying white paint over the Thickers).
Once these were all stuck down, I then added a layer of Gesso (I actually added 2 layers because I wasn't sure how thick the coverage would be from the paint markers).
Once I had let the Gesso dry, and you can use a heat tool to speed the process up (I certainly did), I then applied 2 layers of white acrylic paint over the whole page.
Next came the hard decision as to where I was going to include my photo. I didn't want to cover too much of the background up so I went with a photo that I could cut down to just the subject image (my husband in this case) and I packed the photo with a small amount of 3 different patterned papers around the edges.
This is where the fun part came in. I used the acrylic paint markers to colour in each alpha using the ROYGBIV colours (apart from I had to substitute Indigo for Pink) and I worked my way across the page with each colour. Next I added some of the paint onto a non stick mat and added a little water and went splatter crazy! I tried to keep the coloured splatters within each of their own colour sections. I then went tone on tone with adding some enamel dots in hearts and star shapes.
I did back my white cardstock onto a piece of rainbow(ish) patterned paper. I had used a sheet of Bazzill Marshmallow cardstock which is primed for Mixed Media but it had buckled a little. So cutting down a 1/2 inch from each the top and bottom, I then mounted this onto the patterned paper to held smooth out the warping.
Next I free hand cut some clouds and used a black paint marker to give these a faux stitched border as these were getting lost on the background. Finally, because clearly there were not enough Alphas already on this layout!, I then added my title into the left cloud. I even popped a sun in to the top right cloud to keep with the theme.
In total I used a massive 97 Alpha Stickers!!! And now I need a lie down. Thanks for visiting our blog today. Be sure to head back for more inspiration throughout the month from the other ladies. Oh and we have a new theme on 1st October!!
If you want to watch the process for this layout then you're in luck as there is a process video right here for you. So be sure to head on over to our Youtube channel where you will find hundreds of videos to keep you inspired!
Jackie here with my layout for this months theme - Paint. I decided to do a mixture of two inks on my background.
To add the colour to my background paper, I added oxide ink to a plastic sheet and then added water to the ink which turns it into a colour wash, which can then be added either by using the packaging technique, turning the plastic sheet over and placing it onto the cardstock or by using a paint brush. The ink colours I used were Twisted Citron (green) Mustard Seed (yellow) and a small amount of Tumbled Glass (blue).
I kept my photo to the right of my page, so that the colour wash was visible.