Hello lovely scrappers, Amy here today with my layout that features sewing! I decided to go all out and stitch my title across the whole page. I must apologise that I am not able to create process videos at the moment due to building work at my house, but I tried to take a lot of photos to show you how I created my layout.
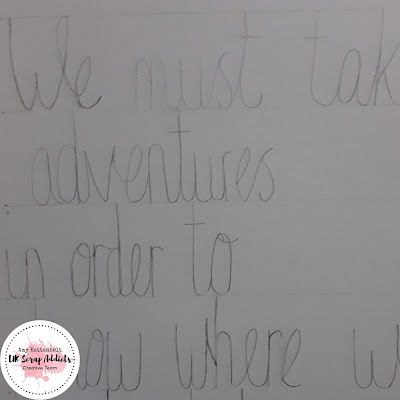
I really wanted my title to be in my own handwriting. So the first thing i did was draw some faint straight pencil lines across my white cardstock. I then planned which words i wanted on which line and took my time to hand write the title across the whole of the page in pencil. You also want to remember to leave a gap in your title for your photo, I left some space in to the left hand side for my photo.
When i was happy with my penciled title I used a 'pokey tool' and created holes along the pencil lines. Remember that the more holes you poke the more stitching you will have to do. Placing them too close together will cause the card to rip as you pull the thread through the holes, but too far apart and curves will become angular. If you look carefully you can see that I place holes closer together around tighter corners. You also need to take care at junctions of lines, making sure you put a hole at these intersections. Getting the holes right will make the rest of the stitching so much easier. If its your first time using this technique you may want to start with something smaller. This took me at least 6 hours to stitch, which i quite enjoyed as you can do it whilst sat watching TV.
Once you have all your holes, now is the time to erase your pencil lines. Be careful and work in small areas so as not to crease or rip the card.
Now we can begin with the sewing. I chose to stitch each line in a different colour. I used regular embroidery thread, the kind you would use for cross stitching. These come with 6 individual threads that you can pull apart (usually you use 2 at a time for cross stitching). The more threads you use the thicker the line will be and also the bigger the holes will need to be. I decided to use 3 threads for this layout.
You use a back stitch to recreate your text. If you struggle with this the best thing to do is google for instructions. Once you understand the principle it really is very simple.
I used washi tape on the back of my layout to hold the thread ends in place, both at the start and end of a length of thread.
Once my title was stitched I knew i wanted to keep the rest of the layout simple so it didn't draw attention away from the title. I used some of the gorgeous rainbow paper by Paige Evans to frame my layout (yes i did cut out the middle so i can use this paper on another layout. I mounted my photo in yellow paper (a colour i hadn't used for sewing) and a doily. I added a few little die cuts, a ribbon and a date stamp to complete my layout.
I hope I have inspired you to give hand stitching a go on a layout. If you have any questions just post on our UK Scrap Addicts Facebook group and ill be able to help you further. Thanks for reading and happy sewing!!


No comments:
Post a Comment
Thanks for your comments...