Showing posts with label mood boards. Show all posts

Monday, 26 June 2017

Week 17 | Sarah Toward | Moodboard

Hi there

I'm here today sharing my Pocket Page layout based on a moodboard.  I find moodboards really inspiring, not just for the colours but for the different images and shapes they have too.


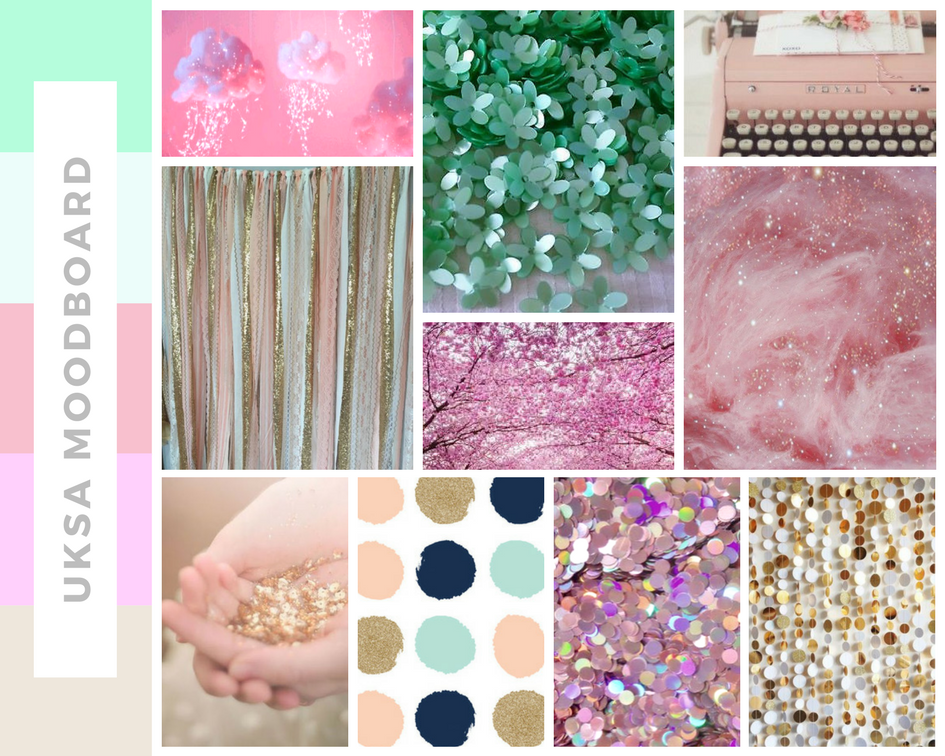
When I first saw the two moodboards for this months assignment I was instantly drawn to this one.  I just love the pinks and mints, and I really love typewriters and clouds and have no problem using these images in my scrapping.  Oh and that hint of navy in the circular splodges at the bottom, one of my favourite colours.  Seriously, what's not to love about this moodboard?


I went into my stash and had no problem finding pink and mint papers to use.  I also had some die-cuts left from the Dear Lizzy, Fine and Dandy collection and they worked perfectly.


I was so excited to use this typewriter paper again, the tone of pink is spot on too.  I had some navy polka dot washi-tape which I've used throughout the layout as well.


I used my Silhouette Portrait to cut some little clouds, and the stripy mint faux washi strips.


I'd been hanging onto this typewriter die-cut as I really liked it and wanted to save it for the right occasion.  I can't remember what it said underneath, but I used a Tim Holtz word phase sticker as I preferred this sentiment.


I liked all the shiny things on the moodboard (I'm a bit of a magpie), so I knew I wanted to include a shiny element to the layout.  I decided these stickers from Paperchase were just right as they were also the perfect colours too, and not my obvious go to shiny element, sequins.

One of the main reasons I enjoyed using this moodboard is that it has made me go back through my stash and use up papers and embellishments, and I've got plenty to go back and use up.  So if you are looking to use up some stash then have a look at some moodboards and get inspired.

Thanks for dropping in again today, be sure to pop back soon for more moodboard inspiration.

xoxo


Monday, 12 June 2017

Mid-Week Getaway | Polly's Papercrafts | Mood Boards

Morning lovelies!

This month on UKSA we are all about mood boards (which I'm sure you've gathered if you're a frequent visitor ✿) I've got to say I do love a good mood board - they're perfect for if you've got that 'staring-at-a-blank-page-not-knowing-where-to-start' feeling...don't tell the rest of the Creative Team, but I get that feeling rather often! 

This is the mood board I'm working with this month: 
Isn't it gorgeous?

Those beautiful pastels with the confetti and the sequins and...oh the typewriter! All the heart-eyes from me! 

So I decided to take inspiration from the sequins. Now, if you've followed me before, you'll know I struggle with sequins. I can never seem to get the lovely random but perfectly placed look that I admire so much. Laura is brilliant with sequins, so if you struggle too I would recommend checking out her videos on YouTube. 
I went the easy option and created a shaker!


I used a vellum envelope that I got in the sale from Paperchase and filled that with an assortment of sequins that I had. There are some blue sequins and gold stars from Cocoa Vanilla as well as some different sizes and colours from a Project Life pack too. 


This month the Creative Team were sent some product from allthingssticky.com and included in my package were some coloured glue dots. At first, I was a tad confused on what the point of coloured glue dots were - BUT they came in incredibly helpful when adhering my vellum pocket. 

I used some of the pink, blue and yellow dots randomly on the back which meant that the glue blended in with the sequins. As you know, glue and vellum is a hard balance as it shows through but the way the dots were camouflaged in with the sequins definitely seemed a good answer! 


allthingssticky.com is actually sponsoring our Mood Board Challenges this month with a £50 prize, so if you would also like to draw inspiration from them (there are two to choose from!) you can find all the information and how to enter on our Facebook Page: UK Scrap Addicts 


The embellishments I used on this page (the flamingo, the tag and the chipboard piece for the title) are all from Crate Paper's Oasis collection. I tried to go minimal on embellishment because the sequin shaker is such a feature! 


If you fancy a gander at the process video too, then do pop over to the UKSA YouTube channel! ❤

Until next time...


SaveSave

Sunday, 11 June 2017

Unconventional Artist | Pol Prince | Mood boards

Hello again friends! Pol here today to share with you a layout I created based on this beautiful rainbow mood board, which is one of two for this months challenge. If you'd like to enter you could be in with a chance of winning a £50 voucher for allthingssticky.


Well, I had lots of messy fun with my Dylusions ink sprays on this one! I tried a few ideas until I settled on this one that I was the most happy with. I also created a drippy runny rainbow background but the inks mixed a little too much and started to go yucky colours. 


The best thing about this process was my 7 year old son and stepson playing out in the back garden one day, when they came running in to excitedly tell me that they had found the magic place where rainbows start from, and it was right in our garden!!! Hope they don't notice it's now washed away in the rain!


Back to my layout - the full page of pretty rainbowiness was way too full on to use on its own, so I decided I would use it as a border around a black and white paper, and this striped paper was perfect. It also put me in mind of one of those stereotypical artist pictures, where they are wearing a striped top and a beret!
I kept the photos fairly simple too - one black and white and one colour. They are photos of the most amazing eye my 14 year old daughter drew on her plate in BBQ sauce!


I fussy cut some flowers out of one the papers in the Crate Paper Oasis collection and tucked them behind my photos. I also fussy cut the birds and butterflies from the Maggie Holmes Chasing Dreams collection, and tucked strands of thread in and around them, to embellish my page. 


I made my own 'flair' to match my page, using wooden buttons and punched out circles of paper. I bought a pack of 50 varnished wooden buttons off eBay, and a small circle punch. I punched out circles of matching paper and stuck them into the centre of the buttons with a tiny bit of Glossy Accents. I then covered the centres with Glossy Accents and left them to dry. Voila - customised 'flair' buttons to match any project!
You could also use Crackle Accents or similar, and the circle punch is the perfect size for using on the barcode strips on patterned paper.


Because I'd chosen the title 'Unconventional Artist', I decided to use lots of different types of alphas for the title, to emphasise the unconventionality. I really love the look this gives to the finished layout, and it helped to use some spare alphas up!


Please do have a go at our very first monthly challenge, and post your projects on the thread on our Facebook page.


Thursday, 1 June 2017

MOOD BOARDS

Our monthly theme for June is mood boards. We will all be working with these two gorgeous mood boards over the next few weeks...


In today's joint post we'll talk you through our individual experiences with mood boards and how we use them...

Maria: Mood boards are a brand new discovery for me. I had never used one until just a couple of weeks ago! I had seen them around, especially on challenge blogs and in Facebook groups, but I just never knew what you were supposed to do with them. Now that it has been explained to me and I know what they are, everything is clear and I love the concept. So with a mood board you get a few images that you can take inspiration from. Imagine you have an image of a pink bird, a rainbow and a ballerina ... you could create a layout with birds on it, or feathers, or anything that reminds you of a bird. From the rainbow, you could be literal and use an arch with the rainbow colours, or just be inspired to use the colours in some other way. With the ballerina, you could use a photo of your daughter dancing, or perhaps give your layout lots of texture using fabric or ribbons that resemble a tutu. So there you go, quite easy, as you can make anything you want from it and make it suit your style. I will definitely play along more often with mood boards as it is difficult not to be inspired by them.

Susan: I'm not sure when 'inspiration boards' became 'mood boards' but I do think the former term is more descriptive of the way I like to use them. The first thing I notice when looking at a ready made board is the overall colour scheme and that is the element I am most likely to pick up on for my inspiration. If I don't like the colour palette I probably won't look further into the board. I know some of you will be saying as you read our joint post, "Oh mood boards aren't for me." but I bet you use Pinterest? Pinterest is one huge reference for inspiration and from it you can easily make your own boards. I like to set up boards on Pinterest for different palettes and as I browse I pin things that take my eye - absolutely anything, flower arrangements, postcards, advertisements, room settings, clothing, you name it. I then have ready made inspiration when I need it for my scrapbooking. I noticed recently I have a bit of a stockpile of yellow cardstock, so I've got a yellow inspiration board on the go. Expect a rash of yellow layouts very soon!

Lisa-Jane: As a recent convert to mood boards I am really loving the inspiration they give. When I initially look at the set of pictures, I will usually be drawn to one or two things first and this drives the rest of the inspiration for me. I will probably decide at this point whether the board will be for me or not. You can really quickly get an overall feel (or mood!) for the board just by a quick glance at the colours and textures. Then when I know I definitely want to use that board I will look in more detail at each of the pictures and see what sorts of things I can incorporate and which elements speak to me. I never feel like I have to use all or even most of the elements and I'm happy to add in a rogue colour or texture etc, whatever makes it work for me. There are so many ways to be inspired by the same mood board over and over again by taking the inspiration in different ways and letting the different elements lead you down alternative avenues, for example a single white feather can inspire you to use white, feathers, make you thinking of sleeping on feather pillows, inspire you to scrap about birds, inspire a light and airy feel to your page, encourage you to use fringing, or even to journal about tickling! :)

Jess: I don't often use mood boards as I am more likely to create based on whatever supplies I have available. I have a fairly small stash of products so I go with whatever I have at the time until it's all used up. Saying that though I did create my own mood board on Pinterest. I was falling in love with spring time and spring colours and I wanted to put together a colour scheme to work with. In all honesty it was totally based on some enamel dots that came in a past Studio Calico kit that I loved and couldn't find anywhere again. Pale blue, peach, pink and yellow. All the heart eyes! Putting it together helped me to use products I already had and to choose new products to buy that had the colours that made me happy. When I used a mood board recently for a challenge I found that the finished layout didn't look much like the colour scheme however using at it for inspiration gave me an idea for the layout, a photo I knew I wanted and colours to start with. I still used those colours in my embellishments though and the layout would never have come about if it wasn't for that mood board.


Vicci: mood boards are literally my fave thing to draw inspiration from if I’m feeling I’m out of ideas. I love them because they allow your full creativity and interpretation to roam free but still help to get the creative mojo going. I haven't got a specific thing I always take away from them because each one is different. Sometimes a certain element reminds me of a photo I want to scrap or a story I’d like to tell. Other times it's the colours because often there are colour schemes I would never think to put together myself. More often than not I choose a mixture of the elements and the colours but I also dig deep within the mood board because sometimes there are ‘hidden’ elements that don't always jump out at me straight away. I always draft my layout whilst looking at a mood board for interpretation and I always make notes! Then I go ahead and create my layout!


Laura: I work with mood boards very loosely! Sometimes I get a general overall feel for the board or focus in on just one image; sometimes I'll go with two or three things from a board. This board is lovely, and you'd think you would have to use mint colours. Not so! You could focus in on other things... there are two lots of confetti to inspire you; there are flowers and flowing fabric; there is ombre colour (remember you don't need to use the same mint colour); there are curvy glass vases that could inspire shapes in your layout. Look a little deeper and go with the less obvious choices ...


Sarah: I do love a mood board for inspiration. I was first introduced to them while doing GCSE Graphic Design. We had to produce an A3 sized mood board as part of our coursework; it was my favourite part. I have a board on Pinterest dedicated to mood boards, and often look through the pins to spark some inspiration, be it from the colours or from the images. I find them really useful.