Sarah here today with my layout for this months theme of mixed media.
Mixed media is my favourite part of creating and it appears in all my scrapbook layouts. The most fun technique for me is creating rainbows.
I decided to do something a little different today and masked off my black background to create a silhouette. I used Impasto paints and blending them with my finger.
My layout features my kitten Neo so I used some fun Cat papers and ephemera to match from a older Mind the Scrap kit.
I distressed my paper edges and added tule for extra texture. Foam between the layers gave the photo cluster some height.
Some white paint splatters over the background helped everything tie in together for a finishing touch.
So this months theme is small photos. What a great way to include small photos in a travellers notebook. I love scrapping in a travellers notebook when I have photos of something that is a smaller story that I want to document but not necessarily warrant a full 12x12 layout in my album.
I used a paper from Paige Evans Oh My Heart collection (desperately trying to kill this kit!!) as I have had this in my stash for ages and this was the perfect project to get it used up. The shelves reminded me of my book shelves. I have recently moved and wanted to create a little nook area where I can go and read and this photo captured this just perfectly.
So I trimmed the paper to fit into my travellers notebook. I am using a Simple Stories one currently and these ones are a little wider than the standard TN size. This really helps me showcasing the amazing patterned paper and really brings the whole theme together. I fussy cut some elements from another one of the papers which had some cutaparts on and used these as embellishments around my photo. This is a great way to make your collection go so much further when you are running out of ephemera etc.
I knew that in the collection there was a die cut that would be perfect to use as my title - Books and More Books!! I popped this on the opposite side and used a black fineliner to create some faux stitching around it to help it stand out a little more.
I added on a book sticker from the Paige Evans sticker book and 1 chipboard piece that says "all you need is a good book". I also used this area to add some journalling on. I don't journal much on my 12x12 layouts but find myself being drawn to adding more journalling in my travellers notebook - especially those random smaller stories that you want to remember in years to come.
My layout felt almost complete but decided to channel my inner Missy Whidden by adding in some lengths of thread in co-ordinating colours and these are layered behind the top left and bottom right of my photo cluster (along with a couple of flower stickers, also from the PE sticker book).
And the layout is finished. I love how colourful this layout is and really encourage you to try and travellers notebook if you haven't yet. Its a great way to scrap on the go, when you don't have much time or even if you have those smaller photos that would look lost on a 12x12 layout.
Be sure to head on over to Youtube to watch the process video for this one too.....
It's nearing the end of Summer here so that means one thing - no more super bright layouts! We head into Autumn colours, photos of Hot Chocolate and crisp Autumn mornings and then onto the Big C!!!
But....For now...I bring you one last hurrah of this summer season and who can resist a rainbow layout (I know I can't!).
So this months theme was paint. I decided to use some acrylic paint markers for this layout and I have teamed this layout up with my Alpha Attack series on Youtube to demonstrate that you can use paint to change the colour of any type of Alpha or Thicker (because we usually have lots of those in our stash right!?).
So my thought was rainbow rain. I know this sounds crazy but here is how the layout came together.
I grabbed a whole load of half used Thicker packs from my stash and started sticking them randomly over the lower 2/3 of my page. (I did Gesso my page first knowing I was going to be applying white paint over the Thickers).
Once these were all stuck down, I then added a layer of Gesso (I actually added 2 layers because I wasn't sure how thick the coverage would be from the paint markers).
Once I had let the Gesso dry, and you can use a heat tool to speed the process up (I certainly did), I then applied 2 layers of white acrylic paint over the whole page.
Next came the hard decision as to where I was going to include my photo. I didn't want to cover too much of the background up so I went with a photo that I could cut down to just the subject image (my husband in this case) and I packed the photo with a small amount of 3 different patterned papers around the edges.
This is where the fun part came in. I used the acrylic paint markers to colour in each alpha using the ROYGBIV colours (apart from I had to substitute Indigo for Pink) and I worked my way across the page with each colour. Next I added some of the paint onto a non stick mat and added a little water and went splatter crazy! I tried to keep the coloured splatters within each of their own colour sections. I then went tone on tone with adding some enamel dots in hearts and star shapes.
I did back my white cardstock onto a piece of rainbow(ish) patterned paper. I had used a sheet of Bazzill Marshmallow cardstock which is primed for Mixed Media but it had buckled a little. So cutting down a 1/2 inch from each the top and bottom, I then mounted this onto the patterned paper to held smooth out the warping.
Next I free hand cut some clouds and used a black paint marker to give these a faux stitched border as these were getting lost on the background. Finally, because clearly there were not enough Alphas already on this layout!, I then added my title into the left cloud. I even popped a sun in to the top right cloud to keep with the theme.
In total I used a massive 97 Alpha Stickers!!! And now I need a lie down. Thanks for visiting our blog today. Be sure to head back for more inspiration throughout the month from the other ladies. Oh and we have a new theme on 1st October!!
If you want to watch the process for this layout then you're in luck as there is a process video right here for you. So be sure to head on over to our Youtube channel where you will find hundreds of videos to keep you inspired!
I can't believe we are nearly at the end of August already.....this means its nearly time for a new theme!
We still have a couple more layouts to share with you for this months theme of Tic Tac Toe. And I hope you like bright colourful rainbow layouts?
So I chose to use Circles, Rainbow and Multiple Alphas.
I started with punching different sized circles from blue, red, pink, yellow and blue patterned papers. I used a 3 inch, 2 inch and 1 inch circle and adhered these onto a piece of white cardstock.
I already loved how this layout started out.
Then I set to work on the title and embellishing. I chose to use 3 different alphas and wanted to use all glittered ones but change the font of each word. I love this bright title and different directions the words run make it more interesting too.
The photo, which can be seen just at the bottom of this photo, was layered with co-ordinating patterned papers that match the circles.
Each circle was then drawn around with a 0.8 black fineliner to help make them pop and give them more of a messy look.
I also added in some accent words from Pink Fresh Studio and used the co-ordinating hearts and stars to create a colour on colour embellishing.
It was then all finished off with a couple of tiny word stickers and some splashes of black ink!
Be sure to head on over to Youtube to watch the process video too.
Its been ages since I have been up for the UKScrapAddicts. But I'm back and super excited to share with you my layout based on this months theme of Monochrome.
I really went completely outside my comfort zone and chose to use red!!
I kept the design aspect fairly simple with almost a grid design as I knew I wanted to include lots of embellishments on my layout to really play on the monochromatic theme.
I grabbed some Simple Stories Project Life cards from my stash and just pulled the black and white and red ones to use for this layout. There was one that had a blue element on but I wasn't too worried as this could easily be covered with an embellishment .
I decided to almost make a page kit ready for this layout as I didn't want to be digging around in my stash to find items that would work together, especially as I was heavily restricted on the colour options.
I mixed in some ephemera from the same Simple Stories pack, some stickers from Shimelles 30 page sticker book (keeping to the red colours only), some wood veneer stars, chipboard from some older kits, some fussy cutting and finally some Tim Holtz tiny word stickers.
Wow - now breath!!!
After I had laid my cards into a 2x3 format across the page horizontally, I cut down the bottom cards to that they were only 2.5x3 inches.
I embellished on top of each of these cars whilst adding my photo to one and my title to another. I didn't really have any journalling for this as the title says exactly what the photo was about. (I need to get better at journalling on my layouts!!) Perhaps that might be an upcoming theme?!
And here is the completed and finished layout. I was nervous about using read but this has definitely spurred me on to want to try those colours that I don't normally scrap with. Perhaps monochrome is the way forward!!
Thanks for joining me today - If you would like to watch the process video for this then please head on over to our Youtube channel and you'll find the video linked below.
Hello, it's Karen here with my first page for UK Scrap Addicts and this month's theme is monochrome. For this page I chose to add mint green to black and white and used a black and white photograph to emphasise the theme.
I predominantly used papers from Kaisercraft's Mint Wishes, which is a Christmas range, for this page as I had two sets of the sticker sheets and some left over pieces of paper.
I used the UK Scrap Addicts free cut file to make a stencil and added crackle texture paste to give my page dimension.
I chopped up the phrases from the sticker sheets to make a non-Christmassy phrase for my journaling and as you can see I splattered some mint green ink over my page.
My page was finished with some chipboard and stickers and the title 'Believe' with a few green gems.
I have a video of how this page came together on our YouTube channel here.
So until next time 'Happy Scrapping' and pop back soon to see what the other UKSA designers have been up to xxx
Yes, it is Maria with you again! It is May, a brand new month and also when we introduce the new design team to the group! You can see the new team in this post. I hope you join me in welcoming them to the team! But a new team means a new schedule, so I am now at the beginning of the month rather than at the end.
So this month's theme is Monochrome. We had a bit of an internal discussion beforehand trying to figure out what monochrome really means as some people had different ideas. We reached the agreement that we can do a couple of different things: we can either choose a colour and use different shades of that colour, or we can choose black and white with an accent colour.
And that's what I've done! As you will be able to see in my page below, I have gone for a very neutral background in grey, with B&W papers, and then an accent of pink-ish coral.
The papers are mainly scraps from a 6x6 pad by Simple Stories - DIY boutique. It is an old collection, but I am sure it can still be found in some online shops. It is a very versatile collection, with tons of basic colours.
The embellishments are from Felicity Jane. Unfortunately, Felicity Jane is an American company that is very difficult to get hold of in the UK. You have to order directly from them and the shipping costs and taxes are not cheap. I have bought a couple of collections, but from UK second hand shops, which makes it so much more affordable.
The photos I have used have quite a neutral colouration, so I was quite lucky to be able to choose any accent colours that I wanted. I happened to have the most embellishment pieces in this coral/pink-ish colour, so that's the one I went for (plus it is my daughter's favourite colour...)
For the title I used the "happy" word from Felicity Jane, alpha stickers by Tim Holtz (which are back in stock at Hobbycraft! yay!) and the word Girl from the Girl Squad collection thickers.
And here is my process video, so you can see how I struggled to repeat the paper positioning that I had originally come up with!! :P
It's almost the end of the month and here I am with one more layout using tags!
I'll be honest with you: I was rummaging through my stash for quite a while looking for tags and I almost gave up! I was going to make my own one... which I am sure would have been just fine, but I hit the jackpot when I found this pack of tags and embellishments! Yay! I've had them for quite a while, so it always feels great to use old products!
Here's my first photo:
As you will be able to see in the process video below, I had two photos to choose from and both of them had quite a neutral colour schemes - but I decided to go with this one as I felt it suited the tags better.
Here's a close up:
I thought about doing my journalling where I end up doing the title, but then I wasn't sure where I was going to be putting the title instead. I think the title looks quite good there, the only downside being that the journalling is now a tiny bit cramped where it is...
I also used a few embellishments from a pack from the same collection. I don't always do that, I love looking through my stash and finding things that match, however this time I thought it was better to stick to the same collection, since the tags had so many different colours.
And here is my video so you can see my process!
Thanks for watching ladies, and read you real soon!
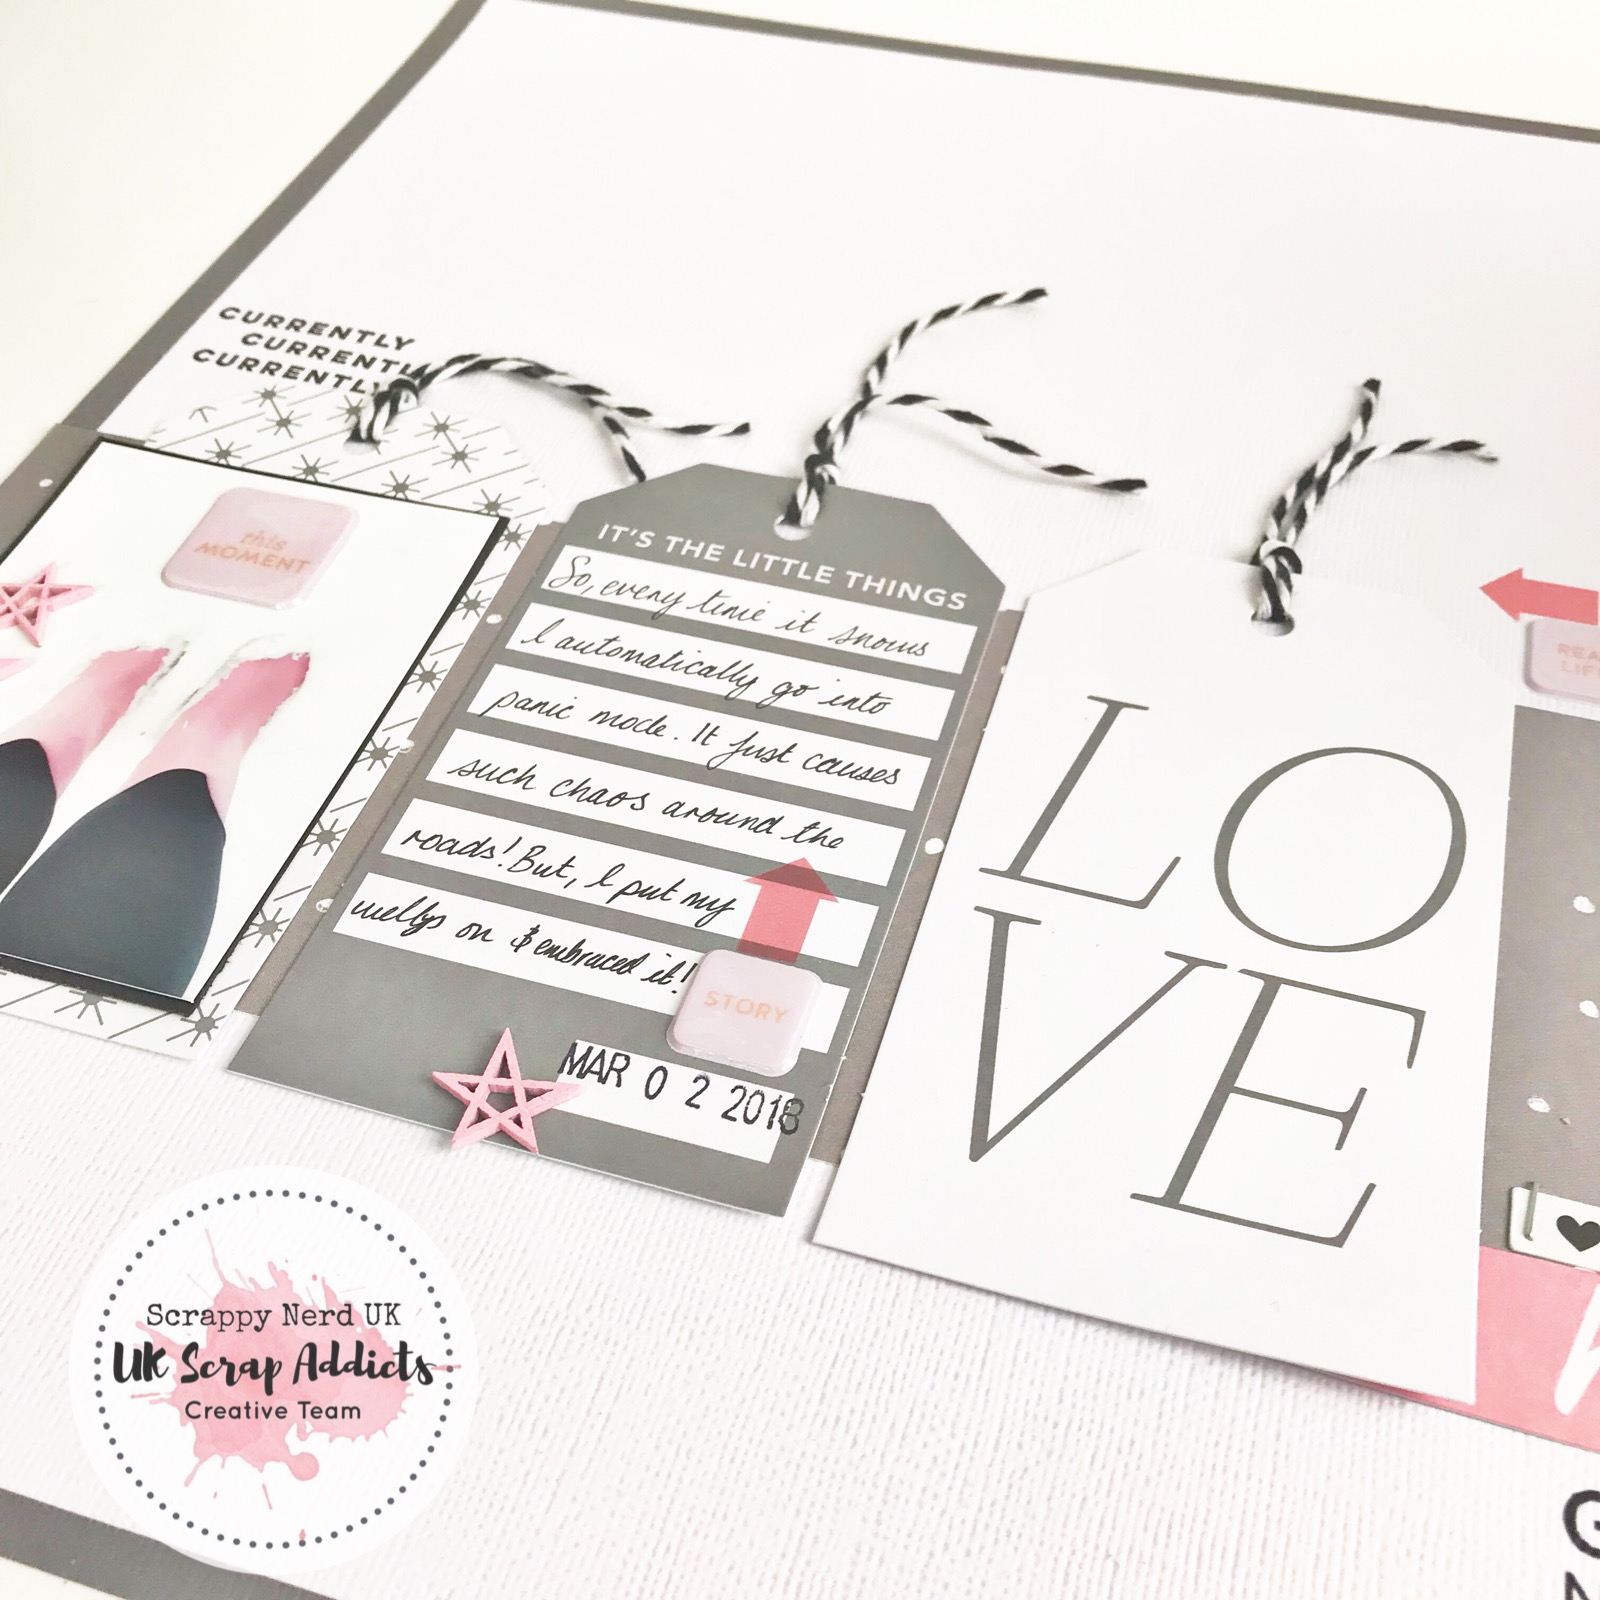
This months theme is....Tags!! I will show you how easy it is to put together a layout using tags as the main focus and in my Youtube video I show a live process to demonstrate how quick a layout comes together with the use of tags.
I used 2 pieces of cardstock and matted the white on top of the grey one to give it a border around the edges. Next I added a strip of grey patterned paper across the bottom third of the page and laid my tags on top.
I chose to keep the colours simple on this layout and went the main theme of grey and white but added in some black and pink accents with the embellishments I used.
I used a photograph of my wellies in the recent snow we had as the colours really matched this layout. I mainly start my layout and then choose my photo as this seems to work best for me. There is no right or wrong way - that is completely your preference.
And here is the final layout. Very simple and clean and I personally love the finsished result. Don’t forget to head on over to Youtube to watch the Process video and if you haven’t already found us on Facebook then head over there and give our page a like. You can upload your tag layouts there too so we can see what you have been creating.
Hello everyone, and welcome once again to UK Scrap Addicts!
As you may already be aware, this month's topic is clustering, and I have to admit that this is not something that I do very frequently, so it doesn't come up naturally to me! But I think I cracked it at the end... I'll let you be the judge of that!
So here is my layout:
As you can see I have only made two clusters. Some purist scrapbookers say that, like in nature, clusters should come in odd numbers, three being the preferred. However, due to the design in my layout I thought two clusters worked better.
The clusters are made with fussy cut paper embellishments, proving the point that you don't have to necessarily have to have tons of materials to make the most of your layouts!
Here are two more close ups:
I have also made a process video that you can watch on our YouTube channel. Here's the link:
I hope you'll join us in this month's challenge, creating clusters on your layouts. Don't forget there is a £30 voucher from Thompson Craft Supplies up for grabs!