Friday 25 December 2020

Naughty or Nice | Kirei Baldwin | Embossing Folders

 Hi UK Scrap Addicts!

It's Kirei here wishing you all a very Merry Christmas, I hope Santa has been good to you this year!

I am sharing a layout for this month's fun challenge which was to use embossing folders on your layout, now I definitely hadn't used them for quite some time so was good to pull them out and have a play. I had this idea in my head to make some baubles and add different embossing details to each one before embellishing and I am really happy with the end result!

I firstly drew the baubles and then cut them out before putting each shape through my Big Shot to emboss them with different patterns. I took some ephemera and small pieces of patterned papers to decorate each bauble and then added gold stitching. 


I took a 11 1/2" piece of white cardstock, distressed the edges and then stuck it to a frame of patterned paper before stitching a border with gold thread. I worked out where I wanted each bauble to go on the layout and then added gold stitching to represent the hanger for each bauble.


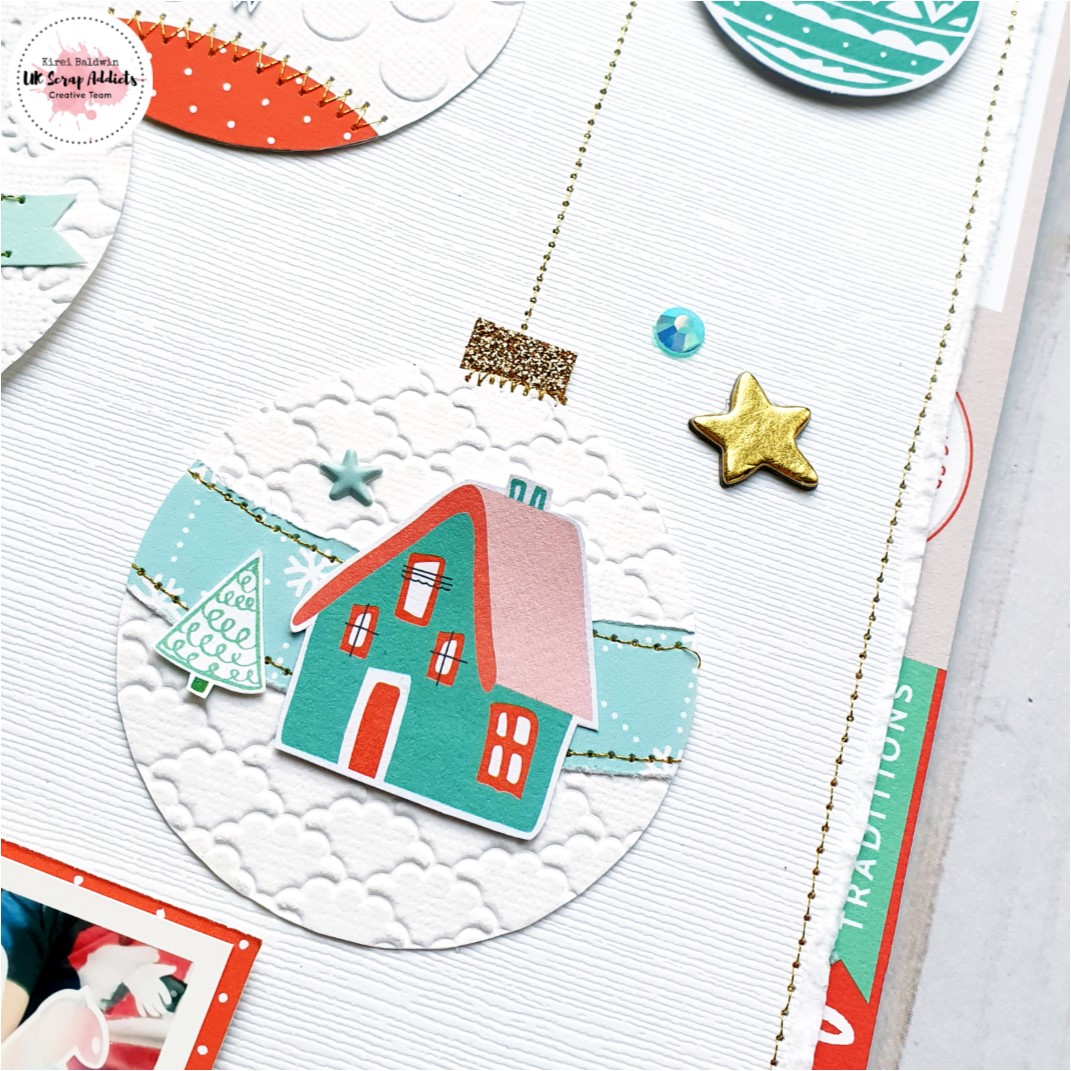
Then each bauble was stuck down, some of them on foam pads to create dimension. 


The two cute photos of my nephews from last Christmas were mounted on patterned papers and stuck down with foam pads on the top edges. Keeping the bottom of the photos flat to the layout makes it easier to add embellishments around them. 


I then added a title and some journaling to finish my layout off....


Thanks for popping by the blog, wishing you all the best for the rest of the festive season! 

Happy Scrapping!


Tuesday 22 December 2020

Home is the Heart of Xmas | Karen Moss | Embossing Folders

Hello, Karen here with my project for this month using Embossing Folders.  


 I used a technique I had taught in a class several years ago - embossing on coloured core card and sanding off the top layer to reveal the core colour. 

I used a cardstock called Core'dination - it's  not as readily available as it was when I taught the class but I found similar card that had been dyed on both sides, resulting in the centre being slightly lighter in colour so alternatives are available. 


I started by die cutting flowers and leaves and then run them through my Big Shot inside an embossing folder.  

One they had been embossed it was simply a case of gently sanding away the top layer with some fine sandpaper. 


If you would like to see exactly how I made the flowers, pop over to our YouTube channel and have a look at my process video

Please show us your take on using a large photo on a page on our Instagram feed or our Pinterest board.

There are more pages that our talented DT have made on there too. 

I would like to wish you a Happy Christmas and a New Year that is approaching normality.

Stay Safe

Karen


Saturday 19 December 2020

Hey Santa | Jackie Ashton | Embossing Folders

 Hi crafter, Jackie here with my layout for this months challenge, using embossing folders.


When I rooted my embossing folders out and dusted them off, I wondered why I hadn’t been using them on my layouts recently, and they are lovely.   I used to love using them, but as trends come and go, this is one that as been put on the back burner, which is such a pity as I love the effect they give to patterned paper.  So having this challenge got me back to thinking about adding them to my layouts more often.


Hey, Santa


To start this layout I went through my embossing folders and selected a few different designs to use.


I used a selection of 6x8 papers and embossed each patterned paper with a different design.


After I had embossed all the papers, including a piece of vellum, I cut them into different lengths and widths, which I laid across the middle of my cardstock overlapping some, and adding some machine stitching over a few to add some extra texture.


I backed my photograph with some patterned papers from the same collection, adding 3D foam to given it some dimension.


Finishing my layout with some wood veneer, word phase stickers and puffy hearts from my stash.  


I love how the embossing folders have given the papers some additional texture without it making the page look overwhelming.  Its definitely a technique that I will be going back to using.


If you have time over the festive season to do some crafting, then please share your layouts over in our Facebook Group, we would love to see them.


I would like to wish you all a Merry Christmas and a Happy New Year.


Till next time, 


Keep scrapping,


Stay Safe and enjoy the season the best you can.


Wednesday 16 December 2020

Christmas Jumper Day | Keighley Brennan | Embossing Folders

Hey UKSA, Keighley here and today I’m sharing my layout using embossing folders. 


I had pre handstitched the background using a Paige Evans cutfile as a template, I didn’t have a layout in mind when I created it, I decided to scrap a photo of my children in their Christmas jumpers last year, my handstitching reminded me of a Christmas jumper. 


I had a rummage in my stash and found some old embossing folders my mum had given me many years ago, I’ve never used embossing folders before, so it was a very new technique for me. I decided to keep it quite simple by embossing a handmade tag to tuck in behind my photo. This was the perfect subtle touch for my layout. 


Please check out my process video on the UK Scrap Addicts YouTube Channel. 
Thank you for stopping by... 


Sunday 13 December 2020

Let it snow, Ho Ho Ho | Sam Ball | Embossing Folders

I’ll confess, I was ‘late the party’ when it die-cutting machines! 

Even though I’ve been scrapping since 2007, it’s only in the last three years that I’ve had my first Big Shot, and whilst I do have a fair few metal dies, when it comes to embossing folders, I own a huge collection of just four!


Knowing this months’ theme was embossing folders, I fully intended to purchase a new one, but with lockdown and Christmas, time simply slipped away! 


After much deliberation, I decided to do a seasonal layout. Using a photo taken only last weekend when we were choosing our Christmas tree, I also knew that one of my four embossing folders was one that creates a cross section of a tree trunk, so at least there was a common theme!


I cut a few in vellum, then used a metallic mousse to highlight their subtle detailing, and create a frosted effect.


Then I backed a cut file from Peartree with vellum to also add to the wintery feel, further backing three of the trees with patterned paper, but keeping the vellum layer to soften the paper designs.


The scallop detail at the base was cut using a Bramble Fox ruler template, and reminds me of a present or package - again a nod to the festive period.


Apart from the Bramble Fox perspective, the layout was created using ‘Snow and Cocoa’, a collection by Crate Paper that was manufactured in 2016. Guiltily, I’d hardly used any of it, but I remember loving it so much, I’d bought loads! In fact, when I looked at my Christmas papers, it looks as though I’ve hardly touched any of the festive collections that I’ve bought from the last four years!


Perhaps I should make my New Years’ resolution to scrap more, or stop hoarding!


Are you a fan of embossing folders? Have you played along with this months’ theme? If you have, don’t forget to share your layouts over on our Facebook page, or tag us on Instagram!


Wednesday 9 December 2020

Winter Wishes | Sheena Rowlands | Embossing folders

 Hi there UK Scrap Addicts x

It's Sheena here again and for our challenge this month we are using embossing folders. To be honest my first challenge was actually finding my embossing folders! I'd had a big tidy up in march & put them somewhere safe, isn't that always the way!

Winter Wishes.


For this page I started first with the embossing folders, knowing I wanted to make a wintery layout I dug out a snowflake one and a camera one.
Firstly I ran vellum through which gave a lovely crisp embossed look. Then I rubbed an ink pad on the inside of the embossing folder and ran white cardstock through it. Finally I ran damp tissue through the camera embossing folder too. To see these techniques check out the Youtube video at the end of this post.

Armed with my embossed items i set about making a grid format layout using mainly Simple Stories - Freezin' Season and Crate paper - Snow and Cocoa paper ranges.


I particularly loved how the inked cardstock turned out and just added a few stickers to finish off that  "card". I used Distress Oxide - speckled egg ink.

From the embossed tissue I cut out a single camera to use as an embellishment as part of a cluster. I enjoyed raiding my Christmas stash looking for embellishments to go with the photos and story I wanted to tell.

Before attaching the cards down I added some mixed media in co ordinating colours to the background.


I hope this inspires you to dig out your embossing folders. 

Do check out my process video on our You Tube channel too.

We would love to hear from you over on our FB group or tag us on Instagram #UKScrapAddicts if you have played along this month?

Till next time x


Tuesday 1 December 2020

Our Memories | Claire Murphy (ScrappyNerdUK) | Embossing Folders

Hey everyone. How is it December already?!

Well that means we have a new focus and this month we are concentrating on using embossing folders. 

I tend to use embossing folders when making cards but rarely use them when making scrapbook layouts so this was a really fun challenge!


I thought about how I could incorporate this into my layout as the embossing folders I have are only 4x6 inches and so I thought about embossing small bits of white cardstock to back a cut file with. 

I decided that white was going to be best for this to really help the patterns stand out. Definitely a single colour cardstock would work best for this technique. 


I chose to use the very pretty Unforgettable collection from Cocoa Vanilla Studios. I chose a neutral background woodgrain paper and set to adding the small squares of embossed papers behind my cutfile. 

I then decided I would add 3 clusters containing bit of ephemera, stickers and also fussy cut some butterflies to add into each cluster. 


I chose my photo to have a stark contrast to the white in the embossing and cut file to really help the photo pop. 

I then added some white ink splatters using a Posca paint pen.

I completed my title by adding on a word from the foam word stickers from the same collection.


And here is my finished layout. I hope you'll give this technique a try and be sure to head on over to our Facebook group and share your layouts there with us too. 


Claire x


Saturday 28 November 2020

Lovely | Amy Kattenbelt | Large Photo

 Hello UK Scrap Addicts. Amy here sharing my example layout that features a large A4 photo. The great thing of scrapping with a large photo is that the layout doesn't require much else and comes together really quickly.

When choosing a photo to print in A4 you need to pick something that is high quality and deserves a very special layout. I picked this lovely landscape photo that I took at sunset whilst out on a dog walk. We are very lucky to have this stunning countryside at the end of our road.

I decided for added impact to use a black background rather than my usual white. But to make the photo really stand out I matted it in white first. As you can see the photo takes up the majority of the layout.

I used ephemera from Vicki Boutin's Storyteller collection to create three areas of embellishments. The colours matched my photo perfectly. I added the date to the smallest cluster and the title piece to the cluster under the photo. I finished the layout off with a few clear gems.

Thanks for coming to take a closer look at my layout. Don't forget to share your layouts over on our Facebook page, or tag us on Instagram if you’ve played along this month?  We look forward to sharing our December theme with you in just a few days time! Take care, and stay safe.


Wednesday 25 November 2020

Chasing Rainbows | Large Photo | Kirei Baldwin

 Hi UK Scrap Addicts! 

It's Kirei here with my layout for this month's 'Scrap a large photo (at least A4)' challenge and this one was definitely a challenge for me! 


I typically scrap with smaller photos and the idea of filling most of a regular 12"x 12" layout with a photo was one I had not tried before but I have to say I really like how it turned out! I did have to print 4 large photos before I found one that worked.... definitely having some space on the photo seemed to be best, as one that was too busy just didn't seem right. 

I used the brightly coloured Amy Tangerine 'Picnic in the Park' collection as it has lots of rainbows and rainbow colours that were perfect with my photo! I added a rainbow striped patterned paper to the left edge of the layout. Then I mounted my photo on one of the patterned papers and distressed the edges before attaching it to the left side of the white cardstock with foam pads. 

I added an embellishment cluster to the top left of the photo and this is where i also added my title directly to the photo. I dug into my alpha stash and made up the word 'rainbow' in rainbow colours. 


Then I added another embellishment cluster to the bottom right of my layout, and added my journaling.


Thanks for stopping by! I hope you have been inspired to try a larger photo on your layout, it is well worth a try... and don't forget to share your layouts over in the UK Scrap Addicts Facebook group or tag us on Instagram if you've played along this month!

Happy Scrapping!


Monday 23 November 2020

NYC | Sheena Rowlands | Large Photo

 Hi there UK Scrap Addicts x

It's Sheena here again and for this month our challenge was to scrap a photo at least A4!!

I have scrapped A4 photos before but not often so I thought I'd challenge myself a little bit more and I had 2 photos printed 12 x 12 for me to choose one to scrap. 

NYC.

I have to admit initially I was stumped as to how to 'scrap' this photo so I decided to concentrate on areas of empty space and use embellishments only. As embellishments are my favourite bit of a scrapbook collection I had plenty that are travel related to go through. I've used mainly Vicki Boutin Let's Wander pieces on here.

I decided to concentrate on 3 places on my photo to add embellishments to help your eye travel around.

I added my title of die cut letters to the largest one.


I tried to add repeating features and colours to these embellishment clusters  including stamps, circles and stars.

As the science viewer I was looking through in the photo took coins I added a small American coin as a little reminder.


I'm quite pleased with how it looks finished and would certainly try it again for a special photograph. 

We would love to hear from you over on our FB group or tag us on Instagram #UKScrapAddicts if you have played along this month?

Till next time x