Today is the first of the month so we are ready to start our new theme.....this month we're going to be focusing on stamping techniques.
So I am first up with my layout and this month I have chosen to share a travellers notebook spread with you.
I had these rainbow stamps that I was desperate to use and had the perfect photo to go with them.
I wanted to say one thing about stamping - do not worry about it being perfect, just go for it and use those stamps. My stamping is far from perfect but I love the layout anyway.
So, my technique is to look at repeat stamping. I masked off the right side of my TN and started repeat stamping the same sentiment in black ink, but adding in each of the colours that appear in the rainbow also. To fill in the gaps I used a smaller raindrop stamp using the same colours. Repeat stamping is a great substitute for patterned paper, and especially if you're working in a TN and worried about how thick your notebook will end up.
I then stamped the rainbow in rainbow colour order and cut around this to add on top of my photo. My photo was matted with a single layer of rainbow patterned paper. I then added on some gold glitter stars to add a little sparkle to this layout.
Finally I added some journalling lines to add my journalling and ta da! The repeat stamping is really the star of the show on this layout and I love how it turned out.
So I encourage you to get your stamps out and give this a go!!
I am so excited about this months theme which is paper folding. We are going to bring you lots of different techniques that you can incorporate into your scrapbooking pages.
So without further ado, I am first up. I love making 3d paper folded stars and so thought I would share this with you here.
The technique is very simple when you know how.
So, first you need to die cut our hand cut out a star. I have used a die through my Sizzix Big Shot and for a little variety I cut a mixture of sizes.
I then used a score board (but you can use most paper trimmers to do this too - be sure to watch the Youtube video linked below for a tutorial on this) and I score from the top of each point to the bottom of each point. I do this for each of the 5 points.
I also die cut my photo into a star to give this a little more interest too.
Next I folded each of the score lines using a mountain and valley style technique. This meant that the mountain fold was each point of the star. The valley folds will naturally happen when you follow these steps.
I then burnished each score line to help define the star shape.
To adhere these stars to your page you will need to add some dimension into the middle of the star (underneath of course). I stacked 2 small foam pads for my stars as I didn't want them to be too dimensional - us scrapbookers know that dimension is not our friends when trying to squeeze our layouts into albums!!
If you are making these for something like a box frame or off the page project them add more height if you wish.
I then added some double sided tape to each of the 5 points of the star and adhered these to my patterned paper.
My title came from a quote from Lord of the Rings and it worked so well with the style and theme of my photo. I used some small gold glitter alphas (called Happy) and added these on top of the stars. They stick very well as they are foam and bend well over the folds. I wouldn't suggest using puffy or chipboard alphas for this - stick to the foam ones!!
I then added some final flourishes with embellishments from Cocoa Vanilla Studios and some Heidi Swapp colour shine in Gold, Rose and Sweet Mint.
Be sure to head on over to watch the process video here -
I'm here launching our new challenge for the month and sharing with you what I have created.
So this months theme is.....selfies!!
We want to encourage you to be in front of the camera and not always behind it. A selfie is exactly what it says - a photo of yourself. It has to be just yourself in the photo. So if you're not the sort of person to take photos of yourself then this is the challenge for you. Grab your camera and get snapping. We cannot wait to see what you create!!
And here is my take on the theme....
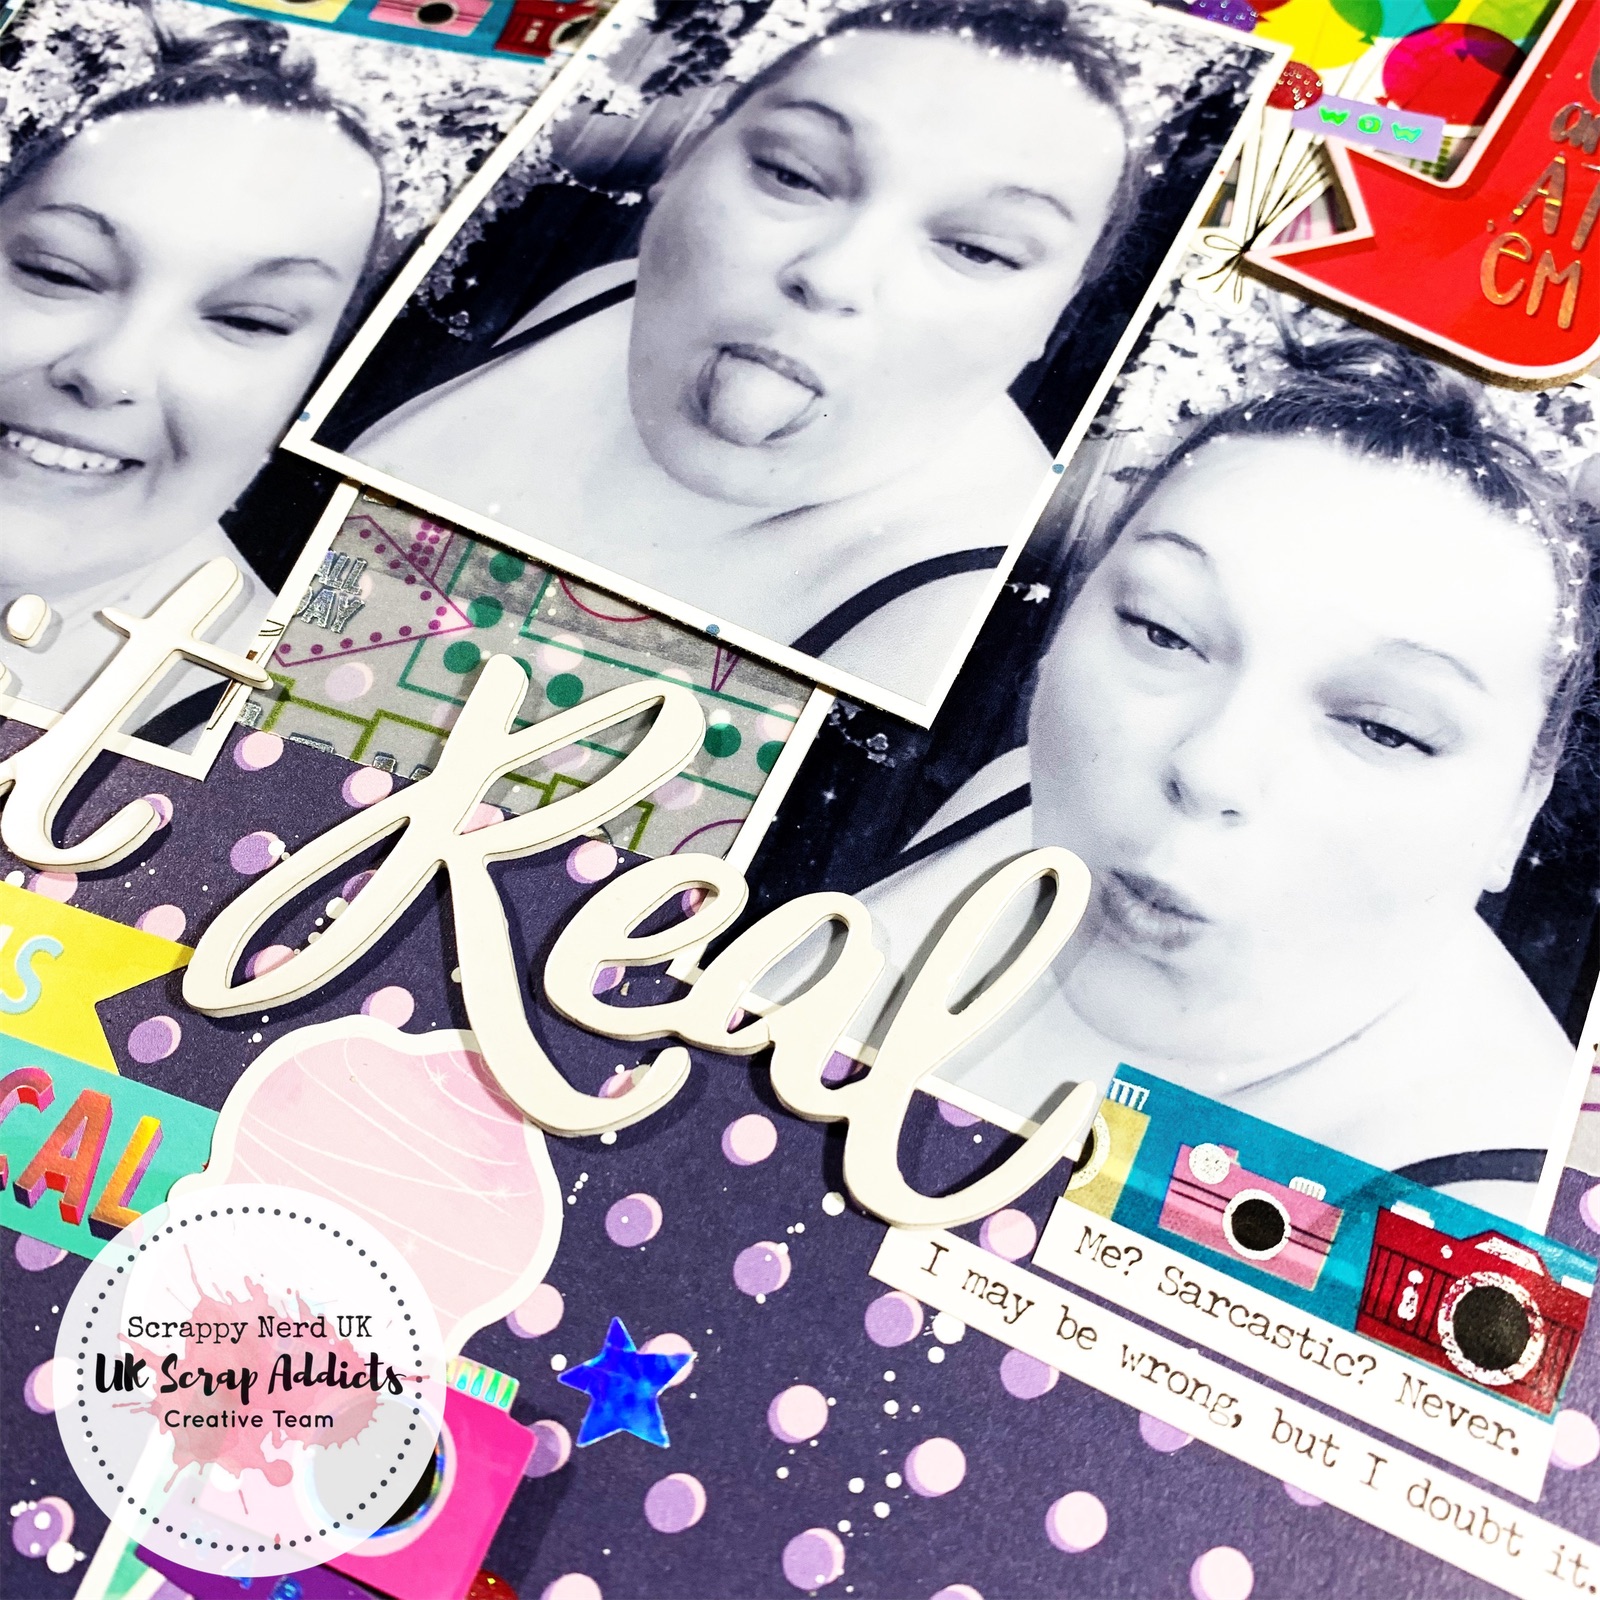
I'm not shy when it comes to taking selfies and never take myself seriously when I do. I don't pose for the perfect Instagram photo or any of my social media accounts - instead I'll take tongue in cheek photos or silly selfies.
For this layout I used my favourite collection, Sparkle City by Shimelle and just loved all the bright fun colours to help with the playfulness of the photos I had taken.
I did use some Thickers I had in my stash for the title and it was great to get these used as I've had them years!! And this was the perfect title for me - Keepin' it Real!.
I took a series of photos on my phone with different poses and chose 4 of the best ones and printed these as 3x4 inch photos. I matted them with a single layer of patterned paper (which was predominantly white) to help the photos pop from the back ground. I did add some messy ink splatters with a white Posca paint pen.
I had the speciality velum from the collection that I was terrified to cut into but I managed to use some on this layout. Behind my photos I used a 5 inch strip horizontally to give my photos a base and I love how the pops of holographic come through.
Next I started embellishing so I added all sorts of stickers, washi, chipboard, enamel dots and puffy stickers (I really went for all of the things!) and used things that worked well with my photos.
Finally I added some Tim Holtz Small Talk stickers to help really show my personality on a page.
Thanks for taking the time to read my blog post and I realllllllly encourage you to join in this month. Be sure to head on over to our Facebook Group and join us there where we share all of the creative teams designs every month.
I was absolutely thrilled when Laura Rumble agreed to design a sketch for us to use this month!!
Sketches are brilliant if you are ever stuck for inspiration and design as they give you a great starting point. They can be interpreted in so many different ways and it's great to see how different layouts look when all using the same sketch.
So I am kicking off the month with my layout......
I used some papers from CVS and grabbed my Big Shot and some star dies and started die cutting a whole load of layered stars. For the largest star I layered 4 papers and for the medium I layered 3. I also added in a little velum here and there within the star clusters.
I then ran these through my sewing machine to stitch down the middle. This enabled me to be able to lift the edges of my stars to create some shadowing.
I then started work on my background. I used a white Posca paint pen to add some ink splatters in a semi circle shape and added on top some gold Heidi Swapp colour shine.
I then arranged the stars in a semi circle to follow the shape as shown on the sketch. I added some wet glue to the back of the stars and secured them down. I then punched out some smaller stars to fill in the gaps around the larger stars. I added some more ink splatters on top too!
I did a simple mat behind my photo and nestled that in to the bottom of the half circle.
Finally I finished it all off by using a white gel pen to hand doodle some stars into the little gaps that were left.
And I'm chuffed with how this layout came out.
Be sure to check back here again soon for more sketch inspiration. And if you want to join in then please head on over to our Facebook group!!
I am one of those weirdos that love to fussy cut so when this challenge came round I relished in it..... well at least I thought I was going to.
So I realised that when I fussy cut things, it always seems to be butterflies or flowers. But there are other things that can be fussy cut - just like in my layout.
I used a sheet of labels from the Carousel collection by Maggie Holmes. I also used a patterned paper to fussy cut some of the icons you can see here that says Cotton Candy and Carousel.
I added some foam behind some of the labels to give dimension and then used this as a base to start adding in embellishments.
I used a mixture of stickers and ephemera and chipboard and just continued layering over the labels and although it's busy, I personally love the design concept with how this turned out.
The photo was one that was taken a long time ago and so I didn't have the actual date available so instead I used the year (I believe?!) and added 2003 in Thickers into one of those labels.
To the other spare label I added my title which is "My Thor" as me and hubby are massive Avengers fans.
I also added some torn edges and backed this with some patterned paper to create some further interest on the sides due to working on white cardstock. This really helps to train your eyes inwards to the photo.
Be sure to join us over on our Facebook group to join in with the monthly themes!!
And don't forget that we are celebrating (Inter)National Scrapbooking Day this weekend (3rd, 4th + 5th May 2019) and all the details can be found over at our Facebook group. Just search for UKScrapAddicts.
My layout turned out to be covering both last months theme of black cardstock and this months theme of sparkles - happy accident I say!!
I thought about how I could use a black cardstock background to do something different on my layout and decided to make like a chalk board effect with using a white gel pen. So I printed off a quote from the internet (which happened to contain the word Sparkle!) and traced it using a pencil, onto some velum ( please use tracing paper as velum is the expensive option and I only used this as I had no tracing paper on hand). Then I traced the reverse of these letters again to get the lead onto the back of the velum.
I then laid this down onto the black cardstock and traced it again to create a faint outline for me to be able to go over with my white pen. I loved how the finished effect turned out.
I added in a photo of me (I love scrapping selfies - I know I'm not the only one!). And decided it was
time to use up some older stash so grabbed out the Chasing Dreams collection by Maggie Holmes and added in the lady chipboard piece (which was never going to be used on any other project) and added in some fussy cut butterflies and a few other chipboard pieces from the Thickers pack.
Finally - because my title contained the work Sparkle I added in some sequins and I had these go from the top left to the bottom right of my page, creating a natural direction for your eye to follow to the photo.
I'm definitely going to try this technique again!
If you want to watch the process video then it's linked here. And be sure to head on over to our Facebook group and come and share what you have made for this months theme of Sparkle!
I almost gave myself a triple challenge this month. Not only did I use punches (which is our theme this month) but I also challenged myself to use up scraps and incorporate more than one shape in my layout.
Here is how I got on.
I pulled out 4 circle punches for this one. I used a 3inch, 2 inch, 1 inch and 1/2 inch. From my scraps I punched first the largest and then used the next size down until all of my scraps were punched.
I then arranged this down the left side of the page. It was apparent that I didn't have enough larger circles and so I also punched out a couple of circles from vellum which is a great alternative to help fill up blank areas.
Next I chose my photo. This is generally how I scrap and tend to get started with my layout before I then choose my photo. I chose a snapchat picture of me and a friend and just loved all the pretty pinks from the Dream Big collection from Simple Stories that I knew this photo was right for my layout.
I added in some stickers from the sticker sheet, a few tiny word stickers mainly. I also added in some chipboard stickers from an older Dear Lizzy collection.
So that's 2 challenges done, punches and scraps. Next up was bringing in another shape to work alongside the circles. I chose to go with a square as my photo was square. I decided to use the little 2x2 cut apart from the Dream Big collection and nestled 3 of these into the circle layers.
Finally was my title. I again used a different collection for these. I used the Thicker stickers from Amy Tangerine On A Whim collection and just love the sentiment "Feeling All The Feels".
And a few little flourishes with stickers and chipboard pieces and these layout was finished in about half an hour!!
Thanks for joining me here - be sure to watch the process video for this layout too - Link here:
So this months theme is small photos. What a great way to include small photos in a travellers notebook. I love scrapping in a travellers notebook when I have photos of something that is a smaller story that I want to document but not necessarily warrant a full 12x12 layout in my album.
I used a paper from Paige Evans Oh My Heart collection (desperately trying to kill this kit!!) as I have had this in my stash for ages and this was the perfect project to get it used up. The shelves reminded me of my book shelves. I have recently moved and wanted to create a little nook area where I can go and read and this photo captured this just perfectly.
So I trimmed the paper to fit into my travellers notebook. I am using a Simple Stories one currently and these ones are a little wider than the standard TN size. This really helps me showcasing the amazing patterned paper and really brings the whole theme together. I fussy cut some elements from another one of the papers which had some cutaparts on and used these as embellishments around my photo. This is a great way to make your collection go so much further when you are running out of ephemera etc.
I knew that in the collection there was a die cut that would be perfect to use as my title - Books and More Books!! I popped this on the opposite side and used a black fineliner to create some faux stitching around it to help it stand out a little more.
I added on a book sticker from the Paige Evans sticker book and 1 chipboard piece that says "all you need is a good book". I also used this area to add some journalling on. I don't journal much on my 12x12 layouts but find myself being drawn to adding more journalling in my travellers notebook - especially those random smaller stories that you want to remember in years to come.
My layout felt almost complete but decided to channel my inner Missy Whidden by adding in some lengths of thread in co-ordinating colours and these are layered behind the top left and bottom right of my photo cluster (along with a couple of flower stickers, also from the PE sticker book).
And the layout is finished. I love how colourful this layout is and really encourage you to try and travellers notebook if you haven't yet. Its a great way to scrap on the go, when you don't have much time or even if you have those smaller photos that would look lost on a 12x12 layout.
Be sure to head on over to Youtube to watch the process video for this one too.....
It's nearing the end of Summer here so that means one thing - no more super bright layouts! We head into Autumn colours, photos of Hot Chocolate and crisp Autumn mornings and then onto the Big C!!!
But....For now...I bring you one last hurrah of this summer season and who can resist a rainbow layout (I know I can't!).
So this months theme was paint. I decided to use some acrylic paint markers for this layout and I have teamed this layout up with my Alpha Attack series on Youtube to demonstrate that you can use paint to change the colour of any type of Alpha or Thicker (because we usually have lots of those in our stash right!?).
So my thought was rainbow rain. I know this sounds crazy but here is how the layout came together.
I grabbed a whole load of half used Thicker packs from my stash and started sticking them randomly over the lower 2/3 of my page. (I did Gesso my page first knowing I was going to be applying white paint over the Thickers).
Once these were all stuck down, I then added a layer of Gesso (I actually added 2 layers because I wasn't sure how thick the coverage would be from the paint markers).
Once I had let the Gesso dry, and you can use a heat tool to speed the process up (I certainly did), I then applied 2 layers of white acrylic paint over the whole page.
Next came the hard decision as to where I was going to include my photo. I didn't want to cover too much of the background up so I went with a photo that I could cut down to just the subject image (my husband in this case) and I packed the photo with a small amount of 3 different patterned papers around the edges.
This is where the fun part came in. I used the acrylic paint markers to colour in each alpha using the ROYGBIV colours (apart from I had to substitute Indigo for Pink) and I worked my way across the page with each colour. Next I added some of the paint onto a non stick mat and added a little water and went splatter crazy! I tried to keep the coloured splatters within each of their own colour sections. I then went tone on tone with adding some enamel dots in hearts and star shapes.
I did back my white cardstock onto a piece of rainbow(ish) patterned paper. I had used a sheet of Bazzill Marshmallow cardstock which is primed for Mixed Media but it had buckled a little. So cutting down a 1/2 inch from each the top and bottom, I then mounted this onto the patterned paper to held smooth out the warping.
Next I free hand cut some clouds and used a black paint marker to give these a faux stitched border as these were getting lost on the background. Finally, because clearly there were not enough Alphas already on this layout!, I then added my title into the left cloud. I even popped a sun in to the top right cloud to keep with the theme.
In total I used a massive 97 Alpha Stickers!!! And now I need a lie down. Thanks for visiting our blog today. Be sure to head back for more inspiration throughout the month from the other ladies. Oh and we have a new theme on 1st October!!
If you want to watch the process for this layout then you're in luck as there is a process video right here for you. So be sure to head on over to our Youtube channel where you will find hundreds of videos to keep you inspired!
I can't believe we are nearly at the end of August already.....this means its nearly time for a new theme!
We still have a couple more layouts to share with you for this months theme of Tic Tac Toe. And I hope you like bright colourful rainbow layouts?
So I chose to use Circles, Rainbow and Multiple Alphas.
I started with punching different sized circles from blue, red, pink, yellow and blue patterned papers. I used a 3 inch, 2 inch and 1 inch circle and adhered these onto a piece of white cardstock.
I already loved how this layout started out.
Then I set to work on the title and embellishing. I chose to use 3 different alphas and wanted to use all glittered ones but change the font of each word. I love this bright title and different directions the words run make it more interesting too.
The photo, which can be seen just at the bottom of this photo, was layered with co-ordinating patterned papers that match the circles.
Each circle was then drawn around with a 0.8 black fineliner to help make them pop and give them more of a messy look.
I also added in some accent words from Pink Fresh Studio and used the co-ordinating hearts and stars to create a colour on colour embellishing.
It was then all finished off with a couple of tiny word stickers and some splashes of black ink!
Be sure to head on over to Youtube to watch the process video too.
This months theme was always going to be one of my favourites. I love working with 6x6 paper pads and find them so versatile. However, I know many people really struggle with using them. I'm hoping you have found lots of inspiration so far this month to get those paper pads put to good use...The ladies on the team have created some fabulous layouts this month!!
So I started with my photo and decided on a Disney one (because I love scrapping my Disney memories!!).
I used a white cardstock background as I really wanted the 6x6 papers to pop and using white will certainly help that.
I used a piece of A4 white cardstock and traced around a plate and sectioned this circle into 8. All of the sections were then cut out and were used as templates for my patterned paper from the 6x6 pad.
I arranged these circle pieces back together on my 12x12 white background and used double sided adhesive runner to glue them down. From the off cuts of the 6x6 papers, I used each of these as layers behind my photo - what a great way to use up 4 sheets of paper with very little waste!
So next came the embellishing. I went through my Disney stash and added on a whole load of stickers into 3 sections of the circle. I used a die cut word "Magic" as my title and added in pops of gold foil in the 3 embellished areas. I used a mixture of stickers, ephemera, chipboard and even used a heart paper clip that can be seen in the photo to the right.
There is something magical and tingly about scrapping Disney memories.
And here is the finished layout. I love how this turned out. I'm sure I say that every time but I really do. I hope that this has bought you some inspiration for diving into those 6x6 paper pads. They need some love and this is a great way to get them used.
If you want to watch the process video for this then you're in luck - you'll find it over on Youtube by using the following link - https://youtu.be/LsMnhidslHc
Hello ScrapAddicts, Its my turn on the blog today with my layout based on a single 4x6 photo. This seems pretty easy to work with for me and so I really concentrated on making a big bold title to fill a lot of the space on the page.
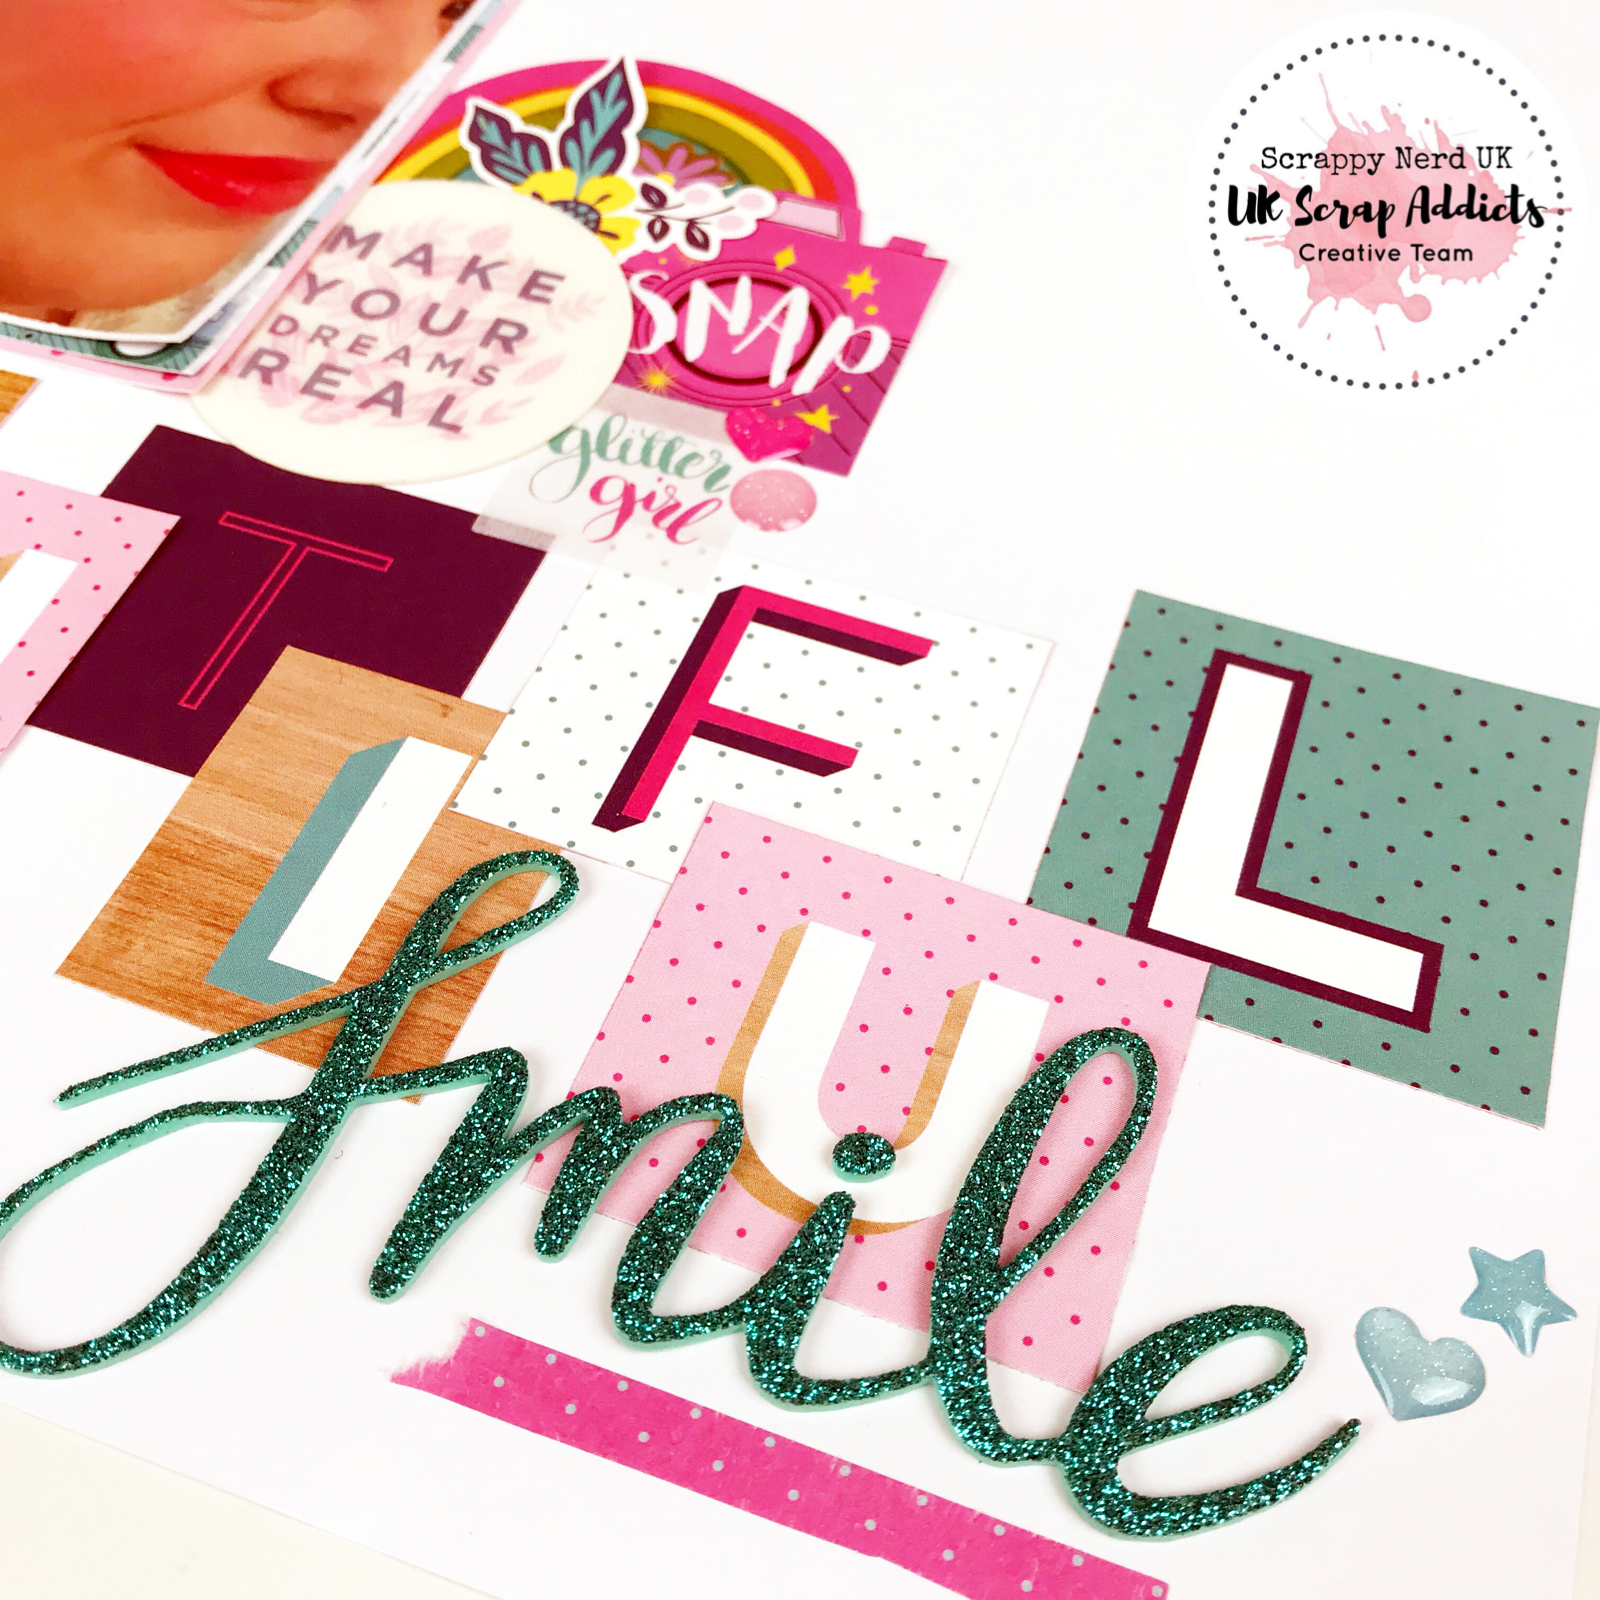
I used the Glitter Girl collection from Shimelle for this layout as in the paper pack there was a 12x12 paper with all of the letters from the alphabet on it and I knew that I wanted to cut these apart to form the basis of my title. Once I had cut the paper up, I then had to decide on a title. Now, I struggled with this as it was a photograph about myself. I decided to embrace it and call the layout Beautiful Smile.
I only added a couple of areas of embellishments which were located at the top left of my photo, the bottom right of my photo and the bottom right of the page where the title ended. I wanted to maintain a lot of white space on this layout to keep it looking clean and I was happy with the balance of embellishments v. white space on this layout. You'll see that I tucked in a mixture of die cuts and stickers to each cluster and added a few enamel shapes to finish the page.
I hope you have enjoyed reading about my layout and be sure to head on over to our Facebook Group here to share what you have been inspired to make. The process video for this layout is linked here for you - https://youtu.be/kpeNNlyWrX4
Its been ages since I have been up for the UKScrapAddicts. But I'm back and super excited to share with you my layout based on this months theme of Monochrome.
I really went completely outside my comfort zone and chose to use red!!
I kept the design aspect fairly simple with almost a grid design as I knew I wanted to include lots of embellishments on my layout to really play on the monochromatic theme.
I grabbed some Simple Stories Project Life cards from my stash and just pulled the black and white and red ones to use for this layout. There was one that had a blue element on but I wasn't too worried as this could easily be covered with an embellishment .
I decided to almost make a page kit ready for this layout as I didn't want to be digging around in my stash to find items that would work together, especially as I was heavily restricted on the colour options.
I mixed in some ephemera from the same Simple Stories pack, some stickers from Shimelles 30 page sticker book (keeping to the red colours only), some wood veneer stars, chipboard from some older kits, some fussy cutting and finally some Tim Holtz tiny word stickers.
Wow - now breath!!!
After I had laid my cards into a 2x3 format across the page horizontally, I cut down the bottom cards to that they were only 2.5x3 inches.
I embellished on top of each of these cars whilst adding my photo to one and my title to another. I didn't really have any journalling for this as the title says exactly what the photo was about. (I need to get better at journalling on my layouts!!) Perhaps that might be an upcoming theme?!
And here is the completed and finished layout. I was nervous about using read but this has definitely spurred me on to want to try those colours that I don't normally scrap with. Perhaps monochrome is the way forward!!
Thanks for joining me today - If you would like to watch the process video for this then please head on over to our Youtube channel and you'll find the video linked below.
So I normally struggle using mood boards and so this was always going to be a task for me. But I loved the inspiration in this mood board that was created by fellow UKSA team member Terri. The colours and themes really had my heart.
UKSA has gone through new branding and I couldn't wait to scrap about this. I love the new logo and our new watermarks (leave us a comment and let us know whether you like them too!!).
I used this months free cut file that was designed by Lisa from Pretty My Page and I loved it!!
I decided I would go stitching crazy on this layout also. I stitched around the cut file and then even made some balloons and stitched around these also. I had cramp in my hand for about a week after all of this!!
I finished the layout with some word Thickers to create my title "Inspire Dream Create" and embellished with some ephemera and stickers from the Girl Squad collection which seemed fitting for what I was scrapping about.
I have been loving the layouts that have been created from the other creative team ladies so be sure to check back here for more inspiration.
This is my most favourite time of the year - especially for scrapping!!
I started by using a piece of patterned paper and covered the left page of the notebook. I loved the warm woodgrain texture from this paper and used this as my jumping off point for the rest of the layout.
I moved onto the right hand side and created a frame for my photo as I wanted the polaroid look. I stamped the word Joy to the bottom of the frame to create a little interest.
I then used some border strips for the photo and tag to have something to "sit on" so it wasn't floating on the page and this was a great way to bring some colour into the layout without overpowering the whole thing.
I used a couple of ephemera pieces to decorate my page, before moving back over to the left side of the page to add a title.
I added my title in a mixture of alpha fonts, colours and sizes and this is the perfect way to really get your alphas used up.
If you haven't tried scrapping in a travellers notebook before then what are you waiting for? Have you got spare photos just lying around and not sure what to do with them? Like me I have left overs from Christmas last year and they'll never make it into an album so scrapping them into a TN is the perfect way to do something creative with them....
I hope this has bought you some inspiration and can't wait to be back next month with another scrappy instalment.
Hello my friends!!! I'm back with my layout using only a black and white photo. Black and white photos are a great way to use busy patterned papers without fear of the colours clashing. Its also a great way to use a photo that might be poor quality as the black and white contrast really helps to hide the quality issues.
I found inspiration for this layout from a sketch I found that had pinwheels. I knew I had a pinwheel die and so I decided to try this sketch with my layout. It helped that I was using a black and white photo as I was also going to introduce lots of patterned papers. I attached the pinwheels using brads - yes thats right, I used brads!!
Next I went embellishment crazy by cutting up the cut apart sheet from the Shimelle Starshine collection. I used patterned paper for the pinwheel embellishments. I also used some ephemera and chipboard from the collection. I concentrated my placement down the right hand side of the photo and used the chipboard piece which says "Make a Wish" to act as my title. And my finished layout is here...... Give it a go and get those black and white photos scrapped!!


 So, my technique is to look at repeat stamping. I masked off the right side of my TN and started repeat stamping the same sentiment in black ink, but adding in each of the colours that appear in the rainbow also. To fill in the gaps I used a smaller raindrop stamp using the same colours. Repeat stamping is a great substitute for patterned paper, and especially if you're working in a TN and worried about how thick your notebook will end up.