Friday, 16 August 2019

Hello | Laura Rumble (Guest Designer) | Sketch

Hello! Laura Rumble here, Guest Designing for my old friend UKScrapAddicts.

I was honoured to be asked to draw up a sketch for this month. I've also created a layout using the sketch (Click here to watch my process video)

It is for an album for a friend so it is left blank for her to add journalling, names, places and dates - all the bits that the taker of the photo knows best - plus her kiddies will then have their Mum's handwriting on their layouts. I've stuck pretty close to the original sketch for my layout but I want to talk a little bit about changing up a sketch in this post.


The first and perhaps most obvious way it to rotate the sketch 90 degrees. Most sketches will also look different when rotated 180 and 270 degrees unless they are a really symmetrical design. Another option is to flip the sketch, or mirror it. As it happens, this sketch flipped looks the same as the sketch rotated 180 degrees. Then there are options to change the shapes. Where you see a star you may add a heart, or a circle, or whatever takes your fancy.


Changing up photos is also an option. If the sketch calls for two small photos buy you prefer using 6x4's, just switch them out. It may mean relocating the title, or scaling up the whole design but this is fine. 


You can also completely change the feel of a sketch by adding your own colour scheme. My sketches tend to be grey tones so you don't feel restricted by which colours to use. All shares of one colour versus rainbow versus ombre versus black and white....it will have an impact on how you're layout looks

My final suggestion is just to focus on one or two of the elements in the sketch and let your imagination run free with the rest of the page. For example with this sketch you could focus  on the crescent of shapes (remember they don't have to be stars) and freestyle your photos and title placement. 


 A huge thanks to UKSA for having me back as a guest.


If you'd like to see more of my designs and sketches then you can follow me on the below links too!

Blog
Instagram
Youtube


Sunday, 11 August 2019

Wisley | RamblingsofGeo | Sketch

Hello everyone,

Today is my turn for the month with my take on Laura's Sketch.

I decided to use my Smash book to document my Recent rip to Wisley Gardens.

I followed the sketch by using the Wisley Gardens leaflets to create the starts around the side of the photos.

I used quite simple tools for this too -


The above tools are -

Small star punch from Hobby craft
Sizzix Star Dies
Crafters Companion Diamond press Die cutter (bought from the Range)
Cutesy Smash Book - bought from Amazon


I layered up the different sized stars cut from the Wisley garden Map, to create a flower style, and then stuck them with a tacky glue which will dry clear.

You can see the process of this layout on the UK Scrap Addicts youtube channel Linked Below -

https://youtu.be/QKyMMlA87zY

Friday, 9 August 2019

I thank my lucky stars | Stephanie Squires | Sketch

Hello Scrapbookers,

Welcome to this moths blog post!  So we were given a sketch by the very talented Laura Rumble and here is my take on it...


I found this great star paper that would work perfectly for my layout and some typed paper.  I cut a strip of the text paper 12 x 5 inches and stuck it on the back of the star paper.
I folded over the star paper to reveal the heart speech bubbles and the typed text and added a few staples from my tiny attacher to the top and the bottom to secure it in place.


I added I piece of black card stock to the left hand side of the layout and added my square black and white 4 x 4  photo to the middle of the strip.  I backed two mini frames with some coordinating paper and stuck them above and below my photo.  

 Onto the mini frames I added a chipboard accent and to the bottom I added a foam heart and a transparent quote and some closed eyes,  


I then added my title and some more transparent stickers.  


I kept on piling on the transparent stickers, some foam stickers and lots of lovely sequins to complete this months layout.

Thank you for reading....

Until next month...happy scrapping

Steph xoxo

Wednesday, 7 August 2019

Awesome Brothers | Amy Kattenbelt | Sketch

Hello Scrap Addicts. Amy here today to share my layout that I created using the fabulous sketch designed exclusively for us by the lovely Laura Rumble.

I thought this star paper from the Boys Rule collection by Cocoa Vanilla Studio would be perfect for a starting point of my layout. I cut it into a crescent moon shape that would cradle my photo and journalling. To contrast with the star paper I used a dark, wood grain, paper from the same collection as my background and added a little white paint splatter to it. I went to town distressing the edges and then stuck it to a blue patterned paper, ripping and stapling it in places for extra details. I added a chipboard title and then finished the layout with lots of matching star shaped ephemera and chipboard pieces.


Thanks for reading. I will be back next month to share another layout with you. In the mean time we would love for you to hop over to our Facebook Group UK Scrap Addicts where you can view the sketch and also share your layouts with us!


Monday, 5 August 2019

Together | Sheena Rowlands | Sketch

Hi there UK Scrap Addicts x

This month our challenge is to use a fabulous sketch created especially for us by Laura Rumble. I love a good sketch so was well up for this challenge.

Together.


When I first looked at the sketch I turned it around a few times but in fact I settled on using it exactly as it was.


I'm not really a star person but a sketch is just a guide or starting point so I thought about layering hearts instead I had a good look through my stash and dug out any ranges with hearts on including Pebbles - Forever my Always, Crate Paper - Main Squeeze and Heart Day.


I picked out stickers, chipboard pieces, fringed and tasselled hearts and then cut a few more from patterned papers then layered them together on foam pads up the left side of my patterned paper background. I added in a few sentiment banners in between.


I only wanted to use one photo so I added a couple of journalling cards to help balance it & give me a small place to write on. I found a padlock stick as I was finishing this page so added a cluster around my title so I could use it on here.

I finished up with a Perspective title and mini hearts to add another pop of blue.


I hope this sketch and my layout provide some inspiration to get scrapping. Please share your creations with us over on our Facebook group page.

Till next time x


Saturday, 3 August 2019

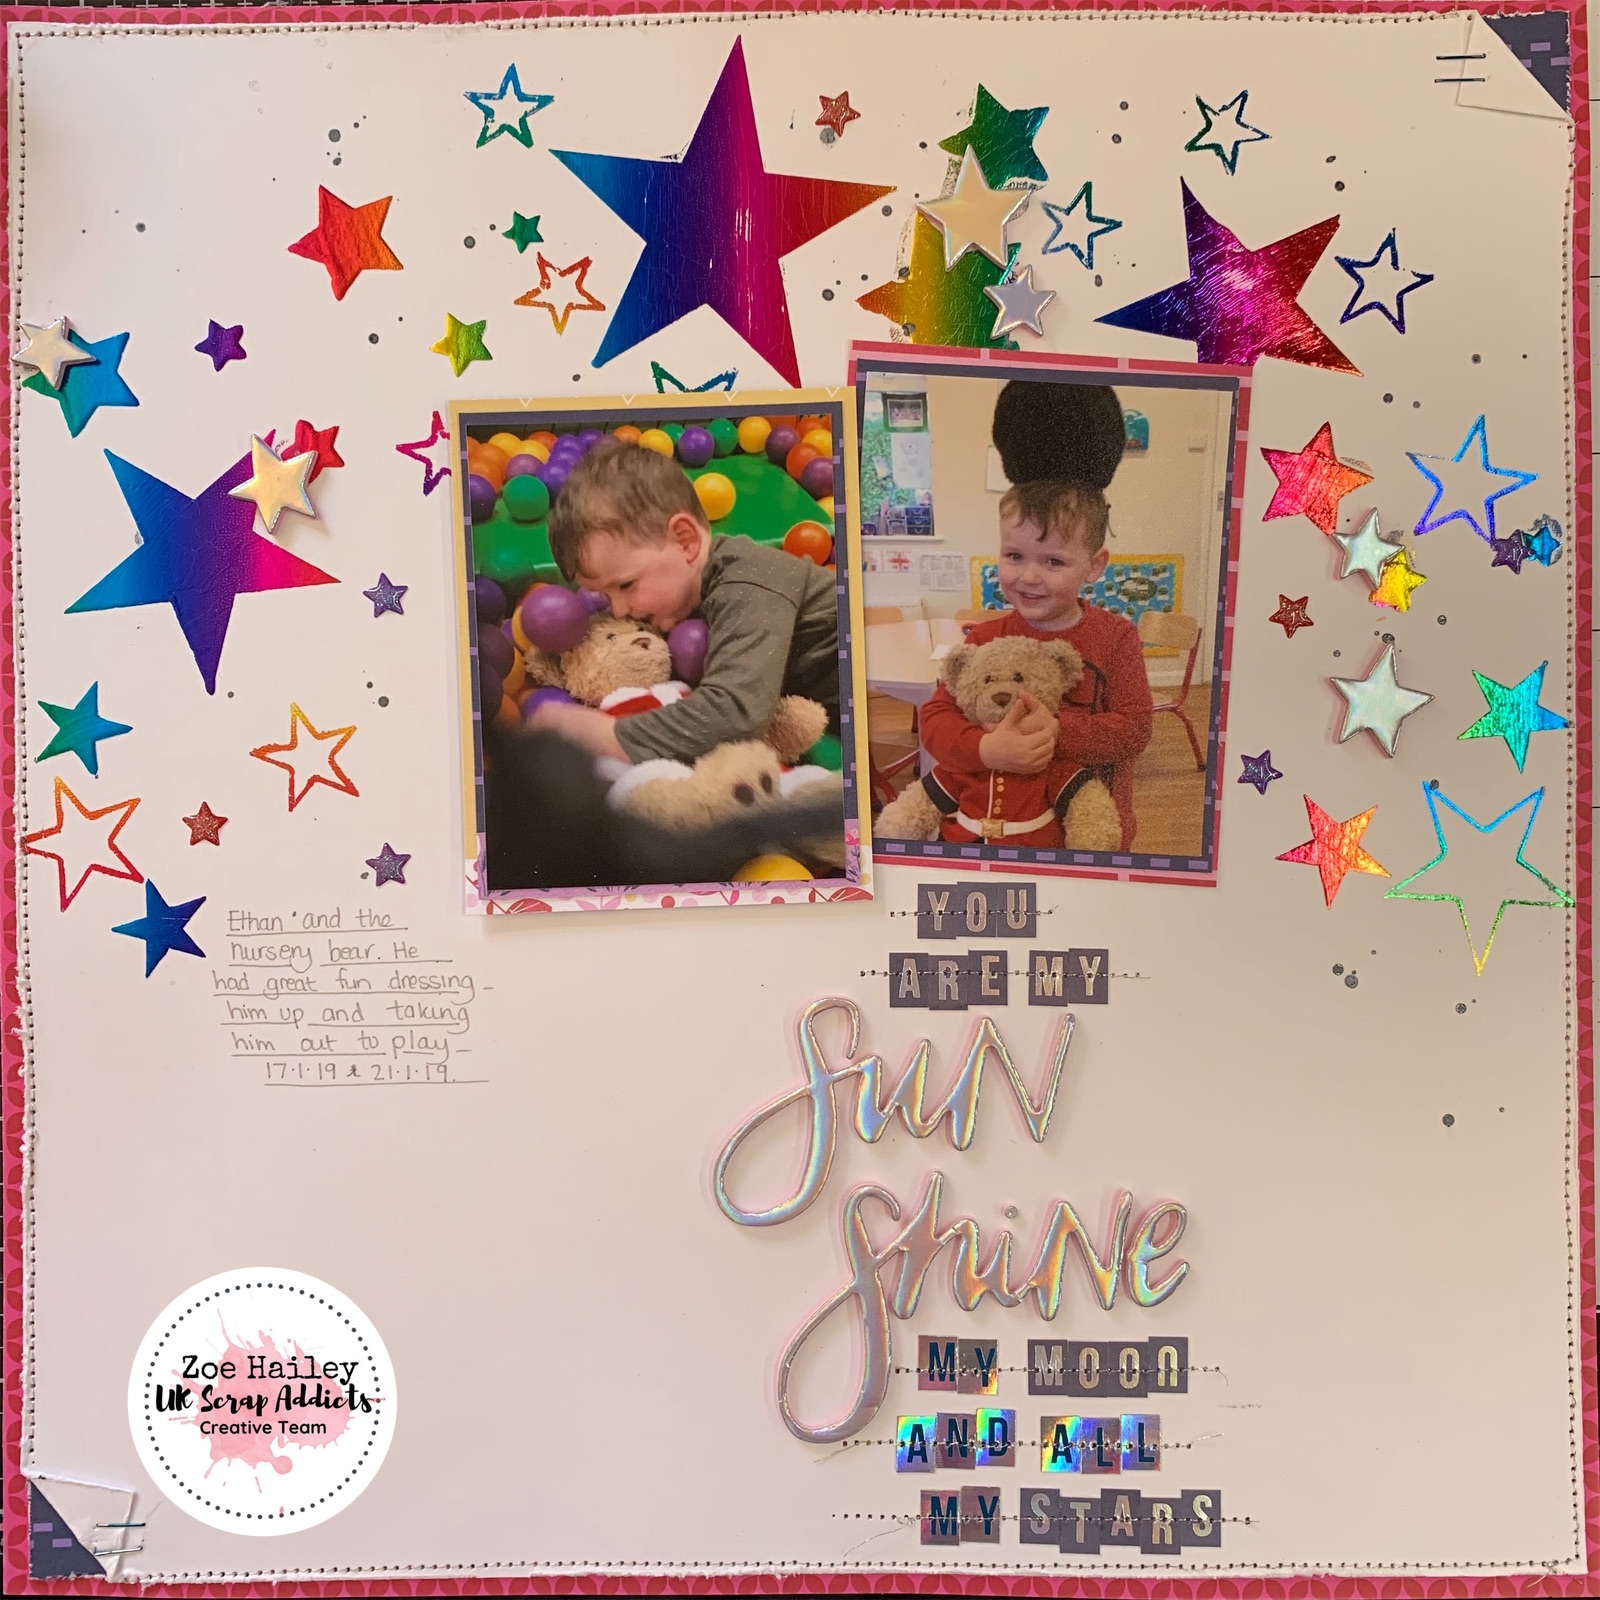
Sun Shine | Zoe Hailey| Sketch

I can't believe August is here already and we are working with a new theme, this time round we have an awesome sketch to inspire us (Thanks so much Laura Rumble). The original sketch included stars which was great for me as I love stars and think they are really versatile on layouts. I just flipped the sketch 90 degrees to get the design for my page.

To create my layout I started by attempting to make my own stencil, but unfortunately I didn't have the deeper blade for my Cricut Explore Air 2 so I had to improvise. I used the Heidi Swapp reactive paint to pull through other stencils and foiled my stars with the rainbow foil ( which I absolutely adore!)  Here is a close up of how that turned out.


I also used the Heidi Swapp pen to outline some stars and foil them and I think these add a really cute element to the page.


I titled my page "you my sun shine, my moon and all my stars" to go with the theme of the layout and because it is a photograph of my son.


I worked with Shimelle's Sparkle City Collection on this layout, which I have to admit I totally adore. I have added some photo layers behind my two images and stitched through my title and layout edges using a metallic thread.
For some finishing touches I added foam stars, sticker stars and teeny wheeny stars (these were the words of my five year old daughter when I was struggling to describe what I meant!) And lastly, proving that you can find new ways to use old stash I have added some stickles dots and ink splatters.


A simple layout but I really love it, hope you are inspired by the sketch and our take on it. Look forward to seeing what you create in our UKSA Facebook Group soon.


Zoe ( Find me on IG @Zola28)


Thursday, 1 August 2019

I Told The Stars About You | ScrappyNerdUK (Claire) | Sketch

I was absolutely thrilled when Laura Rumble agreed to design a sketch for us to use this month!!

Sketches are brilliant if you are ever stuck for inspiration and design as they give you a great starting point. They can be interpreted in so many different ways and it's great to see how different layouts look when all using the same sketch.

So I am kicking off the month with my layout......

I used some papers from CVS and grabbed my Big Shot and some star dies and started die cutting a whole load of layered stars. For the largest star I layered 4 papers and for the medium I layered 3. I also added in a little velum here and there within the star clusters.

I then ran these through my sewing machine to stitch down the middle. This enabled me to be able to lift the edges of my stars to create some shadowing.

I then started work on my background. I used a white Posca paint pen to add some ink splatters in a semi circle shape and added on top some gold Heidi Swapp colour shine.

I then arranged the stars in a semi circle to follow the shape as shown on the sketch. I added some wet glue to the back of the stars and secured them down. I then punched out some smaller stars to fill in the gaps around the larger stars. I added some more ink splatters on top too!

I did a simple mat behind my photo and nestled that in to the bottom of the half circle.

Finally I finished it all off by using a white gel pen to hand doodle some stars into the little gaps that were left.

And I'm chuffed with how this layout came out.

Be sure to check back here again soon for more sketch inspiration. And if you want to join in then please head on over to our Facebook group!!

There is also a process video for this layout which can be found here -https://youtu.be/0HsAbr3mML8