Showing posts with label #scrappynerduk. Show all posts

Thursday, 1 October 2020

Life is a Journey | Claire (ScrappyNerdUK) | Monochrome

Hey everyone. 

I can't believe we are into October already?! Where is this year going?!

So, since it's the 1st of the month it's time for us to focus on a new theme. This month we are working with monochromatic colour schemes on our layouts. 

Monochrome doesn't necessarily mean to use only black and white. Monochrome means the use of a single colour. Now, to only use 1 colour on our layouts would be super challenging so we have mixed things up a little and working with a single colour but with the addition of black and white. 

For my layout, I decided to "shop my stash" and find tools and supplies that often get forgotten. I was desperate to use embossing folders on this layout. So, I cut 9 3x3inch squares from white cardstock. Some of these I put through my BigShot machine using an embossing folder and others I used some black texture paste through a stencil to add textured hearts. 

I love the stark contract of the black texture paste on the white background and I cannot wait to use my embossing folders again on more of my layouts. Look at the text it created!! 


I splattered some white paint across my background to give it some more interest and then stuck down each of my 9 squares in a grid style. 

I only added adhesive to the middle of the squares which enabled me to run my nail around the edge of each of the squares to distress the edges which helps to create some shadowing behind. 

I was really going for lots of different textures on this layout so I added some pom pom trim under 3 of my squares and also used foam pads to pop up some of my embellishments. 


I rarely start a layout with a photo in mind. I just start creating the layout and then find a photo that would work. 

I found this Snapchat photo from last year and the colours and theme of the photo really worked!

I used some white and pink Thicker words from my stash to add my title to the middle square. 

I had the most amount of fun shopping my stash in my room to find all the stickers and embellishments that were pink and I started adding these within the squares, building up different layers as I went. Lots of word stickers, die cut hearts, stickers and enamel dots. It felt great using some older stash!

And here is the finished layout. I just love the soft pink colours and the pop of black and white really works well together. 

There is a process video here too if you want to watch the process of this layout come together  - https://youtu.be/L9nloNCGARs


Saturday, 1 August 2020

Let Your Color Shine | ScrappyNerdUK (Claire) | Mood board

I am the first to admit that I always struggle with a mood board as inspiration. But, I always remind myself that I can pick one thing in the moodboard that inspires me and there are no rules! There is no scrapbook police so we are free to be as creative as we want and to take inspiration from wherever we want.

Amy from our creative team made a moodboard this month for us to all use as inspiration and I just love it!

Rainbows are always a winner in my eyes so I immediately went to a collection that I knew had rainbow papers in and that is Amy Tangerines Picnic in the Park collection.


So I started with a sheet of white cardstock and laid this at an angle across the rainbow paper and trimmed both pieces back to 12x12. (Tip - I didn't stick all of the white cardstock down initially - this enabled me to cut away some of the rainbow paper to save for a later project)


I then decided on my title. My photo was about painting our garden fences and wanted a title about color (ironically, our house and now our garden fence is painted grey!)

I used the little white alphas from the same collection but wanted the word "Color" to be in colour so I had a look through my stash and found some Thickers from Vicki Boutin and cut down the word "Colorful" as I didn't need the last part.


I then had fun with all of the embellishments from the kit and created 3 clusters to create a visual triangle around my photo. In each cluster I started with a flower die cut and added in puffy stickers and foam Thickers and some flat stickers also so it had different textures and depth in each cluster.

I then added in a few flickers of black indian ink into each cluster for a pop of black.

I ran my fingernail underneath the bottom and right of the white cardstock to lift the edges slightly to create some shadow underneath.

And here is my completed layout. I was unsure as to whether I wanted to add journalling to this and there is a nice white area to the photo that would easily allow me to add some before adding to my album if I wanted to do so.


There is a process video for this over on our Youtube Channel so please click the link here to watch the video


Monday, 1 June 2020

Magical Memories | ScrappyNerdUK (Claire) | Combine old & new collections

Hey everyone!!

So it's the 1st of the month and I am here to share with you the topic for the month and my layout. The new theme we are focusing on is combining new and old stash to create a layout.

My tip for being able to combine old and new stash is to find common colours within the products. If you're working with pastels then be sure to find pastels that co-ordinate or if you're working with bright summery colours then match it up with the colours and theme.


I always find it much easier to work in a collection but sometimes use collections from the same designer together and these works well more often than not.

I find that the "Disney" collections are another way to combine old and new stash so here is my take on the theme using some new stash from Simple Stories "Say Cheese 4" collection and some older stash from Echo Park "Magic and Wonder" collection.


Both collections feature a lot of the same colours, blue, red, yellow and black so it made it super easy to combine the two to make this layout. I actually used embellishments from multiple different ephemera packs and chipboard sheets to create this layout I think I used maybe 4 different collections on this on total and although our theme is to incorporate older stash (which I did) it was also a great exercise to show that I could also use multiple collections together too.


And here is the finished layout!! I really am pleased with how this turned out and it's always great to get another Disney layout completed!


Sunday, 1 September 2019

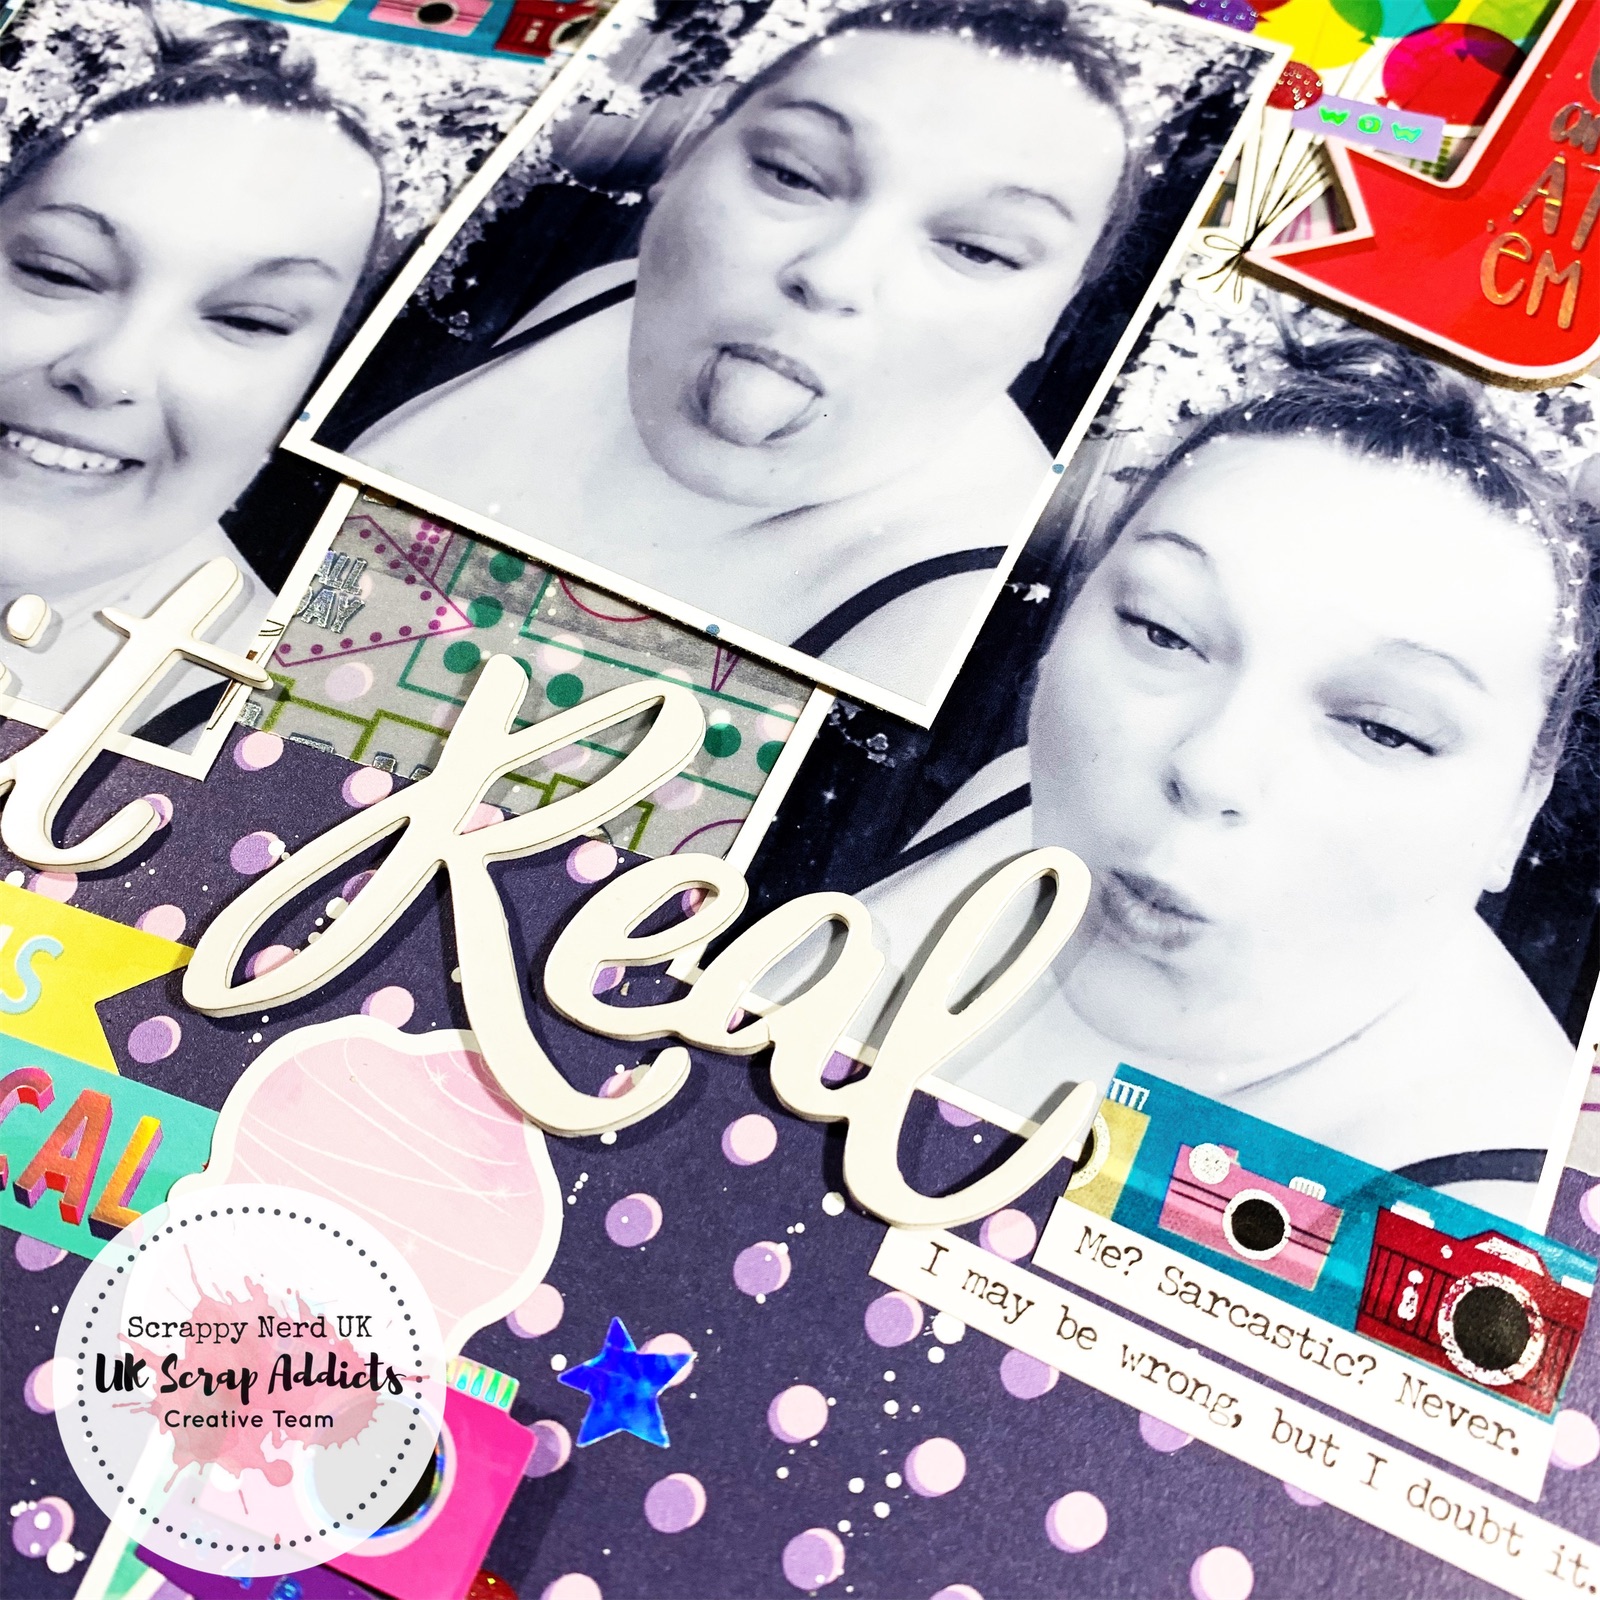
Keepin It Real | ScrappyNerdUK (Claire) | Selfie

Hello everyone!!

I'm here launching our new challenge for the month and sharing with you what I have created.

So this months theme is.....selfies!!

We want to encourage you to be in front of the camera and not always behind it. A selfie is exactly what it says - a photo of yourself. It has to be just yourself in the photo. So if you're not the sort of person to take photos of yourself then this is the challenge for you. Grab your camera and get snapping. We cannot wait to see what you create!!

And here is my take on the theme....

I'm not shy when it comes to taking selfies and never take myself seriously when I do. I don't pose for the perfect Instagram photo or any of my social media accounts - instead I'll take tongue in cheek photos or silly selfies.

For this layout I used my favourite collection, Sparkle City by Shimelle and just loved all the bright fun colours to help with the playfulness of the photos I had taken.

I did use some Thickers I had in my stash for the title and it was great to get these used as I've had them years!! And this was the perfect title for me - Keepin' it Real!.


I took a series of photos on my phone with different poses and chose 4 of the best ones and printed these as 3x4 inch photos. I matted them with a single layer of patterned paper (which was predominantly white) to help the photos pop from the back ground. I did add some messy ink splatters with a white Posca paint pen.

I had the speciality velum from the collection that I was terrified to cut into but I managed to use some on this layout. Behind my photos I used a 5 inch strip horizontally to give my photos a base and I love how the pops of holographic come through.

Next I started embellishing so I added all sorts of stickers, washi, chipboard, enamel dots and puffy stickers (I really went for all of the things!) and used things that worked well with my photos.

Finally I added some Tim Holtz Small Talk stickers to help really show my personality on a page.


Thanks for taking the time to read my blog post and I realllllllly encourage you to join in this month. Be sure to head on over to our Facebook Group and join us there where we share all of the creative teams designs every month.

See you next month

Claire!

Monday, 1 July 2019

Beary Cool | ScrappyNerdUK (Claire) | Sewing

This month is either going to make you or break you if you're joining in with our monthly themes.

It is the Marmite of the scrapbooking world (and I'm not talking about Fussy cutting!!).

Our theme this month is.......Sewing!!!! (I just heard you groan).

We like to pick themes that really stretch you and push you outside your comfort zone so don't shy away and be sure to join in. We have a whole team of amazingly talented ladies that are ready to show you some ideas as to how you can incorporate sewing (hand or machine) into your scrapbook pages.

I decided to dust off my WeRMemory Keepers Sew Easy tool and put it to work on this layout. I have quite a few attachments for it and it was gathering dust in my drawer so this challenge was the perfect excuse to grab it out and use it!

I decided that I wanted to make my layout 9x12 (I do a mixture of different sizes and I think it helps break up the monotony of 12x12 layouts). I trimmed down my white cardstock to 8.75x11.75 inches and distressed the edges with a distressing tool.

I had already pre chosen my paper that I wanted to back my white cardstock with and it is the rainbow paper from the Rainbow Magic paper pad which is made by Hobbycraft. (It has rainbows, unicorns and clouds in it so this collection is a definite winner for me - hehe).

I used some Heidi Swapp colour shine in Black to add some ink splatters before I began as I didn't want to risk getting the splatters onto my sewing.

Next I grabbed some border punches and punched out a few strips of paper from the same paper pad. I had this vision in my head of paper strips, stamps and sewing in strips at the bottom half of my page. I can say that it turned out exactly how I imagined it!!

I layered some paper strips, then I used a star strip stamp with black ink and then my Sew Easy tool pierced the holes for me to add my stitching in. I used 3 different attachments to add different stitching styles. In the straight stitch I did chain stitch and the other 2 I just did a straight back stitch. It created lovely texture and I was really pleased with the result.

I grabbed some black and white Thickers from my stash and added little foam dots underneath each letter to add some dimension for the title. I love the natural shadow it creates underneath the title and stuck these down in a slightly wonky fashion for extra interest.

I finished the layout off with some co-ordinating enamel dots and a couple of 3d stars that I had laying around on my desk from another project I had completed earlier in the day (I love that I managed to put some leftover die cuts to use on another layout).

And here is the finished layout.

So get that sewing needle and thread out and give sewing a go. This shows that a small amount of stitching can still be very effective.


Until next month.......

Claire x