Showing posts with label 6x6 paper pad. Show all posts

Sunday, 13 January 2019

1st Christmas | Elaine King | No Cardstock

Hello everyone

Today I am bringing you a layout made using out monthly prompt of ‘No Cardstock’. At first glance this did seem as though it would be, well, challenging! Lol . However, once you set your mind to it you realise there are lots of papers out there that are ‘neutrals' within a collection so this what I chose to use for my background papers.


The main, pale grey, background piece used here is an ancient piece of paper from my stash and the green heart I used was from a kit I bought from Mind The Scrap last summer.

The rest of the papers are from of one of my favourite collections from Kaisercraft called Mint Wishes. I originally had this collection sent to me when I was on the Design Team for Merly Impressions and it soon became one of my favourite ever collections. There are still some remnants of the kit available from them and some on Charmed Cards and Crafts I believe.

To start with I drew a large freehand heart on the green paper and cut it out using good old fashioned scissors, (you don’t always need fancy tools). Then once I was happy with the positioning I started cutting lots of little banners of varying lengths to create the left hand side of the heart. I always find that using wet glue is preferable in these situations to give you a degree of move-ability when you are figuring out where to place your pieces.
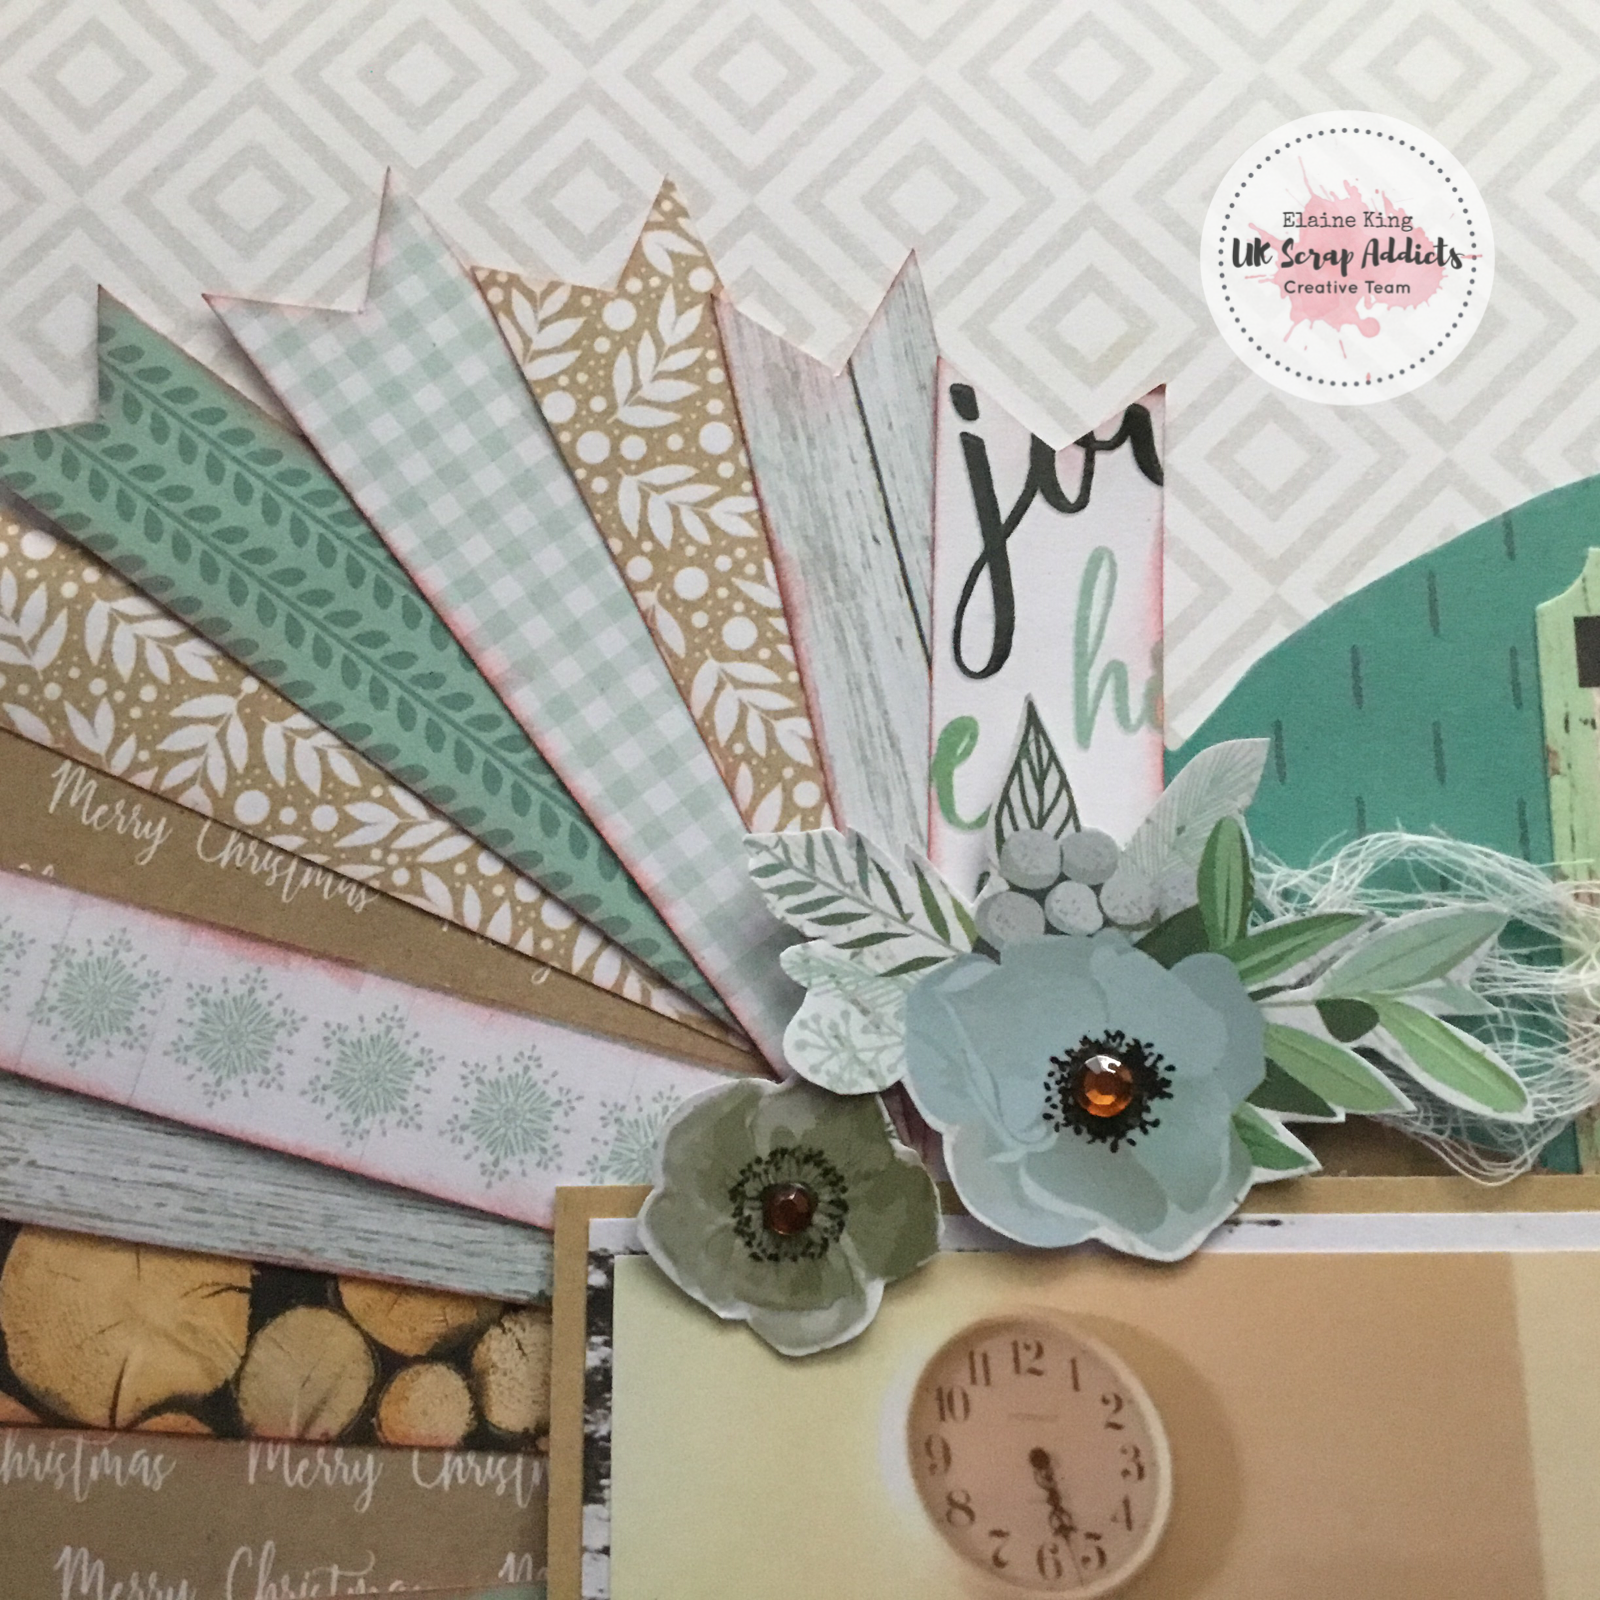
Once I was happy I mounted the photo on more neutral papers from the collection and raised it on foam pads for dimension. I then fussy cut the flowers and arranged them to form clusters. I then added more embellishments and I was done. I confess this was inspired by a layout I saw on Pinterest  but I do hope this has given you more ideas to create a layout using no cardstock and how to use up those neutrals you find in most collections.


One of my friends commented that maybe the layouts may be too flimsy but that has not been my experience at all. The weight of the paper these days is generally very good and with the layering it gives it stability. Once it is in the page protector it will be fine.. trust me! 


anyway.. I do hope you have enjoyed your visit. do remember to come back too though! 


Sunday, 29 July 2018

Keepin' It Real | Kirei Baldwin | 6'' x 6'' Paper Pad

Hi Scrap Addicts!

Kirei here with the final blog post for the month where we have shown you our take on using 6'' x 6'' Paper Pads.... I pulled out a previous Lottie Loves Paper monthly kit that featured the Fancy Pants range 'The Bright Side' as I had the 6'' x 6'' paper pad add on to use up and I love the fresh colours of pale pink, red, yellow, green and pale blue together.


I love using a 6'' x 6'' paper pad as the smaller details look great when layering behind a photo as they don't overwhelm it. And as the details on the paper are all scaled down you can use up small pieces and still see the overall effect of the pattern.

So I used three of the papers with slightly distressed edges to back the photo.


Then I added lots of the lovely matching diecuts, chipboard stickers and puffy stickers in two clusters around the photo.


To edge the layout I cut some small pieces of the same three papers and just layered them along the top and bottom edge and added a few staples.


To finish off I added journaling and a title....


Why don't you share your layouts using a 6'' x 6'' paper pad over on the UK Scrap Addicts Facebook page and join in with the chat.... we love to see what you create!

Thanks for looking, happy scrapping!


Friday, 27 July 2018

Magic | ScrappyNerdUK (Claire) | 6x6 Paper Pads

Hiya Friends,

This months theme was always going to be one of my favourites. I love working with 6x6 paper pads and find them so versatile. However, I know many people really struggle with using them. I'm hoping you have found lots of inspiration so far this month to get those paper pads put to good use...The ladies on the team have created some fabulous layouts this month!!

So I started with my photo and decided on a Disney one (because I love scrapping my Disney memories!!).

I used a white cardstock background as I really wanted the 6x6 papers to pop and using white will certainly help that.

I used a piece of A4 white cardstock and traced around a plate and sectioned this circle into 8. All of the sections were then cut out and were used as templates for my patterned paper from the 6x6 pad.

I arranged these circle pieces back together on my 12x12 white background and used double sided adhesive runner to glue them down. From the off cuts of the 6x6 papers, I used each of these as layers behind my photo - what a great way to use up 4 sheets of paper with very little waste!

So next came the embellishing. I went through my Disney stash and added on a whole load of stickers into 3 sections of the circle. I used a die cut word "Magic" as my title and added in pops of gold foil in the 3 embellished areas. I used a mixture of stickers, ephemera, chipboard and even used a heart paper clip that can be seen in the photo to the right.

There is something magical and tingly about scrapping Disney memories.


And here is the finished layout. I love how this turned out. I'm sure I say that every time but I really do. I hope that this has bought you some inspiration for diving into those 6x6 paper pads. They need some love and this is a great way to get them used.

If you want to watch the process video for this then you're in luck - you'll find it over on Youtube by using the following link - https://youtu.be/LsMnhidslHc


Sunday, 15 July 2018

Cool Kid | Sarah Costain | 6x6 paper pads

Sarah here today with my take on this months challenge.

I have lots of 6x6 pads in my stash from my card making days. I chose to use the Cool Kid collection by Crate Paper as it is so perfect for my numerous pictures of my little boy.


I started my layout by creating a mixed media background using inks and water. I let the ink run through the water to create fun splashes in colours matching the papers.


When my background was dry I added pages from my 6x6 pad across the bottom of the layout. I trimmed of the excess and secured it with some messy machine stitching.

The off cuts from the papers were perfect to create lots of layers behind my photo. I added some vellum and popped it all up on foam for added dimension. 


I used a journaling spot from the sticker sheet and added a silver clip and embellishments in the bottom corner which helped balance the overall look of the page.


You can check out the process video here.

Thanks for joining me have a scrappy day :)

Sarah

Friday, 13 July 2018

Superstar | Elaine King | 6" Paper Pad

Good morning all. 

My turn up on the blog today showing you my way to use up 6" paper pads. These can be very versatile to use for scrapbooking as they are, of course, already perfectly co-ordinated and even have nice little pop out ephemera all ready to use. 

To start with I found a photo I was keen to scrap, (my Mum and I back in March at her birthday celebration.) She was, conveniently, wearing a black sequin top and I too had a jumper with a silver star all in sequins too. How handy was that? 


Anyway, I went through my, not inconsiderable, collection of pads and found this one from Heidi Swapp which had pale blue, black and dotty papers that I knew would work with my photo. I found this pad at TK Maxx when they used to stock a decent range of craft supplies. 


I then matted my photo onto some black card that I got from Crafts4Eternity. Michele who runs the group stocks very good card stock that is brilliant for mixed media too. 

Once I had done this I took several sheets of the pad and cut them into 3/4" strips which I then cut further into 2" blocks ready for the herringbone piecing. I then inked all of the edges for definition. This was my practice run


To start I tried all of the pieces on the background card to make sure I had tried all the combinations to form my herringbone pattern. When I was happy I then took to sticking them all down. 

TIP: Use wet glue at this stage as it gives you more 'wriggle room' than DST or tape runners. 

Here it is.. almost straight! lol 


When they were all stuck down and dried I trimmed the overhang off the black card stock from C4E too. I then mounted the photo. 

To finish I added some die cut stars and sequin stars to embellish finishing off with some silver alphas for the title. 


I do hope the team are inspiring you this month to start using up those long hoarded paper pads. I know they are me! 

Thanks for stopping by, do remember to let us know you've visited. 

'til later