Showing posts with label UK Scrap Addicts. Show all posts

Friday, 14 August 2020

Hello | Sam Ball | Mood Board


Has the recent humid heat been affecting your creativity?


Are you finding it too much like hard work to even contemplate scrapping?


I usually love a mood board, and especially one as pretty as this is, but no matter how hard I tried – the mojo was melting!


I actually had two pieces of this fabulous Pinkfresh paper from their ‘My Favourite Collection’ launched earlier this year, so making the first cut should have been relatively ‘stress free!’ as I obviously had a spare. Even so, I managed to do a fair amount of paper shuffling before committing to cutting into it!


The striped colours were perfect and were made for this mood board, even taking on the colour swatch order!


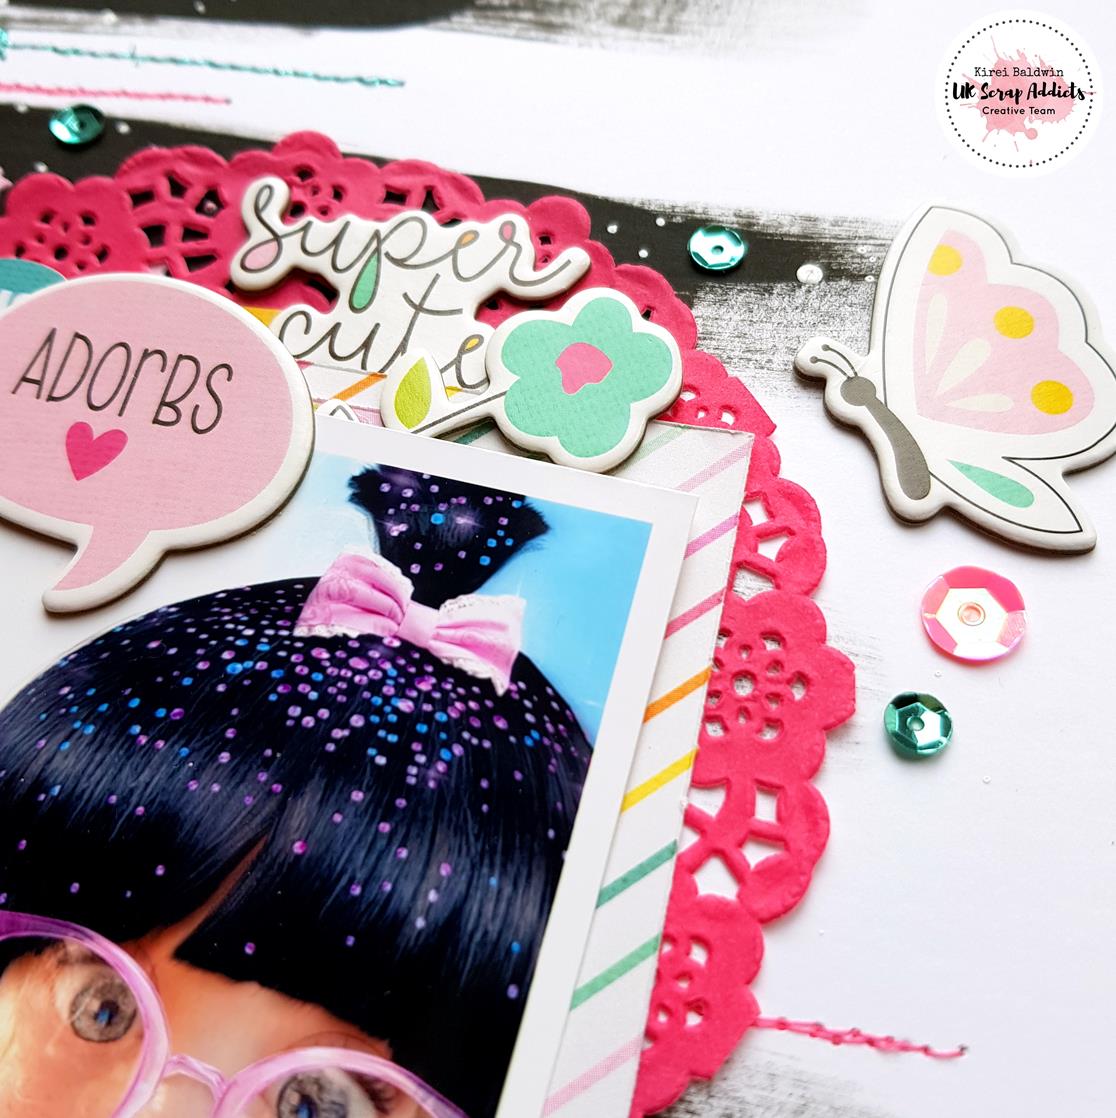
I wanted to include not only the colours but elements from the mood board too!


I’m a great believer that you can never have too many butterflies on a scrapbooking layout, and found that the butterflies from the Cocoa Vanilla Studio ‘Happiness’ paper were a fairly close match.


As much as I wanted to make a rainbow embellishment, I felt tht this would throw the distinct bands of colour so decided instead to add embellishments, grouped to reflect the swatches.


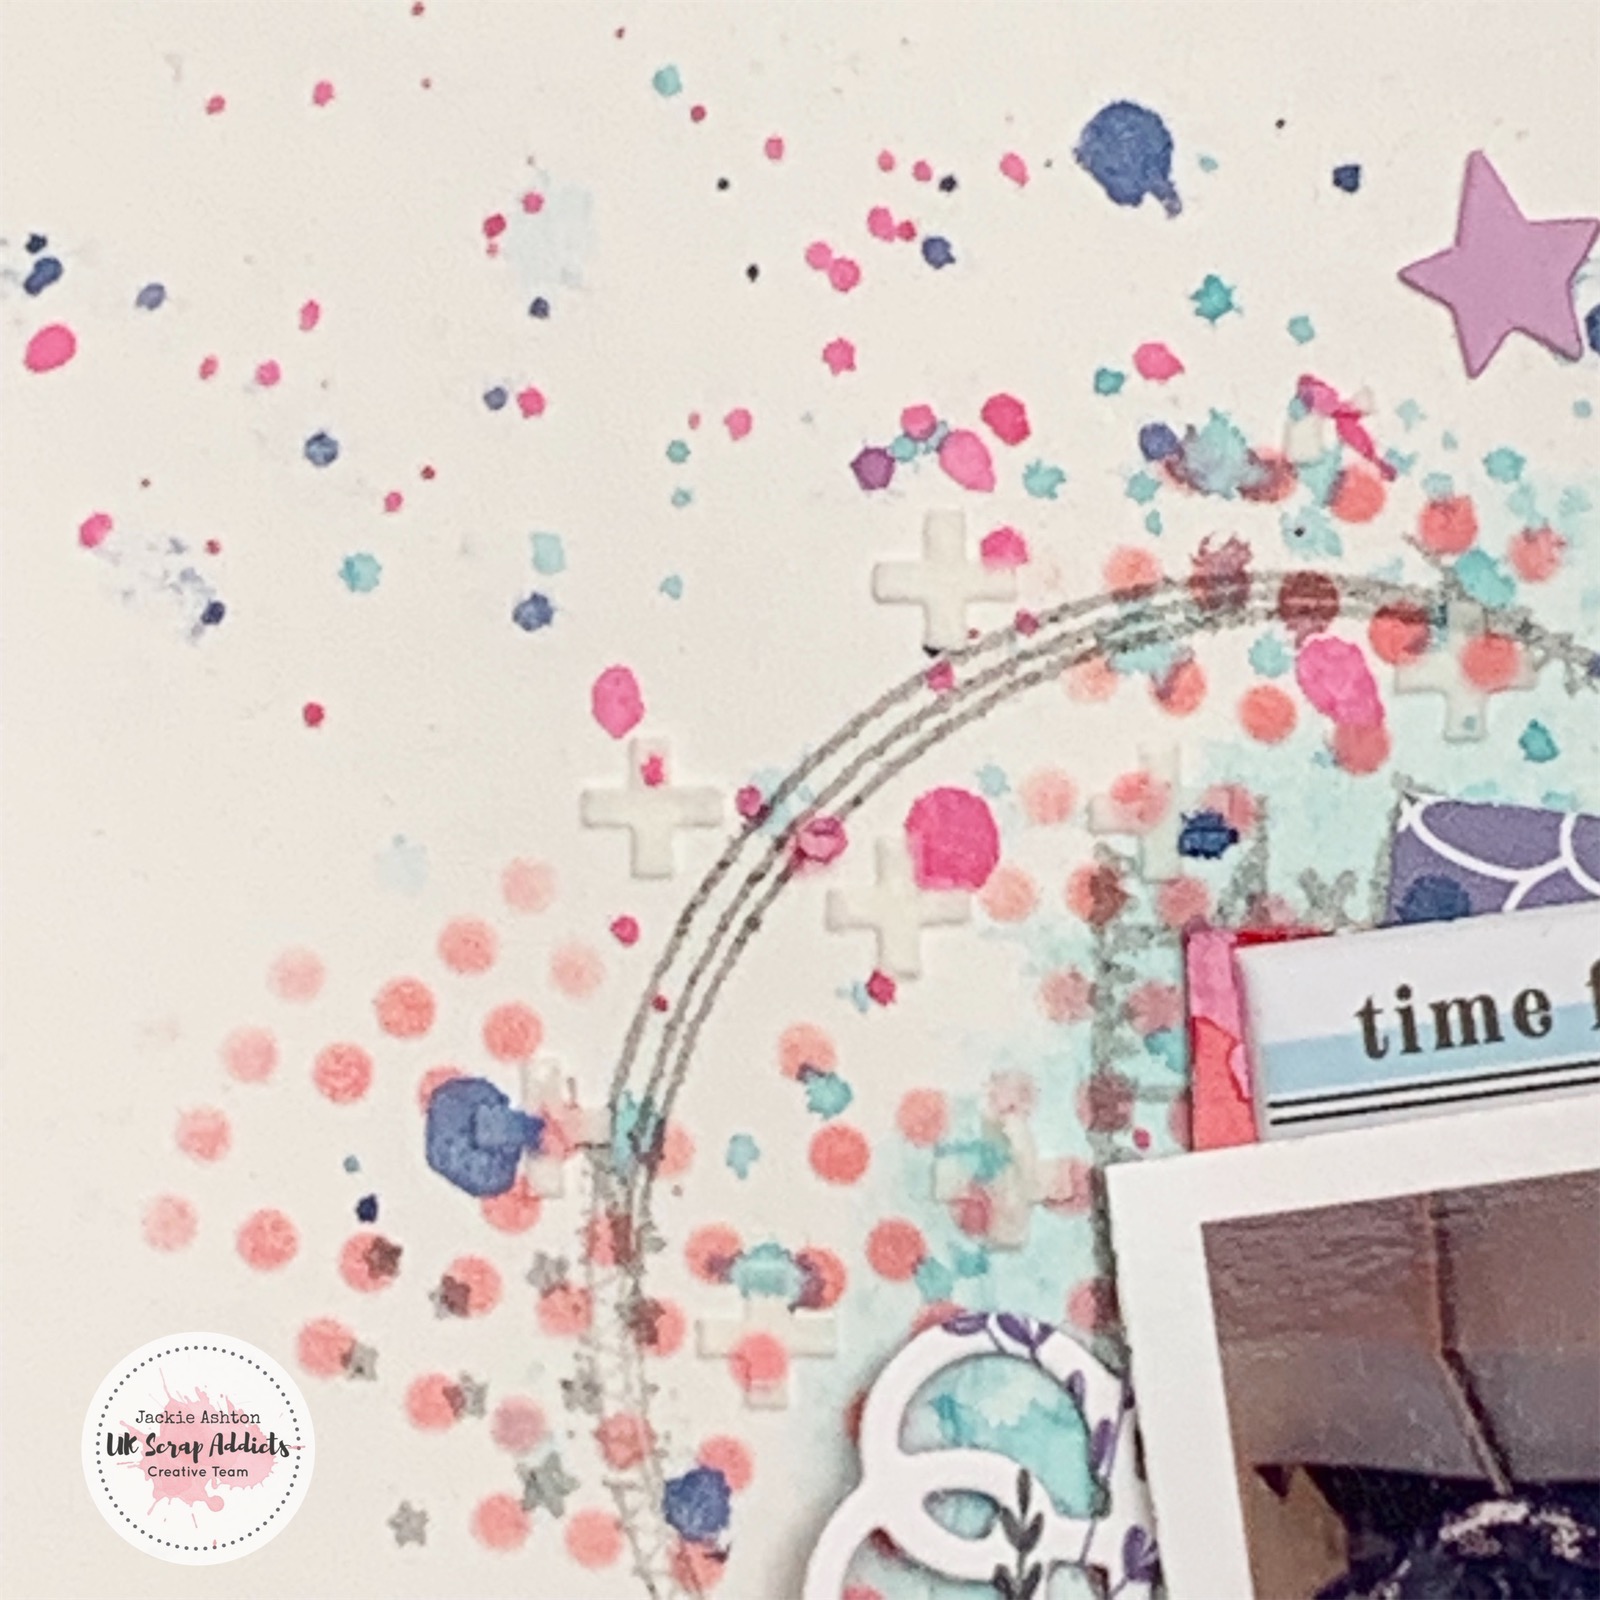
I was also inspired by the lattice image and had every intention to hand sew a series of diagonals. After machine stitching in matching threads, I trialed hand sewing some diamond shapes on a scrap piece of paper. Sadly, I wasn’t sure that they were going to work as well as I’d imagined so I abandoned that idea too!


In the end I’m really pleased with how this layout turned out… it might have been slow in the beginning but once I got into the mood, I finished it fairly quickly.


Are you a fan of a mood board – if you’ve never tried using one, this one is certainly a super one to start with!


And don’t forget, we always love to see your layouts over on our Facebook page, or on Instagram

Wednesday, 1 January 2020

Moonlight | ScrappyNerdUK (Claire) | Paper Folding

Happy New Year to you all. 

I am so excited about this months theme which is paper folding. We are going to bring you lots of different techniques that you can incorporate into your scrapbooking pages. 

So without further ado, I am first up. I love making 3d paper folded stars and so thought I would share this with you here.

 The technique is very simple when you know how.

So, first you need to die cut our hand cut out a star. I have used a die through my Sizzix Big Shot and for a little variety I cut a mixture of sizes.

I then used a score board (but you can use most paper trimmers to do this too - be sure to watch the Youtube video linked below for a tutorial on this) and I score from the top of each point to the bottom of each point. I do this for each of the 5 points.


 I also die cut my photo into a star to give this a little more interest too.

Next I folded each of the score lines using a mountain and valley style technique. This meant that the mountain fold was each point of the star. The valley folds will naturally happen when you follow these steps.

I then burnished each score line to help define the star shape.


To adhere these stars to your page you will need to add some dimension into the middle of the star (underneath of course). I stacked 2 small foam pads for my stars as I didn't want them to be too dimensional - us scrapbookers know that dimension is not our friends when trying to squeeze our layouts into albums!!

If you are making these for something like a box frame or off the page project them add more height if you wish.

I then added some double sided tape to each of the 5 points of the star and adhered these to my patterned paper.

My title came from a quote from Lord of the Rings and it worked so well with the style and theme of my photo. I used some small gold glitter alphas (called Happy) and added these on top of the stars. They stick very well as they are foam and bend well over the folds. I wouldn't suggest using puffy or chipboard alphas for this - stick to the foam ones!!

I then added some final flourishes with embellishments from Cocoa Vanilla Studios and some Heidi Swapp colour shine in Gold, Rose and Sweet Mint.


Be sure to head on over to watch the process video here - 


Friday, 27 December 2019

From Center Parcs | Kirei Baldwin | Hidden Journaling

Hi UK Scrap Addicts!

This month the Creative Team were challenged to incorporate hidden journaling onto a layout so as there were already lots of fab ideas for doing that I thought I would do something different and show how you can add it into a mini album....


To make the mini album I cut patterned paper from the lovely Pinkfresh Studio's 'Home for the Holidays' collection into 6" x 4" pieces and stitched round the edges with sparkly gold thread. I added my photos mounted onto vellum and then decorated each page with the matching ephemera, puffy stickers and enamel dots. 


To create my pockets I stitched two of the patterned papers together leaving a gap at the end so that my tag could slide in. I then stitched vellum to the tag and filled it with some sequins to make it a little shaker pocket.


The rest of my pages were finished in the same way...


I added my journaling to the back of each of the three tags that I included in the mini album.


I also added three of the cut apart cards from one of the patterned papers at different places through the mini album. These were also decorated on the back...


Don't forget to check out all of the inspiration from the rest of the Creative Team this month! Why don't you give 'hidden journaling' a go and share your layouts (or mini album!) over on the UK Scrap Addicts Facebook group.... 

Happy Scrapping!


Sunday, 15 September 2019

Rainbow Hair Don't Care | Vik Davies (Guest Designer) | Selfie

Hi it's Vik here and I've been asked to be Guest Designer this month for UKScrapAddicts. The theme for the month is "selfie". This is not something I usually do...selfies or scrap about myself....but I can now say I'm completely hooked with Snapchat filters!!!!!

To create my layout I used the Amy Tangerine "Slice of Life" and Echo Park "I am Mom" collections.


I started by using the "smooshing" technique to add some yellow distress oxide ink spray to my patterned paper background. One of the papers had a bright chevron design on it so I cut out 2 of the chevrons and placed them on opposite sides to dive up my page.

Next I used my Silhouette to cut a Polaroid strip from some black card stock and placed my photos behind the cut file.


I love to fussy cut so started fussy cutting elements from both of the collections to create extra embellishments. I added these to my layout along with some stickers and chipboard pieces from the same collections. I placed these into opposing corners to create a diagonal feature across the page. I then added a few enamel hearts, some blue distress ink splatters, stamping and some journaling to complete all the finishing touches.

Be sure to head on over and follow me on Instagram here - Vik Davies Instagram


I have recently started my YouTube channel too so would love it if you could head on over and take a look  - Vik Davies Youtube

Thursday, 1 August 2019

I Told The Stars About You | ScrappyNerdUK (Claire) | Sketch

I was absolutely thrilled when Laura Rumble agreed to design a sketch for us to use this month!!

Sketches are brilliant if you are ever stuck for inspiration and design as they give you a great starting point. They can be interpreted in so many different ways and it's great to see how different layouts look when all using the same sketch.

So I am kicking off the month with my layout......

I used some papers from CVS and grabbed my Big Shot and some star dies and started die cutting a whole load of layered stars. For the largest star I layered 4 papers and for the medium I layered 3. I also added in a little velum here and there within the star clusters.

I then ran these through my sewing machine to stitch down the middle. This enabled me to be able to lift the edges of my stars to create some shadowing.

I then started work on my background. I used a white Posca paint pen to add some ink splatters in a semi circle shape and added on top some gold Heidi Swapp colour shine.

I then arranged the stars in a semi circle to follow the shape as shown on the sketch. I added some wet glue to the back of the stars and secured them down. I then punched out some smaller stars to fill in the gaps around the larger stars. I added some more ink splatters on top too!

I did a simple mat behind my photo and nestled that in to the bottom of the half circle.

Finally I finished it all off by using a white gel pen to hand doodle some stars into the little gaps that were left.

And I'm chuffed with how this layout came out.

Be sure to check back here again soon for more sketch inspiration. And if you want to join in then please head on over to our Facebook group!!

There is also a process video for this layout which can be found here -https://youtu.be/0HsAbr3mML8

Thursday, 27 June 2019

Just Be You | Kirei Baldwin | Mixed Media

Hi UK Scrap Addicts!

Kirei here with another layout featuring this months 'mixed media' theme... I had these super cute photos of my friend's daughter playing around on Snap Chat that was perfect for this layout!


Like some of the other DT I don't use mixed media all the time on my layouts but do like to get messy every now and then! So for my layout I was inspired to use a black painted stripe background as I have seen quite a few examples out there and really like the look of it so this is my take on it.

I used Bazzill Marshmallow cardstock for my layout as it's ideal when using mixed media as it is slightly thicker and doesn't need priming with gesso before you start. I used regular black acrylic paint to paint the wide stripes, then once it was dry I added some texture paste (that I had coloured pink) through an Echo Park star stencil to add dimension.


After that had dried I added some white paint splatters all over the layout. And then for some more texture I did a bit of machine stitching using metallic pink and teal thread.


I mounted the photos with papers from the Simple Stories 'Dream Big' collection and then added lots of the matching embellishments along with some pretty sequins from Spiegel Mom Scraps.


And finished off with a title...


So, if you have never used mixed media before hopefully this has inspired you to give it a go! Have a look at the rest of the Creative Team's layouts this month for more inspiration and don't forget to share your mixed media layouts over on the UK Scrap Addicts Facebook page...

Thanks for looking and happy scrapping!


Tuesday, 25 June 2019

Looking Fabulous | Jackie Ashton | Mixed Media

Hi scrappers, Jackie here with my layout for this month theme - mixed media.  
When people think of mixed-media it either scares them, as they think that they need to add all sort of colours and textures to the pages to get a result, that is just ‘not them’, or they love it and use the ‘more is more’ approach.  I’m on the fence with this - I love the look of ‘adding it all’ but find it hard to do it myself for my own pages, so I prefer to stay true to my style of scrapbooking, and add it, but in my way. 


I started by adding blue distress oxide ink to the background along with a few splatter, then I added some texture paste through a stencil and added red ink using a different stencil with stamped details over the top.

Most of this as ended up being covered over, but I’m ok with that as you can still see the details around the outside of the photographs.


For my title, I used a large puffy word as part of the title, which I was able to fit around my journalling label, without it taking over the whole page.


So adding mixed media to your layouts doesn’t have to be a masterpiece with colours in all directions, it can be something as simple as adding texture paste using a stencil, stamping designs on the background, or even adding some machine stitching to add interest  to your layout.  So why not, give it a try, if the ‘more is more’ approach is for you - then do it, if not try adding different textures to your background that is more your style and something that you are comfortable doing, I’m sure you will be pleasantly surprised at the results.

Don’t forget to share your layouts over on our Facebook page, we would love to see them.


Till next time


Friday, 14 June 2019

Cute | Sarah Costain | Mixed Media

Sarah here today with my layout for this months theme of mixed media.

Mixed media is my favourite part of creating and it appears in all my scrapbook layouts. The most fun technique for me is creating rainbows.
I decided to do something a little different today and masked off my black background to create a silhouette. I used Impasto paints and blending them with my finger.


My layout features my kitten Neo so I used some fun Cat papers and ephemera to match from a older Mind the Scrap kit


I distressed my paper edges and added tule for extra texture. Foam between the layers gave the photo cluster some height.

Some white paint splatters over the background helped everything tie in together for a finishing touch.

You can check out how I created my layout in detail over on the UK Scrap Addicts YouTube channel here.


Thanks for joining me and have a Happy Scrappy day :)

Sarah
ManxyCatCrafts