Showing posts with label cardstock. Show all posts

Saturday, 13 April 2019

Sparkle and shine | Elaine King | Sparkle

Good morning one and all

Today I am bringing you a layout using lots of sparkle as per our April Prompt... I hope you can join in too?  


Firstly I took a sheet of sparkly pink glitter cardstock and used it as a mat for my trimmed down white card background. Now I don't know about you but I find sticking to glitter card is impossible...so to get around that I used wet acrylic glue..Pinflair in this instance. 


Then I took my white card, purchased from Crafts4Eternity . I buy their card stock because they  stocks a 300gsm card that twists and warps far less when using wet mixed media.  I punched out three 'chomped' pieces of the border using a Martha Stewart punch. 


I then drew three concentric circles with a sparkly Kaisercraft gel pen purchased from Merly Impressions. These are my 'Go To' pens for journalling and anything sparkly. I then drew random little hearts using the same pen along the three lines of the circles and added lots of sequins. 


Finally I matted the photograph and added a piece of Unicorn paper (and one other) from the Dream Big collection from Simple Stores that I got from Hey Little Magpie using some of the ephemera from the collection too. I raised the photo up on foam pads for extra dimension. 

Hey presto, one quick and easy layout with lots of sparkle. I do hope this inspires you to give our prompt a try..have fun!


Friday, 27 July 2018

Magic | ScrappyNerdUK (Claire) | 6x6 Paper Pads

Hiya Friends,

This months theme was always going to be one of my favourites. I love working with 6x6 paper pads and find them so versatile. However, I know many people really struggle with using them. I'm hoping you have found lots of inspiration so far this month to get those paper pads put to good use...The ladies on the team have created some fabulous layouts this month!!

So I started with my photo and decided on a Disney one (because I love scrapping my Disney memories!!).

I used a white cardstock background as I really wanted the 6x6 papers to pop and using white will certainly help that.

I used a piece of A4 white cardstock and traced around a plate and sectioned this circle into 8. All of the sections were then cut out and were used as templates for my patterned paper from the 6x6 pad.

I arranged these circle pieces back together on my 12x12 white background and used double sided adhesive runner to glue them down. From the off cuts of the 6x6 papers, I used each of these as layers behind my photo - what a great way to use up 4 sheets of paper with very little waste!

So next came the embellishing. I went through my Disney stash and added on a whole load of stickers into 3 sections of the circle. I used a die cut word "Magic" as my title and added in pops of gold foil in the 3 embellished areas. I used a mixture of stickers, ephemera, chipboard and even used a heart paper clip that can be seen in the photo to the right.

There is something magical and tingly about scrapping Disney memories.


And here is the finished layout. I love how this turned out. I'm sure I say that every time but I really do. I hope that this has bought you some inspiration for diving into those 6x6 paper pads. They need some love and this is a great way to get them used.

If you want to watch the process video for this then you're in luck - you'll find it over on Youtube by using the following link - https://youtu.be/LsMnhidslHc


Wednesday, 27 June 2018

Beautiful Smile | ScrappyNerdUK (Claire) | 6x4 Photo

Hello ScrapAddicts,

Its my turn on the blog today with my layout based on a single 4x6 photo. This seems pretty easy to work with for me and so I really concentrated on making a big bold title to fill a lot of the space on the page. 


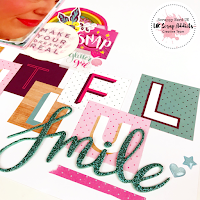
I used the Glitter Girl collection from Shimelle for this layout as in the paper pack there was a 12x12 paper with all of the letters from the alphabet on it and I knew that I wanted to cut these apart to form the basis of my title. 

Once I had cut the paper up, I then had to decide on a title. 

Now, I struggled with this as it was a photograph about myself. I decided to embrace it and call the layout Beautiful Smile.

I only added a couple of areas of embellishments which were located at the top left of my photo, the bottom right of my photo and the bottom right of the page where the title ended. I wanted to maintain a lot of white space on this layout to keep it looking clean and I was happy with the balance of embellishments v. white space on this layout.

You'll see that I tucked in a mixture of die cuts and stickers to each cluster and added a few enamel shapes to finish the page. 


I hope you have enjoyed reading about my layout and be sure to head on over to our Facebook Group here to share what you have been inspired to make.

The process video for this layout is linked here for you - https://youtu.be/kpeNNlyWrX4


Sunday, 13 May 2018

Right Now | Elaine King | Monochrome

Good morning Everyone

Thanks for joining me on my first blog post since becoming a member of the UKScrap Addicts Creative Team.

Today I am bringing you a layout using a monochrome colours. There was some discussion in the team as to how we would define Monochrome, but essentially we all agreed that using just one colour, regardless of how many tones there were, and, if you would like to, adding in a tiny amount of black in amongst the colour was the definition. I hope that helps?

So, here is my layout.


For this I decided to use one of my all time favourite collections from Kaisercraft that I originally sourced from Merly Impressions, one of the leading Kaisercraft suppliers in the UK. This collection is called  Indigo Skies and, of course, is predominantly blue! Lol

To start my layout, I used a starry stencil using texture paste that I had added a little denim coloured distress ink too. 


I then used a 3" piece of the collection paper to pace at the left hand side where I then added two further strips of paper too. I then set about fussy cutting several flowers from the patterned papers and created a cluster at the bottom left of the photo and added a tag and some strips of paper on the right.


I added several enamel dots and a twirl of blue and white bakers twine in amongst the cluster and added a couple of wood veneers that I had coloured with distress ink too. 

One of my favourite 'techniques' and one that gets overlooked a lot, is to literally take a few 'chomps' of punched edge from the sides too. Once I had done this I trimmed the paper down to 11" x 11" and backed it onto a piece of blue cardstock too. 
I do hope you will join in our challenge this month..especially as we are in the month of National Scrapbooking Day too! Go on! Have some fun and do let us know what you've been up to. 


Wednesday, 25 April 2018

Explore | Tags | Jackie Ashton

Hi scrappers, Jackie here with my take on this months theme ‘tags’.

This is my layout ...


 and as you can see I went for the 'more is best approach' and die cut various sizes of tags from patterned papers and used them as a base for my photographs.

I used Crate Paper - Here and There collection, which I purchased from Hey Little Magpie.

I mainly used the 6x6 pad, and a few scraps that was left over from a previous layout, as well as added with printed vellum from the same collection to give my page some added texture and detail.


Before laying the tags across the page, I added some ink to the background using Tim Holtz - Distress Inks and the packaging technique, then added white thread to each of the tags.

I also added some hidden journalling behind the photographs, tag was cut from white cardstock and I added a piece of patterned paper on the front, with the journalling on the back.


I added my photographs to my layouts mounted then onto some 6x6 pattered paper.

I then finished my layout with some chipboard and puffy word stickers from the collection and some wood veneer from my stash.


We would love to see how you use tags on your layouts, please share with us on our Facebook page we would all love to see them.


Saturday, 7 April 2018

Great Things Never Came from Comfort Zones | ScrappyNerdUK | April 2018 (Tags)

Hello fellow Scrap Addicts

This months theme is....Tags!! I will show you how easy it is to put together a layout using tags as the main focus and in my Youtube video I show a live process to demonstrate how quick a layout comes together with the use of tags.

I used 2 pieces of cardstock and matted the white on top of the grey one to give it a border around the edges. Next I added a strip of grey patterned paper across the bottom third of the page and laid my tags on top.


I chose to keep the colours simple on this layout and went the main theme of grey and white but added in some black and pink accents with the embellishments I used.


I used a photograph of my wellies in the recent snow we had as the colours really matched this layout. I mainly start my layout and then choose my photo as this seems to work best for me. There is no right or wrong way - that is completely your preference. 

And here is the final layout. Very simple and clean and I personally love the finsished result. Don’t forget to head on over to Youtube to watch the Process video and if you haven’t already found us on Facebook then head over there and give our page a like. You can upload your tag layouts there too so we can see what you have been creating. 


Tuesday, 26 September 2017

Fresh Start | Laura Jane Thomson | Journaling


Hello UK Scrap Addicts!  Hope you're all having a scrappy week and are enjoying the selection of journaling ideas for your memory keeping that our creative team have been sharing throughout the month of September. 

This month I have decided to incorporate a cut file which was issued by UK Scrap Addicts for National Scrapbooking Day 2017 alongside a beautiful stencil from Pretty My Page, to show case a photograph taken on a day where my life took a turn for the better and we had a fresh start.


This is my completed layout and I will explain the stages throughout this post:


I started with using the Fleur De Lys cut file which was a UK Scrap Addicts exclusive for National Scrapbooking Day 2017 and is available to download HERE.


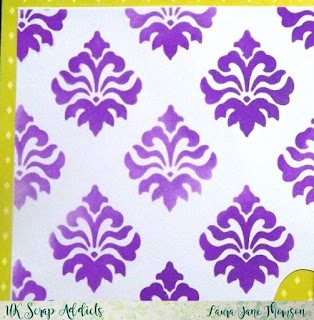
I had this cut file in the centre of a sheet of white 12x12 cardstock and in each of the four corners of the white cardstock I used Wilted Violet Distress Oxides using a sponge blending tool through this beautiful Fleur De Lys stencil from Pretty My Page.


Next I layered my photograph onto a couple of pieces of patterned paper, and matted onto a piece of patterned cardstock which I had cut into a banner shape, before adhering to the page.  

Using embellishments from my stash I added floral pieces to two corners of my photograph and a flair badge to the top right cluster, to complete each of these clusters I added some gorgeous enamel dots which are also from Pretty My Page.


I decided to add hidden journaling to this layout by adding a folded piece of cardstock to the bottom left quarter of the page, the front of which is also decorated with the Fleur De Lys stencil, after stenciling the main page I flipped the stencil onto a second piece of cardstock and using a baby wipe to 'clean' the stencil achieved this faded effect.  

Lastly, I added my title "Fresh Start" using yellow Thickers to co-ordinate with my background paper. 


Using cut files in my scrapbook layouts is not something that I am overly familiar with, however I am quite happy with how his page has come together and I personally think that the colours work well together.  


Pretty My Page have recently re-launched their website with more of a focus on Mixed Media products to compliment the beautiful products Lisa has spent so long working on, so to celebrate this launch Lisa is offering our wonderful UK Scrap Addicts readers a 10% discount on purchases made through her website by using the code: UKSA10

Don't forget to check out our September 2017 challenge by visiting our blog here.


You can show your support for Pretty My Page's business by visiting their Facebook page or shopping on their website.

Thank you so much for popping into our blog and reading my post, and I hope you'll pop back soon. 

Laura xxx


Friday, 7 July 2017

Let's Stay Home and Party | ScrappyNerdUK (Claire) | Large Photo

Hello my friends. Its been awhile. Hope you've been keeping well.

I'm here to share with you today my layout based on this months theme - large photos. What a challenge. I prefer more white space on my layouts for embellishments so this was something that put me outside my comfort zone but I really loved how this turned out. So here goes....


 I used Paige Evans collection, Oh My Heart, for this layout. I had this photograph of myself and my husband with some of his family on New Years Eve and I would never have paired this photo with these papers and embellishments but I felt like doubly challenging myself with this one!


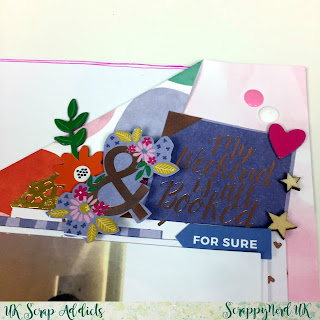
I set about thinking about the title first as I knew that my title would have to be fairly short and contained due to the amount of space I would need for my photo. I had this die cut piece from the ephemera pack and I decided to use this as part of my title which reads "Lets Stay Home and Party". I created an embellishment cluster to the left side of the photo and used a mixture of chipboard stickers, foil stickers, ephemera and cut parts, all from the same collection.


Next I created another cluster to the top right of the photo using the same items and layered a gold foil doilie underneath it all. You can see in these pictures the finishing touches I added with a few tiny wood veneer stars and some enamel accents liquid by Dovecraft (I love this stuff as it creates the same effect as enamel dots and costs a fraction of the price).


 Here is the title in its entirety. I normally make my titles completely straight but for the word "party" I decided to try something difference and slanted each letter slightly to create this look.
For the background I liked this paper where it was a pink ombre one side and different coloured circles the other. So I decided to try and use both sides of the paper, without cutting into it. So I folded one side over and glued it down to create this look. I was a little bit chuffed with myself for thinking of this and can see many more layouts like this in the future. I finished it all off with a messy border and instead of using black ink, I decided to use a co-ordinating pink colour for a change.  
If you'd like to watch the process video then head on over to YouTube using this link here.... https://youtu.be/99HuFm5jmMA

Thanks for looking and i'll see you all next month...


Friday, 2 June 2017

Sweet Child | Maria La Chica | Moodboard

Hello Scrap Addicts! Welcome once again to our blog! Maria here with you today with a layout inspired by an amazing moodboard.

Here is the gorgeous moodboard that I was lucky to play with:


Isn't it super amazing? In particular, I was drawn into the image with the colourful raindrops falling from a cloud of fabric scraps :) although all the images are awesome! So much inspiration to take from just one moodboard!

And this is my layout:


You can watch my process video here:


And a few more close ups:


Thanks once again to Allthingssticky.com for their generous donation of glue dots and also for their discount code "ADDICTS30" for 30% off your first order.

I hope you have liked this layout and thanks for joining us once again! Do not hesitate to ask any questions you may have!


Monday, 15 May 2017

CARDSTOCK

Hi there, today the team are having a chat about cardstock and what we prefer to use when creating...

Claire: I like to use a mixture of sizes when it comes to scrapbook layouts. Although the traditional 12x12 is a favourite, I also use 8.5x11 (A4) and even 6x12. I use a mixture of textured and smooth cardstock and it really depends on what my layout contains as to which one I use. I tend to find you get better adhesion when using smooth cardstock so any heavier embellishments such as resin pieces or metal charms would better suit a smooth piece of cardstock. Using textured cardstock gives different media different effects. So when using Gelatos on textured card it will give an almost patterned look, whereas you don't get that on smooth cardstock. I use Bazzill Marshamallow cardstock for any heavier mixed media work, especially when using lots of water for things like watercolours or using the packaging technique as this gives less warping of the card. I like to use a higher gsm cardstock so generally 250-300gsm as I scrap a lot on white and use the patterned paper on top of this. This helps to keep the layout rigid and buckles less when putting on lots of paper layers or heavier embellishments.
Pol: I usually use a 250gsm smooth white 12x12 cardstock for my pages. It's strong, and is perfect for hand stitching as it doesn't warp. For cutting in the cameo I use a 160gsm smooth white card, as it cuts much better than a higher gsm. I'm a firm believer that you get what you pay for with cardstock, and the higher quality the more you'll pay, but it's one of those things you can't skimp on. Some things you just can't get away with buying cheaply - like toilet roll, and baked beans! Base cardstock is one of them!
Susan: To be honest I'm not too fussy about my cardstock, tending to look for the right colour first and foremost, I do agree with Pol however, in that you get what you pay for. I always scrap using 12x12 but that's really my only stipulation. Smooth or textured, I don't mind unless I am stamping directly onto the base card then it needs to be smooth. American Crafts cardstock tends to be slightly cheaper than Bazzill but I like them equally. UK shop Hey Little Magpie offers a super matching service with the patterned paper collections they sell. The other place I buy 12x12 is Paper Mill Direct - they have considerably increased their colour range in this size and are a great supplier if you want a lot of cardstock in one colour. And last from me a tip - beware the cardstock with a bar code strip! If you don’t spot it until it’s too late to chop it off it won’t fit in your album!
Maria: I used to scrap in 8x8 pre-bound scrapbooks so for a long long time I never bothered about cardstock. When I finally moved to 12x12 a new world appeared in front of me. I could use pretty much anything as my base! I was not tied to the pre-bound pages any more! I love using textured Bazzill white cardstock, as it gives so much interest, even if you are leaving it like it is without adding any media on it. At the same time, if I don't have textured cardstock I don't mind that much. I bought a pack of economy smooth cardstock a couple of months ago and I must confess that I love it. I don't know why it's called ‘economy’ as I believe it is great quality! White backgrounds are all the rage at the moment and I am guilty of following the trend. However, I also love using other colours as my backgrounds. There are tonnes of manufacturers and suppliers out there to suit every taste!
Lisa-Jane: Cardstock has a bit of a chequered past with scrapbooking doesn't it? When I first started scrapping coloured card stock was all the rage and patterned paper was only for using on top of it, never as a base layer. Then they started playing with the core of the paper so you could emboss or tear or distress to reveal a different colour. Then kraft cardstock was the only ‘thing’ to use. Then cardstock of any colour seemed to be old hat because the weights of the patterned paper were heavy enough to use on their own. Now it's all about white card stock! I do use mountains of white myself because of my die cutting. I use a lower weight smooth cardstock for most of my cutting unless the customer requests the heavier weight for stitching or mixed media. I only use smooth cardstock because that way most of the designs can be reversed/flipped etc. I really like to have a mixture of patterned paper and solid colours for my backgrounds so I tend to use a lot of borders at the moment. This is where my ‘oops’ pack comes in ... if I have cardstock that has been damaged by light or dirt or is just a hideous colour you can't imagine using ever, then I keep them in my ‘oops’ pile. If I'm building a page from a 6x6 pad or using strips or gutting some precious patterned paper etc, or if my base layer has got warped then I'll use stuff from my ‘oops’ bag as a backing. It can help to keep your designs to 12x12 when you are piecing together a background and it provides stability because it is a solid piece. I also use a piece from the ‘oops’ bag when I'm using the apertures of my die cuts - I draw through the apertures onto the waste cardstock, remove the die cut, cover the individual shapes that I've drawn with patterned paper or Washi etc, and then replace and adhere the die cut on top. I rarely throw anything away, even if it is the ugliest shade of purple! (Ed: Oi!  I've just made a purple layout!! x)
Jess: I'm predominantly a pocket scrapbooker and more recently a Traveller’s Notebook scrapbooker so I have very little experience with cardstock. I use Project Life cards or patterned paper in my scrapbooking. I have only just started doing traditional scrapbook layouts and using mixed media so I'm kind of learning as I go along with some help from the subscription kits I am a part of. I recently created my first 8.5 x 11 layout and commented on social media that I didn't have any pockets or an album in that size. A helpful UK scrapbooker suggested I create A4 layouts that fit in basic folders and plastic wallets. Since then I have done a few layouts in that size and the card I have used for my white background has been from Poundland. See, you can tell I am no expert in this particular field. It is the cheapest place I've found that does A4 card and the quality suits my purpose. The page warps slightly when I add acrylic paint but once the layouts are in the folder they straighten out. Maybe if I start creating more of these traditional layouts I will purchase good quality card stock. For now, though, my Poundland stack suits me well.
Laura:  I think everything I have to say has been said already... textured, smooth, heavyweight, cheap and premium all have their uses.  I can only add that watercolour paper is fabulous for taking lots of wet media and rarely warps.  I find it hard to get 12x12 which is my preferred size, but I've found 16x12 cuts down to one 12x12 and two 4x6 postcards.  I prefer Winsor and Newton Cotman paper for scrapbooking.

Thursday, 4 May 2017

Now and then | Maria La Chica | Sketch


Hello everyone and welcome once again to UK Scrap Addicts!  Maria here with you today, sharing a layout that was not easy...  Sometimes even the most seasoned scrapper struggles, so this one was one those layouts that started as one thing and ended as something completely different!

For this layout I wanted to use Susan's double page sketch, however, I had this idea in my head to make it work as a single page layout.  So with a certain degree of "artistic license", I have interpreted it a bit and I think in the end you can still see where I got the inspiration from.  In fact, I think my second layout is actually more similar to the sketch than my first layout was!

That is the beauty of sketches.  You can do pretty much anything with them.  They are a great starting point and you can follow them as loosely or closely as you want!

So here is my finished layout and the sketch it was based on:


So let me tell you a story. I don't believe in ghosts or supernatural beings, however, I believe there was some sort of entity preventing me from creating this layout. Everything that could have gone wrong, went wrong. First, my cut file didn't cut well (my fault, I know), then I managed to stick some paper all crooked, and finally, I just wasn't happy at all with how it was looking... So I decided to start all over, but the problems didn't stop there! I accidentally put glue on top of one of my photos, and when I went to reprint it, my printer had run out of black ink! So the photo is not looking great, I will have to reprint it in the future... Oh, and I also had problems with the editing of the video! As I said, maybe it wasn't meant to be.

Anyway... I still managed to pull the layout through, I think :)

A few more closeups of my layout:


And here is my video. I hope you don't laugh too much at my struggles (I won't blame you if you do, I laugh at myself too!) and really wish you are inspired to create with this sketch!


Read you soon!