Kirei here with my layout for this month's 'fussy cutting' theme....
Now I love fussy cutting so this was perfect for me! I used more of the lovely Cocoa Vanilla Studio 'Midnight' collection that I have been hoarding... I used the 12" x 12" paper called 'Sophisticated' which was perfect for some fussy cutting as it was covered in sketchy flowers in black and white.
I sat in front of the TV and fussy cut most of the flowers from it, and then I painted most of them with some of the pretty Shimmerz paints picking colours that matched the 'Midnight' collection. A little tip when fussy cutting, leave a little white border around your image, it's easier to cut and looks finished.
I cut the centre from the striped 'Bloom & Grow' paper then trimmed it to 11 1/2" and mounted it onto a frame cut from the 'Shine Bright' paper. Then I backed it all with a piece of white cardstock.
I added the fussy cut flowers in a wreath around the cut out circle, only sticking them in the centre so that I could curl up the edges to add dimension.
My photo was mounted onto a mix of the patterned papers and tucked in under the right side of the wreath. I added some matching embellishments and a title and finished off with some splatters of white paint.
I hope you have been inspired by this month's 'fussy cutting' theme... whether cutting just a few images to add to your layout or cutting lots to make it a feature like I have done. Please don't forget to share your layouts over on the UK Scrap Addicts Facebook page as we love to see them!
This month we focus on fussy cutting. I selected a paper from the Vicki Boutin Field Notes collection with lots of beautiful feathers. I fussy cut them and rearranged them into a heart shape. I hope this simple layout inspires beginners to give fussy cutting a go. You can sit and cut the patterned paper whilst watching TV and then create an easy layout.
Check out my quick process video to see my layout being created.
My name is Rebecca Meadows and I am really pleased to have been offered a guest designer slot for this month.
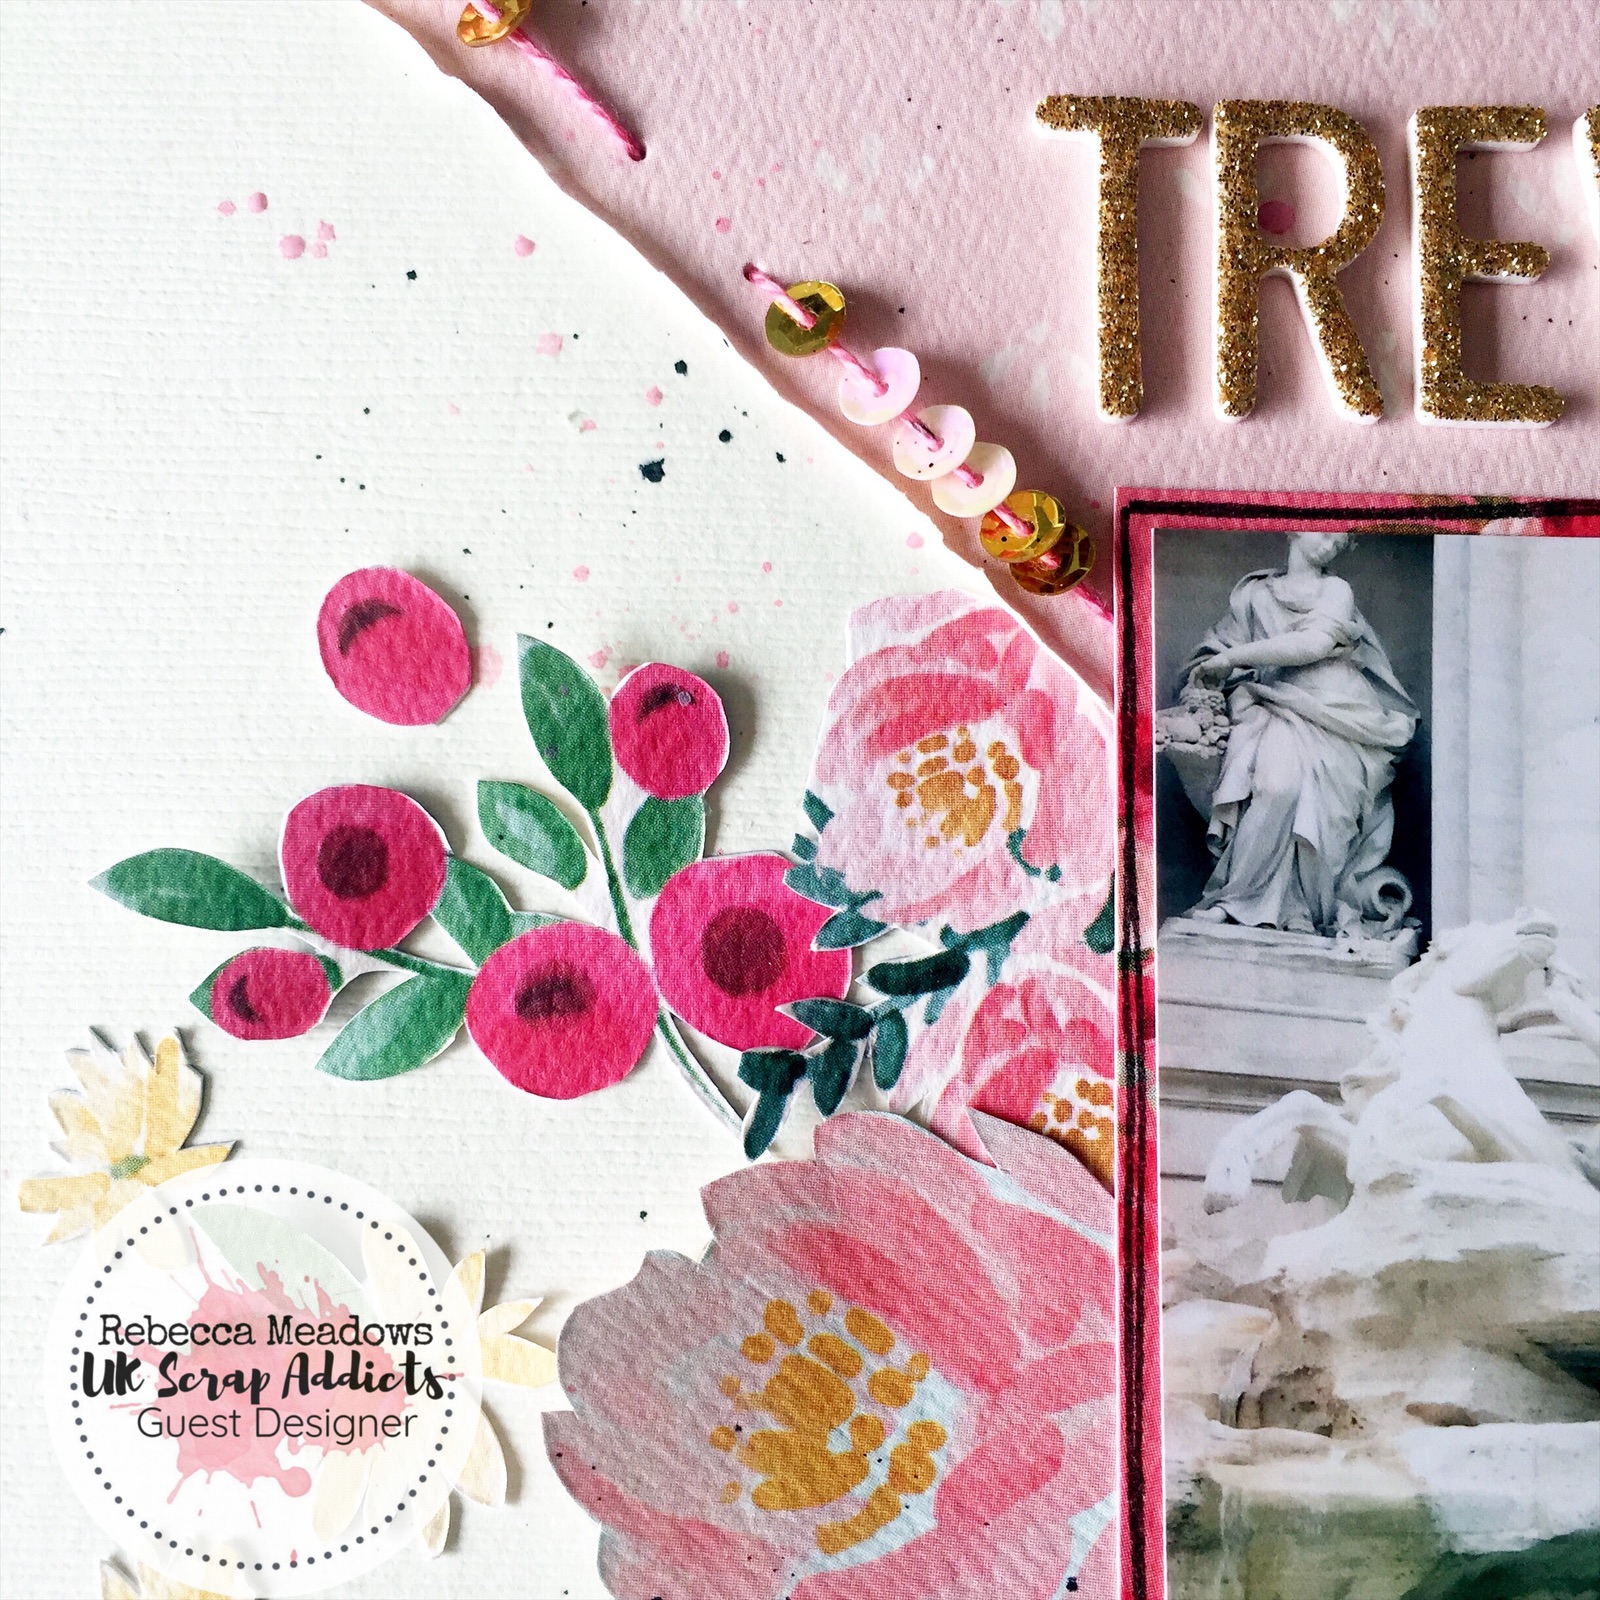
I have been wanting to scrap this photo for quite a while now and this months UKSA theme of "sparkle" is a perfect opportunity to use it.
I have used Carta Bella, Flower Market papers to make my layout. I love to fussy cut and these papers have a great selection of flowers that are perfect for this so this is where I started!
I had a layout plan in mind for this photo. I wanted the threaded sequins to represent coins being thrown into the fountain.
So, here is my process.....
Having fussy cut lots of flowers, I put these to one side while I began working on my background. I chose a pink patterned paper and cut two triangles from the sides. I roughed up the edges using a paper distressed and then marked our with a paper piercer where my thread and sequins would go.
I used a threaded needle to post the sequins on to, if you do this, be sure to check that the sequins will fit over the eye of the needle before continuing. I used a bit of washi tape to hold the thread at the back, then kept the stitches quite tight to help kept the sequins in place, a couple of the sequins still moved and grouped together so I added a small amount of glue to keep them in place.
Next, I added the pink paper to a piece of cardstock and stuck down my matted photo. I wanted similar flowers in each cluster to give a look of symmetry and used foam pads to add definition to some of the flowers. My title was an obvious choice and I think the sparkly alphas really finished off the layout.
Finally, I added pink and black mist to the background and some journalling strips.
I loved creating this layout. I'm really pleased with how it turned out. This months theme has been really inspiring and I hope you are having fun with it too.
Good morning everyone! I hope today is a little warmer than when this photo was taken! Brrr!
Anyway, today I am bringing you a layout created using some of my punches. It was nice to dig them out again..It is something I often overlook..how about you? To start with I chose this collection of Simple Stories, Winter Wonderland. Sticking with the UK Scrap Addicts January theme of No Cardstock.. (I know, I know, its the Feb prompt I'm supposed to be promoting..lol) I started with a piece of the wood grain paper to use as my background. I bought this collection a while back now from Pretty My Page..the shop run by our very own creative team member Lisa-Jane. Se still has a little left in stock..and they are reduced..woohoo! She is moving over to concentrate on her fantastic cut files now so there are bargains to be had! Anyway..back to the layout.. I then took some long pieces of patterned paper and punched along the edge of the longest piece. I then layered them along the left hand side adding a piece at right angles along the bottom and adding some punched tags tucked under he top at the far left.
Next I mounted the photo and used foam tape to lift it off the page for added dimension.
Once this was placed I punched little bunting flags and added it to some bakers twine along the bottom.
I then punched several snowflakes and scattered them around the edges of the photo and added several stickers from the collection too.
Quite a simple layout but I managed to use four different punches..shown here.
Why not have a go yourself and let me know you've got on?
This month is all about showing how you can really make stamps an integral part of a layout. With this in mind, I thought a monochrome theme might work really well.
I therefore began with some white cardstock. As I wanted to use a picture of my cat, I thought this black and white sheet went well as it reminds me a little of paw prints. I cut a triangle and use tape to stick this to my cardstock
I then used another white paper with a subtle marble effect on to back my photo. I inked this with black memento ink and stuck them at an angle.
I then stamped across the diagonal using some embossing ink and added a glitter embossing powder and heat set it
To the bottom left of the page I then added lots of different stamps and stickers. I also added some music note stamps around the frame as well as a camera and stars stamp above the frame.
I decided at this point that the embossing was too much so I added some more triangles of paper of this and a clear word sticker. The sticker was put onto one of the papers and fussy cut to make it stand out from the background and added some cardboard to the back of the sticker.
I hope you like the layout and will consider using more stamps in your layouts.
Something I have been wanting to try more of is using multiple photos on a layout. This month's theme to use small photos presented the perfect opportunity.
I used free app 'photogrid' to create some collages of small photos which I then sent to the be printed using the Free Prints app.
I began by adding a piece of Prima's Havana foiled paper to my navy stripe main page. On the diagonal, I added a dotty sticker, blue ribbon and a 3 circle sticker.
I cut up 5 of the small photos I printed of my nephew having fun at the park.
I backed these with some green paper to make them stand out from the background
I added some flowers, stickers, puffy words and hearts and gems.
I then used some foam squares to added the photos to the layout in a diagonal shape.
Hope you liked this layout and give your own layout with small photos a go.
It's nearing the end of Summer here so that means one thing - no more super bright layouts! We head into Autumn colours, photos of Hot Chocolate and crisp Autumn mornings and then onto the Big C!!!
But....For now...I bring you one last hurrah of this summer season and who can resist a rainbow layout (I know I can't!).
So this months theme was paint. I decided to use some acrylic paint markers for this layout and I have teamed this layout up with my Alpha Attack series on Youtube to demonstrate that you can use paint to change the colour of any type of Alpha or Thicker (because we usually have lots of those in our stash right!?).
So my thought was rainbow rain. I know this sounds crazy but here is how the layout came together.
I grabbed a whole load of half used Thicker packs from my stash and started sticking them randomly over the lower 2/3 of my page. (I did Gesso my page first knowing I was going to be applying white paint over the Thickers).
Once these were all stuck down, I then added a layer of Gesso (I actually added 2 layers because I wasn't sure how thick the coverage would be from the paint markers).
Once I had let the Gesso dry, and you can use a heat tool to speed the process up (I certainly did), I then applied 2 layers of white acrylic paint over the whole page.
Next came the hard decision as to where I was going to include my photo. I didn't want to cover too much of the background up so I went with a photo that I could cut down to just the subject image (my husband in this case) and I packed the photo with a small amount of 3 different patterned papers around the edges.
This is where the fun part came in. I used the acrylic paint markers to colour in each alpha using the ROYGBIV colours (apart from I had to substitute Indigo for Pink) and I worked my way across the page with each colour. Next I added some of the paint onto a non stick mat and added a little water and went splatter crazy! I tried to keep the coloured splatters within each of their own colour sections. I then went tone on tone with adding some enamel dots in hearts and star shapes.
I did back my white cardstock onto a piece of rainbow(ish) patterned paper. I had used a sheet of Bazzill Marshmallow cardstock which is primed for Mixed Media but it had buckled a little. So cutting down a 1/2 inch from each the top and bottom, I then mounted this onto the patterned paper to held smooth out the warping.
Next I free hand cut some clouds and used a black paint marker to give these a faux stitched border as these were getting lost on the background. Finally, because clearly there were not enough Alphas already on this layout!, I then added my title into the left cloud. I even popped a sun in to the top right cloud to keep with the theme.
In total I used a massive 97 Alpha Stickers!!! And now I need a lie down. Thanks for visiting our blog today. Be sure to head back for more inspiration throughout the month from the other ladies. Oh and we have a new theme on 1st October!!
If you want to watch the process for this layout then you're in luck as there is a process video right here for you. So be sure to head on over to our Youtube channel where you will find hundreds of videos to keep you inspired!
Today I have a very colourful layout for you. This month is all about celebrating the use of paint on layouts. With this in mind, I decided to choose a black background and keep the embellishments to a minimum.
I used a Prima Silicone brush to create the painted, textured background.