Showing posts with label ink splatters. Show all posts

Tuesday, 1 May 2018

Happy and crazy girl | Maria La Chica | Monochrome

Hello again everyone!

Yes, it is Maria with you again! It is May, a brand new month and also when we introduce the new design team to the group! You can see the new team in this post. I hope you join me in welcoming them to the team! But a new team means a new schedule, so I am now at the beginning of the month rather than at the end.

So this month's theme is Monochrome. We had a bit of an internal discussion beforehand trying to figure out what monochrome really means as some people had different ideas. We reached the agreement that we can do a couple of different things: we can either choose a colour and use different shades of that colour, or we can choose black and white with an accent colour.

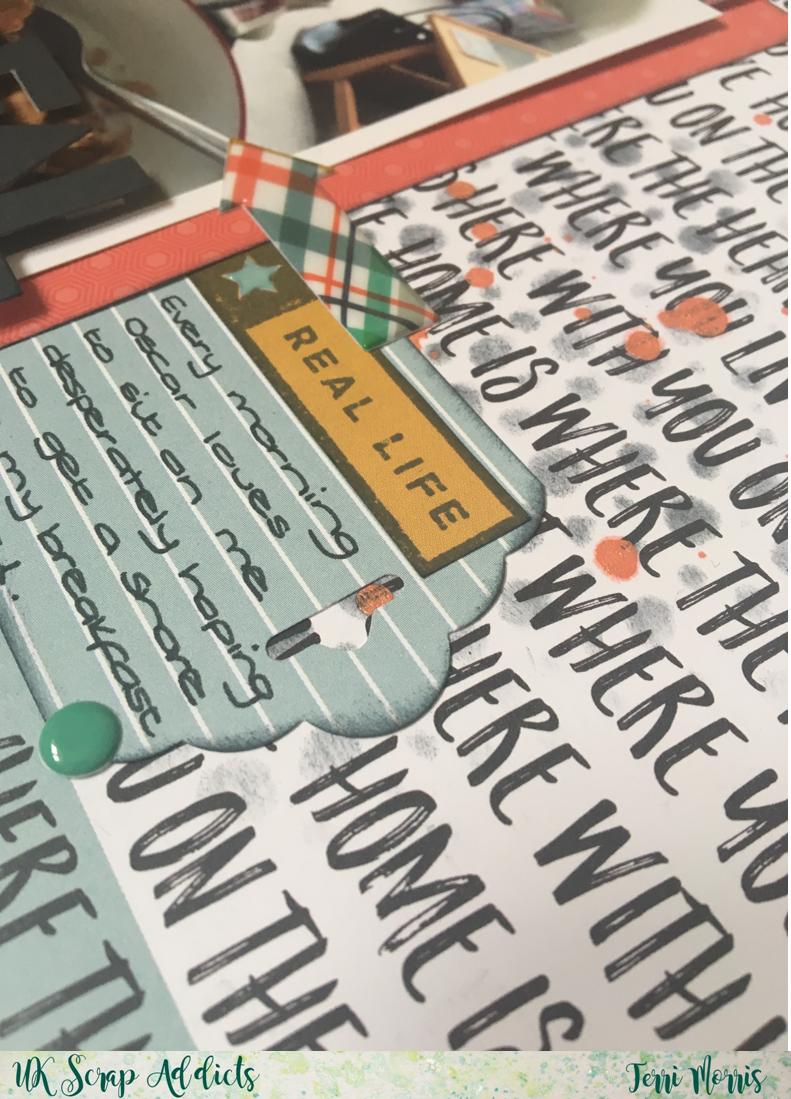
And that's what I've done! As you will be able to see in my page below, I have gone for a very neutral background in grey, with B&W papers, and then an accent of pink-ish coral.


The papers are mainly scraps from a 6x6 pad by Simple Stories - DIY boutique. It is an old collection, but I am sure it can still be found in some online shops. It is a very versatile collection, with tons of basic colours.


The embellishments are from Felicity Jane. Unfortunately, Felicity Jane is an American company that is very difficult to get hold of in the UK. You have to order directly from them and the shipping costs and taxes are not cheap. I have bought a couple of collections, but from UK second hand shops, which makes it so much more affordable.


The photos I have used have quite a neutral colouration, so I was quite lucky to be able to choose any accent colours that I wanted. I happened to have the most embellishment pieces in this coral/pink-ish colour, so that's the one I went for (plus it is my daughter's favourite colour...)

For the title I used the "happy" word from Felicity Jane, alpha stickers by Tim Holtz (which are back in stock at Hobbycraft! yay!) and the word Girl from the Girl Squad collection thickers.


And here is my process video, so you can see how I struggled to repeat the paper positioning that I had originally come up with!! :P


Thanks for joining me today, and read you soon!


Monday, 14 August 2017

Happy Here & Now │Gemma Summers │Clustering


Hello, Gemma here with my layout based on our theme for this month, which is Clustering.

I love clustering because I like to use a lot of embellishments on a page as you will see from my layout this month! Having clusters of embellishments helps your eye travel round the page, and I have used them to surround my photo, with one cluster on each side. I chose to base my layout on a selfie of me at my craft desk, which I printed in black and white so I could chose any colour palette for my layout.


I started with a lined paper (I used a lot of the Pebbles 'girl squad' collection for this layout). I went with my photo central and decided to ground the clusters with some mixed media first.

I went with pinks, peaches and coral made using some distress inks and the packaging technique. I then added some splatters and crayon marks. I knew most of this would be covered up but some would still peak through for colour.


Next I could focus on my clusters.

I started by fussy cutting the speech bubbles, trees and raindrops. These elements were all from pattern paper, individually cut and arranged. I backed the speech bubbles onto craft foam to raise them and give the cluster different dimensions. I always start with the bigger elements, then move onto details like the puffy stickers, buttons and roller stamping.


I worked on both clusters at the same time, so they looked balanced and both had all the same elements in them. I stuck to coral, turquoise, black and white.
As the layout is about me, I chose stickers that match me like the backpack, headphones
and the girl puffy sticker even has my hair cut :)

The title was made from turquoise glitter words from Paige Evans, as I like the script font and the colour fits perfectly. It's a recent photo of me so really is 'here and now'. I used stamping in diagonal corners and added a doodle border round the entire page, with black pen.


Don't forget we would love to see your layouts using clustering this month
on our Facebook page and Instagram using #ukscrapaddicts

I hope you enjoyed this layout.
Is your craft desk your happy place too?

See you next month!


Friday, 2 June 2017

Sweet Child | Maria La Chica | Moodboard

Hello Scrap Addicts! Welcome once again to our blog! Maria here with you today with a layout inspired by an amazing moodboard.

Here is the gorgeous moodboard that I was lucky to play with:


Isn't it super amazing? In particular, I was drawn into the image with the colourful raindrops falling from a cloud of fabric scraps :) although all the images are awesome! So much inspiration to take from just one moodboard!

And this is my layout:


You can watch my process video here:


And a few more close ups:


Thanks once again to Allthingssticky.com for their generous donation of glue dots and also for their discount code "ADDICTS30" for 30% off your first order.

I hope you have liked this layout and thanks for joining us once again! Do not hesitate to ask any questions you may have!


Thursday, 4 May 2017

Now and then | Maria La Chica | Sketch


Hello everyone and welcome once again to UK Scrap Addicts!  Maria here with you today, sharing a layout that was not easy...  Sometimes even the most seasoned scrapper struggles, so this one was one those layouts that started as one thing and ended as something completely different!

For this layout I wanted to use Susan's double page sketch, however, I had this idea in my head to make it work as a single page layout.  So with a certain degree of "artistic license", I have interpreted it a bit and I think in the end you can still see where I got the inspiration from.  In fact, I think my second layout is actually more similar to the sketch than my first layout was!

That is the beauty of sketches.  You can do pretty much anything with them.  They are a great starting point and you can follow them as loosely or closely as you want!

So here is my finished layout and the sketch it was based on:


So let me tell you a story. I don't believe in ghosts or supernatural beings, however, I believe there was some sort of entity preventing me from creating this layout. Everything that could have gone wrong, went wrong. First, my cut file didn't cut well (my fault, I know), then I managed to stick some paper all crooked, and finally, I just wasn't happy at all with how it was looking... So I decided to start all over, but the problems didn't stop there! I accidentally put glue on top of one of my photos, and when I went to reprint it, my printer had run out of black ink! So the photo is not looking great, I will have to reprint it in the future... Oh, and I also had problems with the editing of the video! As I said, maybe it wasn't meant to be.

Anyway... I still managed to pull the layout through, I think :)

A few more closeups of my layout:


And here is my video. I hope you don't laugh too much at my struggles (I won't blame you if you do, I laugh at myself too!) and really wish you are inspired to create with this sketch!


Read you soon!


Wednesday, 3 May 2017

Real Life | Terri Morris | Sketch


Well 2017 is fast passing us by, I'm shocked that we are now in May already. I'm currently recovering from an operation a couple of weeks ago so thought it would be good to document some of the things that happen at home.


My boy cat Oscar loves to share our food, especially breakfast. He sits by my side staring at me until I give him a cornflake or two. He spends his days curled up on the sofa with me or sat in my craft room. 


This month we had a choice of sketches to use as our inspiration. I used the sketch above created by Laura Rumble and have pretty much stuck to it. I love using sketches but often flip them or twist them to create a layout that doesn't really look like the sketch in the end.

I used the new Fancy Pants Family & Co. collection. The background I chose is very busy so I tried to keep the layout as simple as possible. I used a stencil and black ink to add texture on the background. I used the 6x6 paper pad to create a layered background behind the photo and make it stand out against the background.


I added in some enamel dots and Heidi Shine mist splatters to add in more texture. I absolutely love this collection. It is so bright and vibrant. Often the opposite of what I usually use in my scrapbooking. I often go for pastel or distressed style collections.


I'd love to see your take on Laura's sketch, just tag UK Scrap Addicts on Instagram. I'm hoping meet up with a fellow UK Scrap Addicts CT member whilst I'm off which will be great.

Happy Crafting! 


Tuesday, 2 May 2017

Hoppy Easter | SciFi Scrapper | Sketch


Hi everyone, Emma Marie here today sharing my May layout.

Each month we have a different theme or prompt to work with, and in May we're working with sketches!

This is the sketch I used to create my layout. It's a 12x12 sketch, but I adapted it to the 9x12 size I typically work in.


I created a mixed media background to match the sketch, using some Distress Mist and Color Shine in Cracked Pistachio and Butter respectively. I also decided to add some gold texture paste to the layout, using a stencil from Hip Kit, to add a bit more dimension and interest to the layout.


The majority of this layout is made using my Felicity Jane kit. I loved how the colours went perfectly with the mists I had picked out, and featured those traditional colours we tend to associate with Easter.


The sketch included a tag, which I decided to add at the top of my layout as it fit better there with my vertical photo. I made the tag out of plain cardstock, and then added washi tape to add that decorative touch. It's a black and white washi so doesn't overpower the layout, but adds an extra layer of visual interest.  I also added several rubber embellishments to the page. These are some of my favourite things to use, so I was really happy to be able to get some rubber phrases and hearts down on to the layout.


For the most part I feel I kept pretty close to the sketch. I did however add a smaller embellishment cluster to the top right of the page to help fill in some of the dead space at the top of the layout. I used some scraps of patterned paper as well as some more of the washi tape to help tie the two parts of the layout together, and then lightly embellished. 


This was a fun layout to create! The photo doesn't really have a 'story' to it, which is why there isn't any journalling, but sometimes it's nice to just create for the enjoyment, without a deeper purpose behind it. :)

If you'd like to watch my process video, you can do so below. Have a great day!


Saturday, 29 April 2017

1, 2, 3 & Pose | Jackie Ashton | Sewing

Hello, Jackie here with my post following the theme for the month - stitching.  For my layout this month I decided to hand-stitch my title.  

I started this layout by using the packaging technique and Tim Holtz Distress Ink in Worn Lipstick to my white cardstock.

For the papers on this layouts I used a selection of papers from Shimelle - Little by Little collection, Maggie Holmes - Chasing Dreams collection, and I wanted the colour of the embroidery cotton to coordinate with the papers.

I used a stitching template by Amy Tangerine.


By hand stitching my title in a variegated yellow thread, as the outline of the letters, and a soft pink for the inside, it made the title stand out more from the page.


I added three clusters around the photographs and adding some embellishments from Shimelle - Little by Little collection as well as some hand cut butterflies from Maggie Holmes - Chasing Dreams collection.


I love how stitching on your layouts can give it a whole new dimension.

Hope you give it a try


Monday, 10 April 2017

Listening Ears| Laura Rumble | Machine Sewing


Hi Chaps, Laura here today.  I love the effect of hand sewing on layouts but I just don't have the patience... nor do I want little red splatters on my layouts!  So I use my sewing machine.  Here is the video:


I inherited this machine from my Nan when she upgraded.  The tips I can give you for using a sewing machine for scrapbooking are:
  1. The manual is your friend - it will tell you how to thread the machine and which button does what.
  2. If you use the machine for sewing on fabric as well keep a separate needle - paper blunts the point and a blunt needle doesn't do fabric much good. 
  3. You get what you pay for with threads - I had a very cheap thread and bobbin set and the thread kept breaking.
  4. If your bobbin (the bottom thread) runs out of thread while you are sewing and you don't realise (ask me how I know!) it is fairly simple to use a regular needle to hand sew through the holes you've made with the machine.
  5. Experiment - just remember which button/dial you are fiddling with so you can rectify if need be!


As you can see, I didn't aim for neat and tidy.  I did go for a giant paper clip holding my journalling...


Here is the finished ayout: