Showing posts with label #zola28. Show all posts

Monday, 3 August 2020

Staying Home | Zoe (zola28) | Moodboard

Personally I love a mood-board to inspire creativity and the one created by Amy this month certainly did that for me!

The colour palette in the mood-board really spoke to me as did the rainbow, pink brickwork and the kaleidoscope of butterflies, in fact it was just perfect for me.

I started with some mixed media using my new AMAZING water colours and layered some pink Heidi Swapp Textured Paste using my Tim Holtz brickwork stencil (one of my most used stencils). 


I backed my Rainbow cut file using the Pinkfresh Studios Noteworthy collection and also made myself some bows using my new die (already a firm favourite in my small collection). 


I used my Martha Stewart Butterfly punch to create my kaleidoscope coming up and through the centre of the rainbow. (I adore how this bit turned out as I had trapped space there before and was really struggling with it from a composition perspective). 


I finished by embellishing around my photo clusters and adding some perspectives from Bramble Fox. 


I enjoyed making a layout for the mood-board. Please make sure you share how this mood-board inspires you this month over on our facebook group.


Friday, 3 July 2020

Here & Now | Zoe (zola28) | Handmade Embellishments


Welcome to the blog focusing this month on the theme of handmade embellishments. Making my own embellishments isn't something I do that often as I tend to love all the beautiful bits and pieces that are made for us in the collections. However this month I did have some fun with some simple embellishments. 

I created my layout with the fantastic 5th & Monaco collection from Crate Paper which I love! I wanted the focus of this page to be grass green and texture. 

To create the texture I have focused on the ruffles and banner. The ruffles are simply pleated tissue paper which I have trimmed with some pom pom trims (cute aren't they!?)


I made my top bunting using a punch and stitching the bunting pieces to some green ribbon so I could add the bunting in a hung style at the top of the page. 


Continuing with the them of green ribbon, I decorated a paper clip to go on the photograph of my son on his sister's skates. 


My last and probably favourite embellishment are the sequin tails that I made and added underneath my butterflies. These were quick and easy to make but are a nice way to add some movement to a page ( remember this in case you are ever challenged to 'create a moving part' on a page!) . I just added some knots along the way to stop all the sequins stacking up on the embroidery thread. 

I have some epoxy stickers which are also great for making your own flair type embellishment. I have added one on this page but its a bit hard to spot. (up in my top cluster for those of you with great eyesight). 


I love the texture and movement of this layout. I really look forward to seeing what you create for this months them in our facebook group, be sure to tag me if this page inspires you in any way. 


Thursday, 4 June 2020

Fun Times With All Of You | Zola28 Zoe Hailey | Old and New Collections


So it's my turn to share my creation on the blog today. 

I don't mind admitting, I normally scrap from one collection per layout so themes like these always challenge me. Even more so because I started with one piece of 12x12 paper and tried to produce something with it! 


I had  a pink piece of paper from the Cocoa Vanilla Studio Midnight collection along with a large die cut and some ephemera which I was planning to 'stash bust!' It's one of my favourite collections and it was all I had left. I wanted to combine this with embellishments I had left from a recent kit so I combined this with Maggie Holmes Sweet Story Chipboard stickers. 

On the large die cut I  coloured it using the Vicki Boutin watercolour markers and then added some extra gloss with the Vicki Boutin Silver Glaze. I machine stitched the die cut with white cotton to add some further dimension. 


I created my left and right clusters of photos , layering pieces of ephemera and chipboard. Adding lots of foam for dimension and shadows. I needed to add some black to the page to balance the title so I distressed the top and bottom and mounted it on card. I added some splatters of black Indian ink around the page to balance the colour. 

I really like how this turned out and I'm so pleased to have used up the last of a collection; making way for more new supplies!

Please share what you create this month in UK Scrap Addicts Facebook Group, happy creating !


Friday, 3 April 2020

Awesome Boys| Zoe Hailey Zola28 | Stamp Technique


So are you like me, someone who owns a bunch of stamps but hardly ever uses them?
I was glad to be challenged to dust off some stamps and make this layout, which I have to say is one of my favourites that I have made recently.

I created this stamped border by covering my card stock with a scrap of square paper and then used the stamping off technique, leaving a beautiful alphabet edging. The stamps were perfect because they had both capital and lower case letters, making it easier to fill in any gaps.

For my background I seed my favourite splat stamps and heat embossed creating the red and turquoise splats which I love!


I worked with Shimelle's Field Trip collection which was perfect for these photos of my son and his bestie enjoying some time at the farm together. I love how  bright and bold the design is and how heavily embellished the layout is. Rockets and Dinosaurs were perfect for this page!


To finish my page I added more ink splats and sequins because no page is complete without sequins in my opinion!


Let's make the most of those stamps this month and get creating with them, be sure to share your stamped creations on the UKSA Facebook Group.

Happy Scrapping

Zoe Zola 28


Tuesday, 3 March 2020

Together| Zoe Hailey Zola28 | Vertical Design


I was really looking forward to creating a layout on the theme of vertical design, I even sketched out some ideas (which I hardly ever do!) and then I started creating and made something totally different..... Anyone else do that or is it just me?

I wanted to use up some of my stash before working with new goodies, so this layout was made using the Pink Paislee Paige Evans collection "Truly Grateful".

My design focussed on a central vertical column with different paper layers. I distressed the edges of these and did some random stitching in black. This helped to bring in the black from the glasses that me and my daughter are wearing in this snapchat filter.


I included two ephemera clusters one slightly to the top right and the other to the bottom left to balance it out. Flowers were the obvious choice due to the photo and I ensured I had many dimensions adding things on foam, tucking bits in and including wooden buttons and sequins for even more texture.


I really love the colour in this collection and it was so quick to create this layout. Share your vertical design layouts over on the UKSA Facebook Group for everyone to see.


Happy Scrapping

Zoe Zola28


Monday, 3 February 2020

The big 40 | Zoe Hailey Zola28 | More Than One Collection

Hi Everyone,


Zoe here on the blog today and sharing a layout I made with more than one collection for our February theme.


Admittedly, I don't mix collections often as my preference is to work with one collection per layout, so I took the easy route and used a cutfile! (There's no need to make this harder than it needs to be, right!?)


I absolutely adore this Paige Evans star cutfile and I found backing it quite a therapeutic process. It helped that I joined a live scrap stream and sat watching another scrapbooker whilst doing this...


I used Bella Blvd "Squeeze The Day" and Echo Park "Teen Spirit" which is apt considering this photo is of my brother, at his fancy dress Halloween themed 40th Birthday party!  I kept my colour scheme to black, white and yellow to bring the supplies together easily.


I popped the whole cut file up on foam pads to add even more dimension to my page and made some epoxy stickers for my embellishment clusters to add further dimension. To ensure some of my embellishments stood out on a very busy page, I added black outlining.


A simple layout which made mixing collections fun to do.


Be sure to share your layouts in the UKSA Facebook Group, I'd love to see what you create.

Zoe Zola28


Tuesday, 3 December 2019

Go Girl | Zoe Hailey zola28 | Hidden Journalling

Hi Everyone, it's Zoe here on the UKSA blog today.

I can't believe we are already in December, I made this layout a couple of months ago as I knew I would be busy with festive preparations and creative projects!

Inside of page before journaling
I worked with Crate Paper's All Heart collection (one of my all time favs!) and created a flip up on the left hand side of my layout for my hidden journaling. The story in my journaling is about me being kinder to myself and learning to love some of features , rather than focusing on the bits I don't like!

Photo Flip Up


I created some simple patches of metallic background for my clusters using Vicki Boutin's Iridescent Glaze. I tore my paper to act as the base for my photo and cluster on the left hand side. I attached this to my page with washi so that the whole thing moves. I absolutely love this affect, especially as it created dimension with embellishments sitting on the background page when you flip up the photo. I added the she shines sticker to make it a little easier to lift the whole thing.

Around my title, I created a banner style embellishment using the charms and tassels from the collection and attaching them with my Tim Holtz tiny attacher. I really love that I have another moving element on my page.


Remember ladies, No One Is You, That Is Your Power! Have fun with hidden photos and journaling this month and be sure to share what you create.


Sunday, 3 November 2019

Pair Of Jokers| Zoe Hailey| Masculine Layout

Hi Everyone

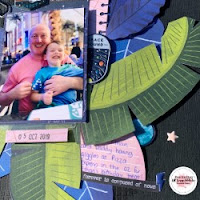
Zoe back again with another masculine layout, this time I've had some fun with Shimelle's Field Trip collection.

My definition of masculine for this page includes black cardstock, blues, greens, leaves and Astronauts!


I had this photo of my husband and our youngest son,  both of them were giggling and laughing hysterically;  I just Love It! So much in fact, I printed it twice (once in colour and once in black and white) and I couldn't decide which photograph to use. So I included both by adding a flip up on my photo.


I took inspiration from the tress in the background of the image which was taken at the O2 so the leaves seemed a good starting point. I pulled in the pink from my husbands T shirt and included that in some of my clusters (who says pink isn't masculine!?)


I love how this page came together, especially the flip up photo of my pair of jokers!

Thanks for reading and I look forward to seeing what you create this month.

Zoe (find me on Instagram zola28)

Friday, 1 November 2019

You Set My Heart On Fire | Zoe Hailey | Masculine Layout


Welcome to our challenge theme for November; creating a masculine layout.

I'm not sure what comes to mind for you, when you think of masculine pages but for me dark colours spring to mind, particularly black.


For this layout I have worked with Bella BLVD's collection 'Squeeze The Day'. I created my background using the deco foil transfer gel through a stencil and ran it through my Minc to bond a red foil to it. I loved the stencil as it reminded me of a metal grate texture; what more could be masculine? It certainly seemed to fit with my page which is an image of my husband who got to experience being a fire fighter for the day.

I used the Becky Higgins Project Life App to write on my photo, I always love other people's layouts when I see this but never really get round to doing it myself.... so this month I have finally managed it; My Hunk, My Hero!

So despite the brief of masculinity, I have managed to include red, yellow, hearts and even sequins on my page! I did find this theme slightly challenging but mainly because I over thought it! Whatever masculinity means to you, have fun creating a layout or two this month.


Thanks for taking a look at the blog and I look forward to seeing what you create this month.

Happy Scrapping!

Zoe (find me on Instagram zola28)


Tuesday, 3 September 2019

Create Happy Times | Zoe Hailey (Zola28) | Selfie

What a great theme for September; Selfies!


Personally,  I am not a massive selfie taker so this month I have forced myself to take more photographs of me and I have actually ended up scrapping three pages of myself! ( I have even made my layout for our December theme, which is really fun!)

With so many gorgeous new collections coming out, I'm challenging myself to use up some of my older stuff, mainly to make room for the new! So I have worked with Cocoa Vanilla Studio's gorgeous collection; Happiness. I just love this flower reef paper and I had four sheets of it, so on this page, I used two up in my layering.


If fussy cutting isn't your thing (and it isn't usually mine) then this may not be a page for you. I fussy cut two pages of the reef paper and then mounted them on black card and cut them both out again. Adding the outer reef up on foam pads, for even more dimension. I really wanted to bring in the black from my sunglasses and I am pleased with how it turned out.

Of course once I had done that on the reefs, I decided I needed to do the same on the butterflies and it really helps them stand out on a very busy colourful page. I love the shadows they create too.


I really enjoyed making this layout, I love the florals and the beautiful colour palette in the Happiness collection. I hope you enjoy scrapping a selfie or two this month and look forward to seeing your creations in our Facebook Group UK Scrap Addicts.


Zoe ( Follow me on Instagram Zola28)